
Westin 21-23940
Westin PRO TRAXX 4 Oval Nerf Bars Instruction Manual
Model: 21-23940
Fits: 2015-2025 F-150, 2022-2025 F-150 Lightning, 2017-2025 F-250 F-350 F-450 F-550 Crew Cab
Introduction
The Westin Pro Traxx 4 Oval Nerf Step Bars are designed to provide a wider and more secure step area for your vehicle. Constructed with a 4-inch oval tube and heavy-duty step pads, these bars feature 30-degree factory-style bends and seamless domed ends, ensuring a clean appearance without exposed bolt heads. This manual provides essential information for installation, operation, and maintenance of your Westin Pro Traxx 4 Nerf Bars.
What's in the Box
Please verify that all components are present before beginning installation.
- Driver side Pro Traxx 4 Nerf Step Bar
- Passenger side Pro Traxx 4 Nerf Step Bar
- Mounting kit (includes all necessary hardware)
- DIY installation instructions (this manual)
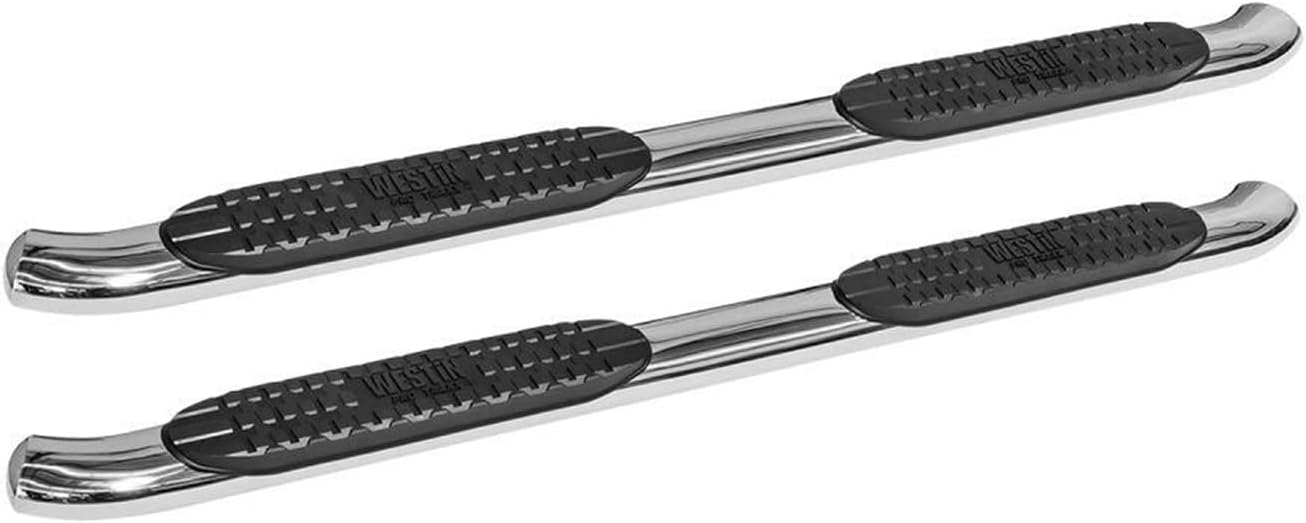
Image: A pair of polished Westin PRO TRAXX 4 Oval Nerf Bars, showing their sleek design and integrated step pads.
Setup and Installation
Installation of the Westin Pro Traxx 4 Nerf Bars is a bolt-on process and typically requires no drilling on most applications. A torque wrench is recommended for proper tightening of fasteners.
Tools Required:
- Standard Socket Set
- Wrenches
- Torque Wrench
- Small Wire Brush (optional, for cleaning studs)
Installation Steps:
- Prepare Vehicle: Park the vehicle on a level surface and engage the parking brake. For easier access, consider using a lift or jack stands, ensuring the vehicle is securely supported.
- Identify Mounting Points: Locate the factory mounting points along the rocker panel of your vehicle. These are typically pre-drilled holes or studs.
- Clean Studs (if applicable): If there is paint overspray or debris on the rocker panel studs, use a small wire brush to clean them thoroughly to ensure proper fitment and torque.
- Attach Brackets: Securely attach the provided mounting brackets to the vehicle's frame or rocker panel using the supplied hardware. Ensure all bolts are hand-tightened initially.
- Position Nerf Bar: Carefully lift the nerf bar into position and align it with the attached mounting brackets.
- Secure Nerf Bar to Brackets: Attach the nerf bar to the brackets using the provided M10-1.5x25mm button head allen screws.
- Align and Adjust: Before fully tightening, adjust the position of the nerf bar to ensure it is level and properly aligned with the vehicle's body.
- Torque Fasteners: Systematically tighten all bolts to the manufacturer's specified torque settings. For the button head allen screws attaching the rails to the brackets, torque to 30-35 ft-lbs (40-47 Nm). Refer to the specific instructions included in your mounting kit for all torque specifications.
- Repeat for Opposite Side: Follow the same steps for installing the nerf bar on the opposite side of the vehicle.
- Final Check: After installation, double-check all fasteners to ensure they are properly tightened and that the nerf bars are secure and stable.

Image: An angled view of the Westin PRO TRAXX 4 Oval Nerf Bars, highlighting the oval tubing and the placement of the step pads.
Operating Instructions
The Westin Pro Traxx 4 Oval Nerf Bars are designed to provide a safe and convenient step for entering and exiting your vehicle. The wide, injection-molded polymer step pads offer a secure, non-slip surface.
- Stepping On: Place your foot firmly on the textured step pad when entering or exiting the vehicle. The robust construction ensures stability.
- Weight Capacity: While designed for heavy-duty use, avoid excessive or sudden impacts on the step bars.

Image: A close-up view of the Westin PRO TRAXX 4 step pad, showing the textured surface and the embossed brand logo.
Maintenance
Regular maintenance will help preserve the appearance and longevity of your Westin Pro Traxx 4 Nerf Bars.
- Cleaning: Clean the polished stainless steel finish regularly with a mild automotive soap and water. Avoid abrasive cleaners or harsh chemicals that could damage the finish. For best results, dry with a soft cloth to prevent water spots.
- Inspection: Periodically inspect all mounting hardware for tightness. Vibrations from driving can sometimes loosen fasteners over time. Re-torque any loose bolts to the specified values.
- Damage Prevention: The nerf bars protect vehicle rocker panels from potential damage. However, avoid direct impacts or scraping against obstacles, which could damage the bars themselves.
Troubleshooting
If you encounter any issues with your Westin Pro Traxx 4 Nerf Bars, refer to the following common problems and solutions:
| Problem | Possible Cause | Solution |
|---|---|---|
| Nerf bar feels loose or wobbly. | Loose mounting hardware. | Inspect all bolts and re-torque them to the specified values (30-35 ft-lbs for rail-to-bracket screws). |
| Difficulty aligning during installation. | Brackets not fully seated or vehicle studs obstructed. | Ensure brackets are correctly positioned. Clean any paint overspray or debris from vehicle studs. Do not fully tighten bolts until alignment is satisfactory. |
| Scratches or dull finish on polished surface. | Abrasive cleaning materials or environmental exposure. | Use only mild automotive soap and water for cleaning. Avoid harsh chemicals. For minor scratches, specialized stainless steel polish may be used. |
Specifications
- Model: Pro Traxx 4 (Part Number: 21-23940)
- Material: Stainless Steel
- Finish: Polished
- Tubing Diameter: 4 inches (oval)
- Step Pad Width: 4 inches (injection molded polymer)
- Dimensions (L x W x H): Approximately 96 x 9 x 8 inches
- Item Weight: Approximately 63 pounds
- Vehicle Service Type: Truck
- Fit Type: Vehicle Specific Fit
- Installation: Bolt-on (no drilling required on most applications)
Warranty and Support
Westin Automotive Products, Inc. provides a limited warranty on its products. For specific warranty details, including coverage and duration, please refer to the official Westin website or contact Westin customer support directly. Keep your purchase receipt as proof of purchase.
For technical assistance, installation questions, or warranty claims, please visit the Westin Store on Amazon or their official corporate website.
Ask a question about this manual
Ask about setup, troubleshooting, compatibility, parts, safety, or missing instructions. Manuals+ will review the question and use this page’s manual context to help answer it.