Introduction
The Behringer UMC202HD is an audiophile 2x2, 24-Bit/192 kHz USB audio interface equipped with high-quality MIDAS mic Preamplifiers. This manual provides essential information for setting up, operating, maintaining, and troubleshooting your U-PHORIA UMC202HD to ensure optimal performance and longevity.
Setup
Before connecting your UMC202HD, ensure your computer meets the minimum system requirements (Mac & Windows compatible). No external power source is required as the unit is USB bus-powered.
Connecting to Your Computer
- Connect the UMC202HD to an available USB 2.0 port on your computer using a standard USB cable. The device will power on automatically when connected to an active USB port.
- Allow your operating system to recognize the device and install any necessary drivers. For optimal performance, it is recommended to download the latest drivers from the official Behringer website.

Front view of the Behringer U-PHORIA UMC202HD audio interface, showing XLR/TRS combo inputs, gain controls, and headphone output. Cables are connected to the inputs and headphone jack.
Connecting Audio Devices
- Microphones/Instruments: Use the two XLR/TRS combo inputs on the front panel to connect microphones or instruments. These inputs feature professional-grade MIDAS mic preamplifiers for superior sound quality.
- Monitor Speakers: Connect your studio monitor speakers to the TRS outputs (1/L and 2/R) on the rear panel of the UMC202HD.
- Headphones: Plug your headphones into the 1/4-inch PHONES jack on the front panel. Adjust the PHONES knob to control the headphone volume.
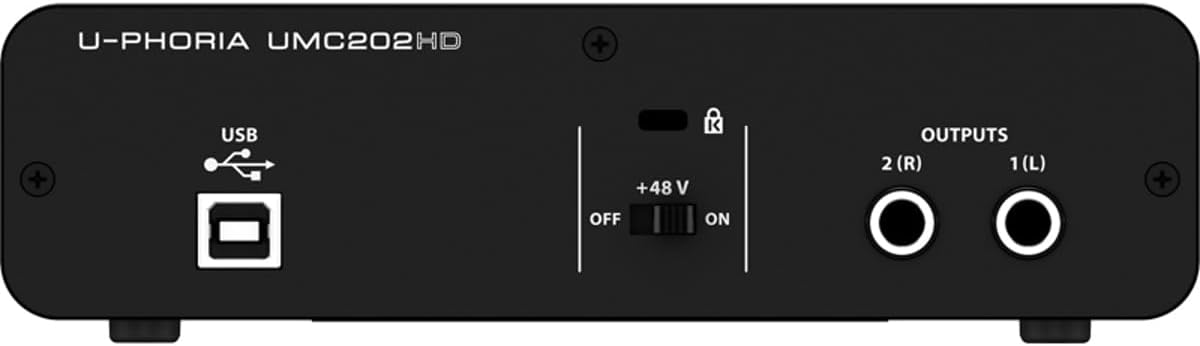
Rear view of the Behringer U-PHORIA UMC202HD, highlighting the USB port for computer connection and the TRS outputs for monitor speakers. Also visible is the +48V phantom power switch.
Operating
The UMC202HD is designed for intuitive operation, providing essential controls for recording and monitoring.
Input Controls
- GAIN Knobs: Adjust the input level for each of the two inputs using the GAIN 1 and GAIN 2 knobs. The SIG (Signal) LED indicates input signal presence, while the CLIP LED warns of signal overload.
- LINE/INST Switch: Toggle between Line level (for keyboards, mixers) and Instrument level (for guitars, basses) for each input.
- PAD Switch: Engage the PAD switch to attenuate the input signal by 20 dB, useful for very loud sources to prevent clipping.
- +48V Phantom Power: For condenser microphones, activate the +48V phantom power switch located on the rear panel. This supplies the necessary power to the microphone. Note that phantom power is applied to both inputs simultaneously.

Detailed view of the front panel controls on the Behringer U-PHORIA UMC202HD, showing the gain knobs, LINE/INST, and PAD switches for each input.
Monitoring Controls
- OUTPUT Knob: Controls the overall output level to your monitor speakers.
- DIRECT MONITOR Switch: Engage this switch to enable direct monitoring of your input signals through your headphones and monitor speakers with zero-latency. This is particularly useful for recording vocals or instruments without audible delay.
- PHONES Knob: Adjusts the volume of the headphone output independently.
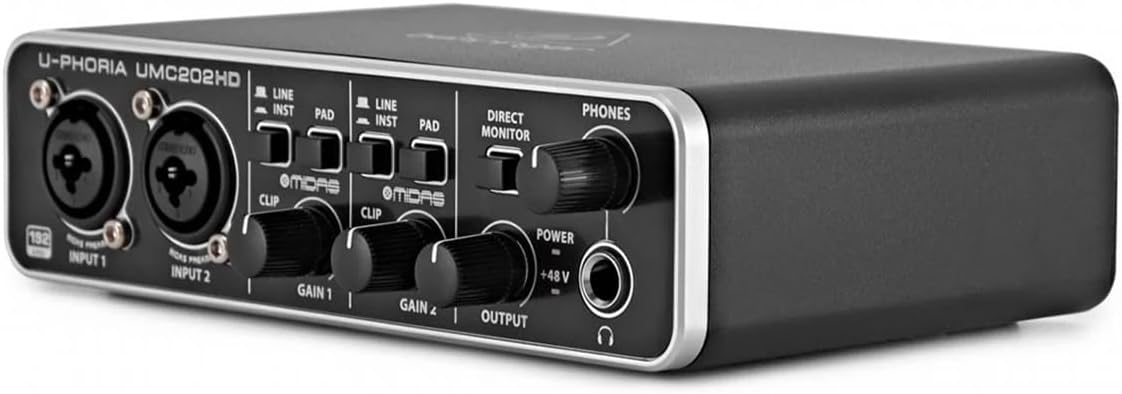
Angled front view of the Behringer U-PHORIA UMC202HD, emphasizing the OUTPUT and PHONES volume knobs, along with the DIRECT MONITOR switch.
Maintenance
Proper care and maintenance will ensure the longevity and reliable performance of your Behringer U-PHORIA UMC202HD.
- Cleaning: Use a soft, dry cloth to clean the exterior of the unit. Avoid using abrasive cleaners or solvents, as they may damage the finish.
- Environment: Operate and store the device in a clean, dry environment away from direct sunlight, excessive heat, humidity, and dust.
- Handling: Handle the unit with care. Avoid dropping it or subjecting it to strong impacts.
- Disconnection: When not in use for extended periods, disconnect the USB cable from your computer.
Troubleshooting
If you encounter issues with your UMC202HD, try the following steps:
- No Power: Ensure the USB cable is securely connected to both the interface and a powered USB port on your computer. The unit is bus-powered and does not require an external power adapter.
- No Sound Output:
- Check all cable connections to your speakers and headphones.
- Verify that the OUTPUT and PHONES knobs are turned up.
- Ensure the UMC202HD is selected as the default audio output device in your computer's sound settings.
- Check the volume levels within your recording software or media player.
- No Input Signal:
- Confirm that your microphone or instrument is properly connected to the XLR/TRS combo input.
- Adjust the GAIN knob for the respective input.
- If using a condenser microphone, ensure the +48V phantom power is engaged.
- Check the LINE/INST and PAD switches are set correctly for your input source.
- Verify the UMC202HD is selected as the input device in your recording software.
- Latency Issues:
- Engage the DIRECT MONITOR switch for zero-latency monitoring of your input signal.
- Ensure you are using the latest ASIO drivers (for Windows) or Core Audio drivers (for Mac) for the UMC202HD.
- Adjust the buffer size settings in your recording software to a lower value (this may increase CPU load).
- Distorted Sound:
- Reduce the input GAIN to prevent the CLIP LED from illuminating.
- If the input source is very loud, engage the PAD switch.
- Check the output levels to your speakers/headphones to avoid overloading them.
For further assistance, refer to the official Behringer support resources or the detailed User Manual (PDF) available online.
Specifications
| Feature | Detail |
|---|---|
| Model Number | UMC202HD |
| Connectivity Technology | USB 2.0 |
| Number of Channels | 2 (2x2 I/O) |
| Audio Resolution | 24-Bit/192 kHz |
| Preamplifiers | MIDAS Mic Preamplifiers |
| Phantom Power | +48V Switchable |
| Direct Monitoring | Yes, Zero-Latency |
| Compatible Devices | Laptop, Personal Computer |
| Computer Platform | Mac & Windows |
| Supported Software | Avid Pro Tools, Ableton Live, Steinberg Cubase, Fruity Loops, Traktion |
| Material Type | Metal |
| Color | Black |
| Item Weight | 1.19 pounds |
| Product Dimensions | 6.69 x 4.92 x 1.97 inches |
Warranty and Support
For detailed warranty information and technical support, please visit the official Behringer website or contact their customer service. Keep your purchase receipt as proof of purchase for any warranty claims.
- Official Website: www.behringer.com
- User Manual (PDF): For a more detailed guide, you can download the official user manual in PDF format from the Behringer support page or via this direct link: User Manual (PDF)
- Troubleshooting Guide (PDF): Additional troubleshooting steps may be found in the dedicated guide: Troubleshooting Guide (PDF)


