1. Introduction
This manual provides essential information for the proper installation, operation, and maintenance of your MISOL WH-SP-RG Rain Gauge Spare Part. This unit is designed as a replacement or extension component for compatible professional weather stations. Please read these instructions carefully before use to ensure accurate rainfall measurement and longevity of the product.
2. Product Overview
The MISOL WH-SP-RG is a tipping bucket rain gauge designed to measure precipitation volume. It functions by collecting rainwater, which fills one side of a balanced seesaw mechanism. Once a specific volume of water is collected, the bucket tips, emptying the water and bringing the other side into position to collect more. Each tip generates an electrical pulse, which is then transmitted to a connected weather station for data processing.
Key Features:
- Measures rain volume via tipping bucket mechanism.
- Each pulse corresponds to 0.3mm (0.012 inches) of rainfall.
- Designed for integration with compatible professional weather stations.
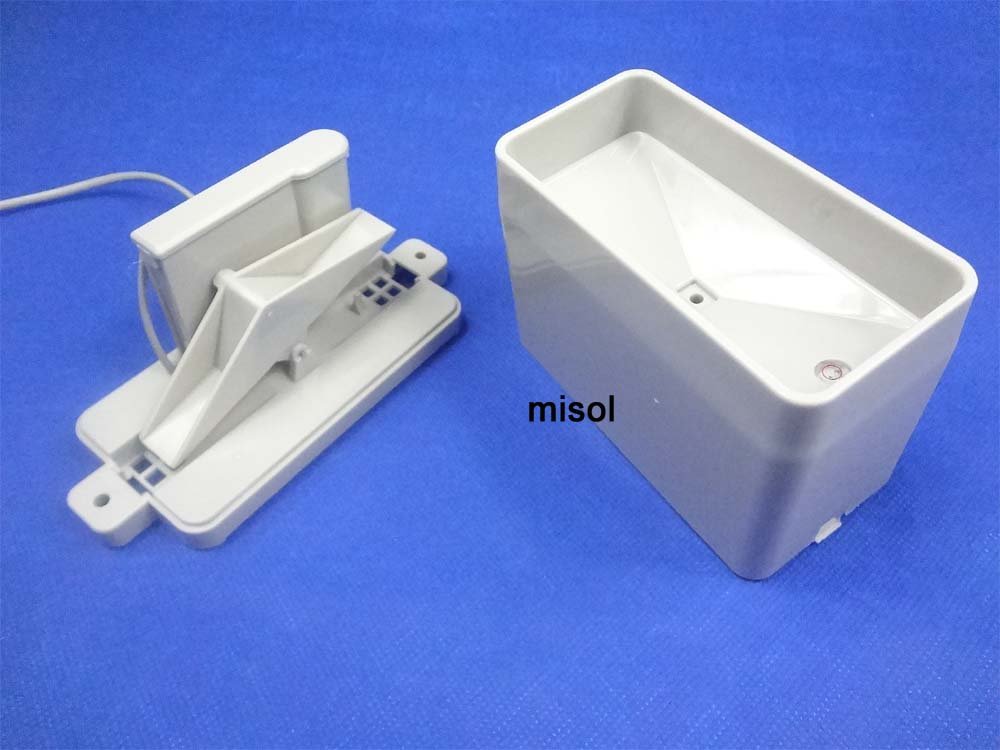
Figure 2.1: Assembled view of the MISOL WH-SP-RG Rain Gauge Spare Part.

Figure 2.2: Disassembled view illustrating the internal tipping bucket mechanism.
3. Setup and Installation
The WH-SP-RG rain gauge is intended as a spare part for existing weather station systems. It requires connection to a compatible professional weather station for data collection and interpretation.
3.1 Site Selection
- Choose an open location, free from obstructions such as trees, buildings, or other structures that could block rainfall or cause wind turbulence.
- Ensure the mounting surface is stable and can support the rain gauge securely.
- For meteorological standards, aim for a height of approximately 1.5 meters (5 feet) above ground level.
3.2 Mounting the Rain Gauge
- Secure the base of the rain gauge to a level surface using appropriate fasteners (not included). The base features mounting holes for this purpose.
- Crucially, ensure the rain gauge is perfectly level. Use a spirit level to verify. An unlevel installation will result in inaccurate readings as the tipping bucket mechanism will not operate correctly.
3.3 Electrical Connection
The rain gauge connects to your weather station via a wired connection. The internal mechanism uses a reed switch that briefly shorts two signal conductors each time the bucket tips. Refer to your specific weather station's manual for connection details.
- Connect the provided cable from the rain gauge to the designated rain input port on your weather station console or data logger.
- The polarity of the two signal conductors typically does not matter for basic pulse counting.
- For long cable runs, consider adding series resistance and a Zener diode to protect connected electronics from lightning-induced surges, if recommended by your weather station manufacturer.

Figure 3.1: Rain gauge with its integrated connection cable.
4. Operation
Once properly installed and connected, the rain gauge operates automatically. Rainwater enters the collection funnel and is directed into the tipping bucket. Each time the bucket tips, a pulse signal is sent to the connected weather station. The weather station then records these pulses and converts them into a total rainfall measurement based on the gauge's calibration.
Rainfall Measurement:
- Each tip of the bucket corresponds to 0.3 millimeters (mm) of rainfall.
- This is equivalent to 0.012 inches (in) of rainfall per tip.
Your weather station's software or display will accumulate these pulses over time to provide total rainfall, rain rate, and other related data.
5. Maintenance
Regular maintenance ensures the accuracy and reliability of your rain gauge.
- Cleaning: Periodically inspect the collection funnel and tipping bucket mechanism for debris such as leaves, insects, or dirt. Gently clean with water and a soft cloth or brush. Avoid using abrasive cleaners or tools that could damage the plastic.
- Level Check: Re-verify that the rain gauge remains perfectly level, especially after strong winds or ground shifts. Adjust if necessary.
- Cable Inspection: Check the connection cable for any signs of wear, damage, or loose connections.
- Calibration Check: While factory calibrated, if you suspect inaccuracies, you can perform a manual calibration by introducing a known volume of water (e.g., with a syringe) and counting the resulting pulses. Compare this to the specified 0.3mm/pulse rate.
6. Troubleshooting
If your rain gauge is not providing accurate readings or is not registering rainfall, consider the following:
- No Rainfall Registered:
- Check for obstructions in the collection funnel or tipping bucket that prevent water from reaching the mechanism or tipping freely.
- Verify the electrical connection to the weather station. Ensure the cable is securely plugged in and undamaged.
- Inspect the internal magnet and reed switch. Ensure the magnet on the tipping bucket is close enough to the reed switch to activate it when the bucket tips. If the magnet has shifted, it may need to be repositioned carefully.
- Confirm the rain gauge is level. An unlevel gauge may prevent the bucket from tipping or resetting correctly.
- Inaccurate Readings:
- Ensure the gauge is perfectly level.
- Check for partial obstructions that might reduce the amount of water entering the funnel.
- Verify that your weather station's settings for the rain gauge match the 0.3mm/pulse specification.
If issues persist, consult the manual for your specific weather station or contact MISOL customer support.
7. Specifications
| Feature | Detail |
|---|---|
| Model Number | WH-SP-RG |
| Manufacturer | MISOL |
| Material | Plastic |
| Color | Grey |
| Rainfall Resolution | 1 pulse = 0.3 mm (0.012 inches) |
| Power Source | Corded Electric (via weather station connection) |
| Included Components | 1 unit of rain gauge spare part |
| Approximate Dimensions | 150mm (L) x 60mm (W) x 94mm (H) - Refer to diagram for details |

Figure 7.1: Technical drawing with key dimensions of the rain gauge.
8. Warranty and Support
Specific warranty details for the MISOL WH-SP-RG Rain Gauge Spare Part are not provided within this document. For warranty information, technical support, or further assistance, please refer to the documentation provided with your complete weather station system or contact MISOL directly through their official website or customer service channels.


