1. Introduction
This manual provides essential information for the safe and efficient installation, operation, and maintenance of your Hypro 9202C Cast Iron Pedestal Mount Pump. Please read these instructions thoroughly before operating the pump to ensure proper function and longevity.
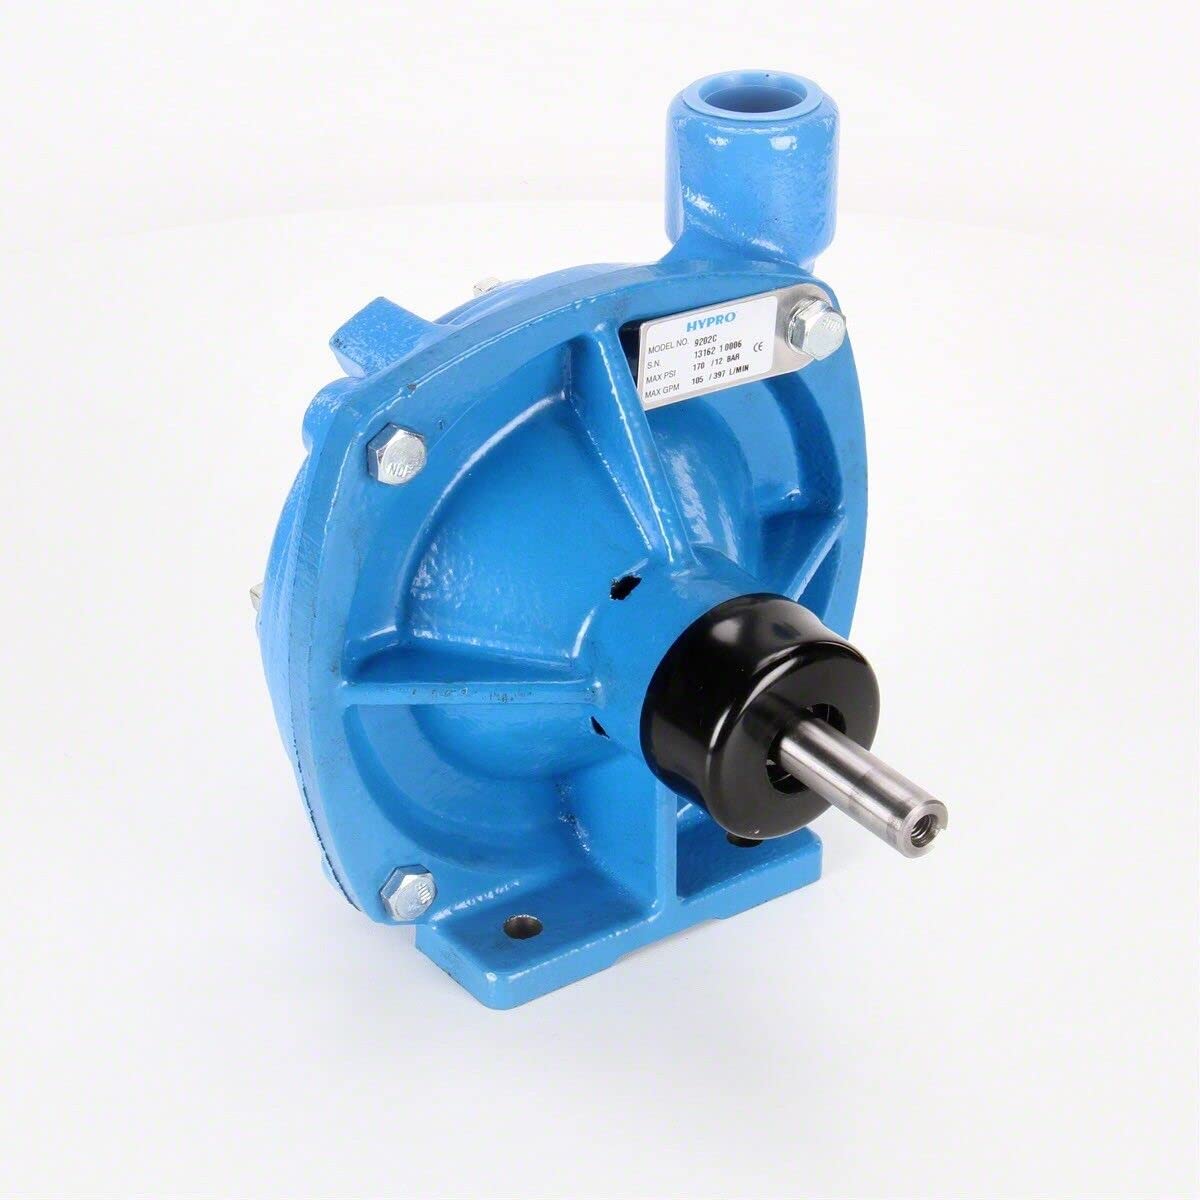
Image 1: Front view of the Hypro 9202C Cast Iron Pedestal Mount Pump. This image shows the overall design of the pump, highlighting its robust cast iron construction and the inlet/outlet ports.
2. Safety Information
Always observe safety precautions to prevent injury and damage to equipment. This pump is designed for specific applications; ensure it is used within its stated performance limits.
- Read all instructions: Familiarize yourself with the pump's operation before use.
- Wear appropriate personal protective equipment (PPE): Including eye protection and gloves.
- Ensure proper ventilation: When operating in enclosed spaces.
- Disconnect power: Always disconnect power to the motor before performing any maintenance or service.
- Avoid hot surfaces: The pump and motor can become hot during operation.
- Use correct fluids: Only pump fluids compatible with the pump's materials.
- Secure mounting: Ensure the pump is securely mounted to prevent vibration and movement.
3. Setup and Installation
Proper installation is crucial for the pump's performance and longevity.
3.1 Mounting
Mount the pump on a stable, level surface capable of supporting its weight and resisting operational vibrations. Use appropriate fasteners to secure the pedestal base.

Image 2: Side view of the Hypro 9202C pump, showing the 5/8 inch solid shaft and the mounting points on the pedestal base. This view is important for understanding how the pump connects to a power source.
3.2 Plumbing Connections
- Inlet Port: Connect a 1 1/4 inch NPT pipe to the inlet. Ensure the suction line is as short and straight as possible to minimize friction loss.
- Outlet Port: Connect a 1 inch NPT pipe to the outlet.
- Use thread sealant on all connections to prevent leaks.
- Ensure all hoses and pipes are adequately supported to prevent strain on the pump ports.
3.3 Shaft Rotation
The standard pump shaft rotation is Counter-Clockwise (CCW) when viewed from the shaft end. Verify the rotation of your power source matches the pump's requirement.
4. Operating Instructions
4.1 Priming the Pump
Before initial operation, the pump must be primed. Fill the pump casing and suction line with the fluid to be pumped. This helps establish a vacuum for efficient operation.
4.2 Starting the Pump
- Ensure all connections are secure and there are no leaks.
- Verify the pump is properly primed.
- Gradually start the power source (e.g., engine or motor) connected to the pump shaft.
- Monitor for proper flow and pressure.
4.3 Stopping the Pump
To stop the pump, gradually reduce the power source speed or shut off the motor. Close any valves in the discharge line if necessary.
5. Maintenance
Regular maintenance ensures optimal performance and extends the life of your pump.
5.1 Post-Operation Flush
After each use, especially when pumping corrosive or abrasive fluids, flush the pump with clean water to prevent buildup and corrosion.
5.2 Seal Inspection and Replacement
Periodically inspect the pump seals for wear or leakage. The pump uses Viton/ceramic standard seals. Life Guard™ silicon carbide, Buna-N ceramic, and Viton/silicon carbide are also available. Refer to the specifications for your specific seal type.
5.3 Winterization
In freezing conditions, drain all fluid from the pump and lines to prevent damage from ice expansion. Store the pump in a dry, protected environment.
6. Troubleshooting
| Problem | Possible Cause | Solution |
|---|---|---|
| Pump fails to prime | Insufficient fluid in casing/suction line, air leak in suction line, clogged suction filter. | Ensure pump is fully primed. Check all suction connections for tightness. Clean or replace suction filter. |
| Low flow or pressure | Clogged impeller, worn seals, incorrect shaft speed, air in system. | Inspect and clean impeller. Replace worn seals. Verify power source RPM. Bleed air from system. |
| Excessive noise/vibration | Misalignment, cavitation, loose mounting, worn bearings (if applicable). | Check alignment of pump and power source. Ensure adequate fluid supply to prevent cavitation. Tighten mounting bolts. Consult a technician for bearing issues. |
| Leakage from pump | Worn shaft seal, loose connections, cracked casing. | Replace shaft seal. Tighten all plumbing connections. Inspect casing for damage. |
7. Specifications
Detailed technical specifications for the Hypro 9202C Cast Iron Pedestal Mount Pump.

Image 3: Close-up of the Hypro 9202C pump's identification label, showing Model No. 9202C, Serial Number, Max PSI (180 / 12 BAR), and Max GPM (105 / 397 L/MIN).
- Model: 9202C
- Housing Material: Cast Iron
- Mounting: Pedestal Mount, Direct Drive
- Maximum Flow: 103 gpm (390 lpm) (free flow)
- Maximum Pressure: 180 psi (12.4 bar) (Shut off)
- Maximum Speed: 6000 rpm
- Maximum Fluid Temperature: 140°F (60°C)
- Inlet Port Size: 1 1/4 inch NPT
- Outlet Port Size: 1 inch NPT
- Shaft: 5/8 inch solid
- Pump Shaft Rotation: CCW (Counter-Clockwise)
- Impeller: Glass-filled nylon (standard for cast iron)
- Pump Seals: Viton/ceramic standard (Life Guard™ silicon carbide, Buna-N ceramic, and Viton/silicon carbide available)
- UPC: 0734943001373, 698035174485

Image 4: Detailed specification label for the Hypro 9202C Centrifugal Pump, confirming cast iron construction, 5/8 inch solid shaft with Viton shaft seal, 1-1/4 inch inlet, 1 inch outlet, and 6000 RPM max. Also shows a barcode with UPC 0734943001373.
8. Warranty Information
Hypro products are manufactured to high-quality standards. For specific warranty terms and conditions, please refer to the warranty statement provided with your purchase or visit the official Hypro website. Keep your proof of purchase for warranty claims.
9. Customer Support
For technical assistance, spare parts, or further inquiries, please contact Hypro customer support. Have your pump model number (9202C) and serial number ready when contacting support.
Contact information can typically be found on the manufacturer's website or product packaging.


