Introduction
This manual provides detailed instructions for the proper installation and use of the Panasonic KX-A433-B Wall Mount Kit. This kit is specifically designed to securely mount Panasonic KX-UT133 and KX-UT136 VoIP SIP phones to a wall, optimizing desk space and improving accessibility. Please read these instructions thoroughly before beginning installation to ensure correct setup and safe operation.
Important Safety Information
- Ensure the mounting surface is structurally sound and can support the weight of the phone and the wall mount kit.
- Use appropriate tools and fasteners for your wall type. Consult a professional if unsure.
- Do not overtighten screws, as this may damage the kit or the phone.
- Keep small parts out of reach of children to prevent choking hazards.
- Disconnect the phone from power and network before installation.
Package Contents
Verify that all items are present in the package:
- 1x Panasonic KX-A433-B Wall Mount Bracket
- (Screws and wall anchors may be included or sold separately, depending on region and retailer. Please check your specific packaging.)

Image 1: Packaging for the Panasonic KX-A433-B Wall Mount Kit, showing the product label and model number.
Setup and Installation
Follow these steps to properly install your Panasonic KX-A433-B Wall Mount Kit and attach your compatible VoIP phone.
Tools Required (Not Included):
- Phillips head screwdriver
- Drill (if using wall anchors)
- Pencil
- Level
- Appropriate screws and wall anchors for your wall type
Installation Steps:
- Prepare the Phone: Disconnect your Panasonic KX-UT133 or KX-UT136 phone from its power adapter and network cable. If the phone is currently on a desk stand, remove the stand.
- Position the Mount: Hold the KX-A433-B wall mount bracket against the desired wall location. Use a level to ensure it is straight. Mark the positions for the mounting screws through the designated holes on the bracket.
- Drill Holes (if necessary): If using wall anchors, drill pilot holes at the marked locations according to the anchor manufacturer's instructions. Insert the wall anchors.
- Secure the Bracket: Align the wall mount bracket with the drilled holes (or marks for direct screw-in). Insert and tighten the appropriate screws to firmly secure the bracket to the wall. Do not overtighten.
- Attach the Phone: Carefully align the mounting slots on the back of your KX-UT133 or KX-UT136 phone with the corresponding tabs on the installed wall mount bracket. Slide the phone downwards until it clicks securely into place.
- Connect Cables: Reconnect the network cable and power adapter to the phone. Ensure cables are routed neatly and do not interfere with the phone's stability.

Image 2: Front view of the KX-A433-B wall mount bracket, showing the various slots and screw holes for phone attachment and wall mounting.
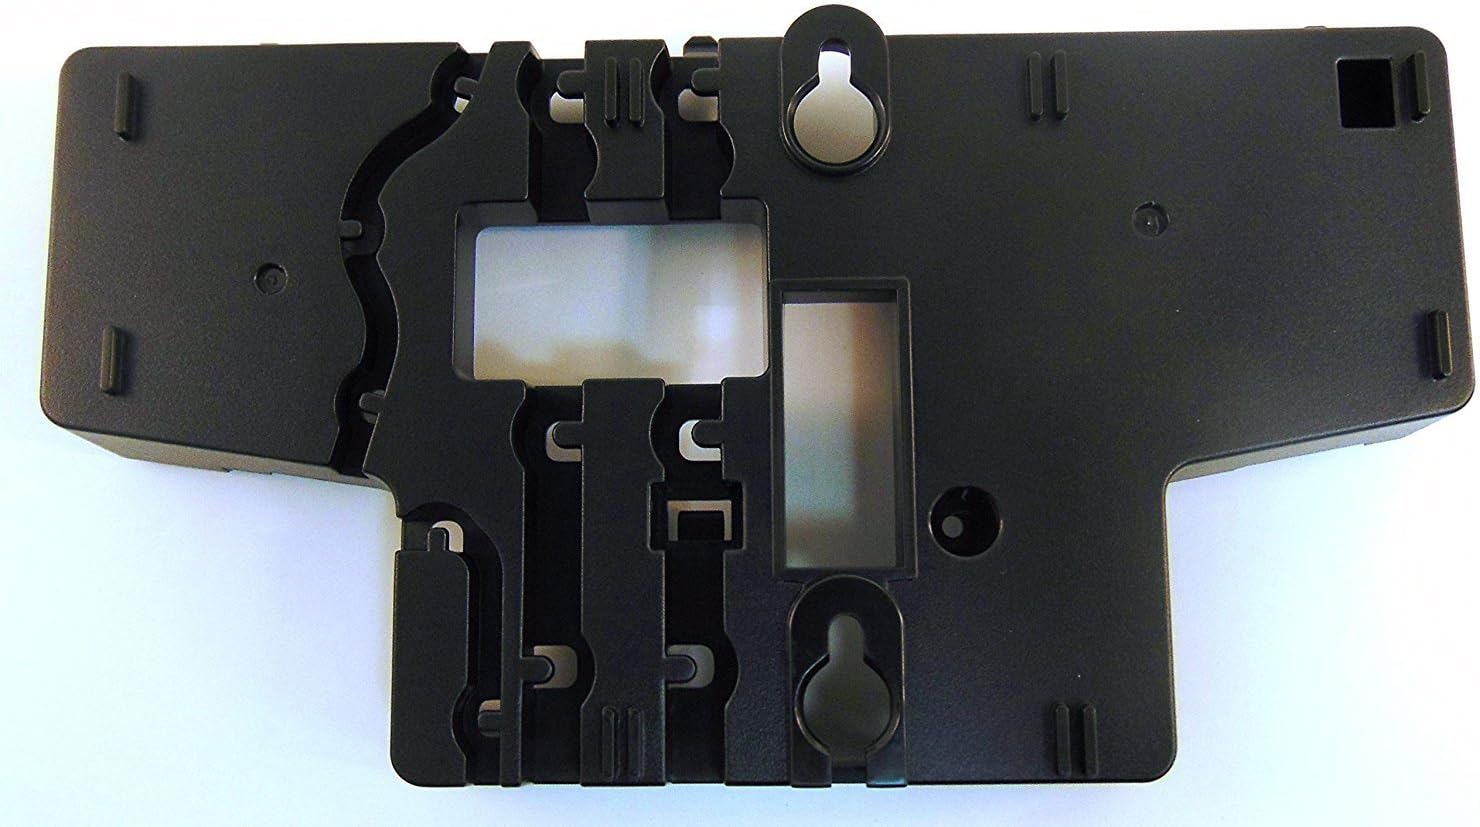
Image 3: Back view of the KX-A433-B wall mount bracket, illustrating the keyhole slots for wall mounting.
Operating Instructions
Once installed, the Panasonic KX-A433-B Wall Mount Kit provides a stable and secure platform for your VoIP phone. No specific operational steps are required for the mount itself. Operate your Panasonic KX-UT133 or KX-UT136 phone as per its own user manual.
Maintenance
- Periodically check the wall mount and phone for any signs of loosening or damage.
- Clean the surface of the wall mount with a soft, dry cloth. Avoid abrasive cleaners or solvents.
- Ensure cables remain untangled and are not under undue stress.
Troubleshooting
| Problem | Possible Cause | Solution |
|---|---|---|
| Phone feels loose on the mount. | Phone not fully engaged with the bracket, or bracket not securely fastened to the wall. | Ensure the phone is slid down completely onto the bracket tabs. Check wall screws for tightness. |
| Mount is wobbly on the wall. | Screws are loose, or wall anchors are not properly installed/suited for the wall material. | Retighten screws. If problem persists, consider using different wall anchors or consulting a professional. |
| Cables are difficult to manage. | Improper cable routing. | Route cables through the designated channels on the phone and mount (if available) or use cable ties to keep them tidy. |
Specifications
- Model: KX-A433-B
- Brand: Panasonic
- Mounting Type: Wall Mount
- Compatible Phones: Panasonic KX-UT133, Panasonic KX-UT136
- Material: Plastic
- Color: Black
- Product Dimensions (L x W x H): 10 x 7 x 2 inches (25.4 x 17.78 x 5.08 cm)
- Item Weight: 6.4 ounces (181.44 grams)
- UPC: 0885170057791
Warranty and Support
For warranty information and technical support regarding your Panasonic KX-A433-B Wall Mount Kit, please refer to the documentation included with your purchase or visit the official Panasonic support website. You can also contact Panasonic customer service directly for assistance.
Panasonic Official Website: https://na.panasonic.com/us/


