
1. Introduction
This manual provides detailed instructions for the setup, operation, and maintenance of your Technoline WS 6760 Radio-Controlled Weather Station. Please read this manual thoroughly before using the device to ensure correct operation and to maximize its features. The WS 6760 offers comprehensive weather data including indoor and outdoor temperature and humidity, atmospheric pressure, weather forecasts, and a radio-controlled clock with additional astronomical information.
2. Safety Information
- Do not expose the main unit or sensor to extreme temperatures, direct sunlight, or moisture.
- Avoid dropping the device or subjecting it to strong impacts.
- Do not attempt to disassemble or repair the unit yourself. Refer all servicing to qualified personnel.
- Dispose of used batteries responsibly according to local regulations.
- Keep the device out of reach of children.
3. Package Contents
Please check that all items are present and in good condition:
- Technoline WS 6760 Main Weather Station Unit
- TX70DTH Wireless Outdoor Sensor
- Instruction Manual
4. Product Overview
4.1 Main Unit
The main unit features a large LCD display showing various weather parameters and time information. It is designed for tabletop placement.

Figure 4.1: Technoline WS 6760 Main Unit and TX70DTH Outdoor Sensor. This image shows the primary display unit alongside its wireless outdoor sensor, illustrating their relative sizes and designs.

Figure 4.2: Detailed view of the WS 6760 main unit's display, showing various data points such as time, date, indoor/outdoor temperature and humidity, atmospheric pressure history, and weather forecast icons.
4.2 Wireless Outdoor Sensor (TX70DTH)
The TX70DTH sensor measures outdoor temperature and humidity and transmits data wirelessly to the main unit. It features a small display for local readings.

Figure 4.3: The TX70DTH outdoor sensor shown mounted on a brick wall, demonstrating a typical installation scenario. The sensor displays its current temperature and humidity readings.

Figure 4.4: A standalone view of the TX70DTH outdoor sensor, highlighting its compact design and integrated display for temperature and humidity.
5. Setup
5.1 Battery Installation
- Main Unit: Open the battery compartment cover on the back of the main unit. Insert 2 x AA batteries, observing the correct polarity (+/-). Close the cover.
- Outdoor Sensor: Open the battery compartment cover on the back of the TX70DTH sensor. Insert 2 x AA batteries, observing the correct polarity (+/-). Close the cover.
Note: Always replace all batteries at the same time. Use high-quality alkaline batteries for optimal performance.
5.2 Sensor Pairing
After inserting batteries into both units, the main unit will automatically attempt to connect with the outdoor sensor. This process may take a few minutes. Ensure the sensor is within range of the main unit (typically up to 30 meters in open air).
- If the outdoor temperature/humidity does not appear, press the "SEARCH" button on the main unit to initiate a manual search for the sensor.
- The sensor has a channel switch (1, 2, 3). Ensure the main unit is set to the same channel as the sensor if you are using multiple sensors or experiencing interference.
5.3 Initial Time and Date Setup
The WS 6760 is equipped with a radio-controlled clock (DCF-77). Upon initial power-up, it will automatically search for the DCF signal to set the time and date. This process can take several hours depending on your location and signal strength.
- Place the main unit near a window for better signal reception.
- Once the signal is received, the time, date, and day of the week will be automatically set. A signal icon will appear on the display.
- You can manually set the time and date if the radio signal is unavailable or if you prefer manual adjustment. Refer to Section 6.1 for manual settings.
- Adjust the time zone offset (± 12 hours) if your location is not in the standard DCF time zone.
6. Operating Instructions
6.1 Time and Date Display
- 12/24 Hour Format: Press the "MODE" button to toggle between 12-hour and 24-hour time display.
- Manual Time Setting: If the radio signal is not received, hold the "MODE" button to enter manual time setting mode. Use the "UP" and "DOWN" buttons to adjust values and "MODE" to confirm.
- Weekday Language: The weekday can be displayed in 7 different languages. Access this setting via the manual time setting mode.
6.2 Temperature and Humidity
The station displays both indoor and outdoor temperature and humidity. The outdoor readings are received from the TX70DTH sensor.
- MIN/MAX Memory: Press the "MIN/MAX" button to view the minimum and maximum recorded indoor/outdoor temperature and humidity values. Press again to clear.
- Trend Display: Arrows next to the temperature and humidity readings indicate rising, stable, or falling trends.
- Comfort Indicator: An icon indicates the indoor comfort level based on temperature and humidity.
- Frost Alert: An alarm icon will appear when the outdoor temperature approaches freezing point.
6.3 Atmospheric Pressure and Weather Forecast
The station measures atmospheric pressure and uses this data to predict future weather conditions.
- Pressure Display: The current atmospheric pressure is displayed, often in hPa.
- 12-Hour History: A bar graph shows the atmospheric pressure trend over the last 12 hours, aiding in weather prediction.
- Weather Forecast Icons: Icons (e.g., sunny, partly cloudy, cloudy, rainy) predict the weather for the next 12-24 hours based on pressure changes.
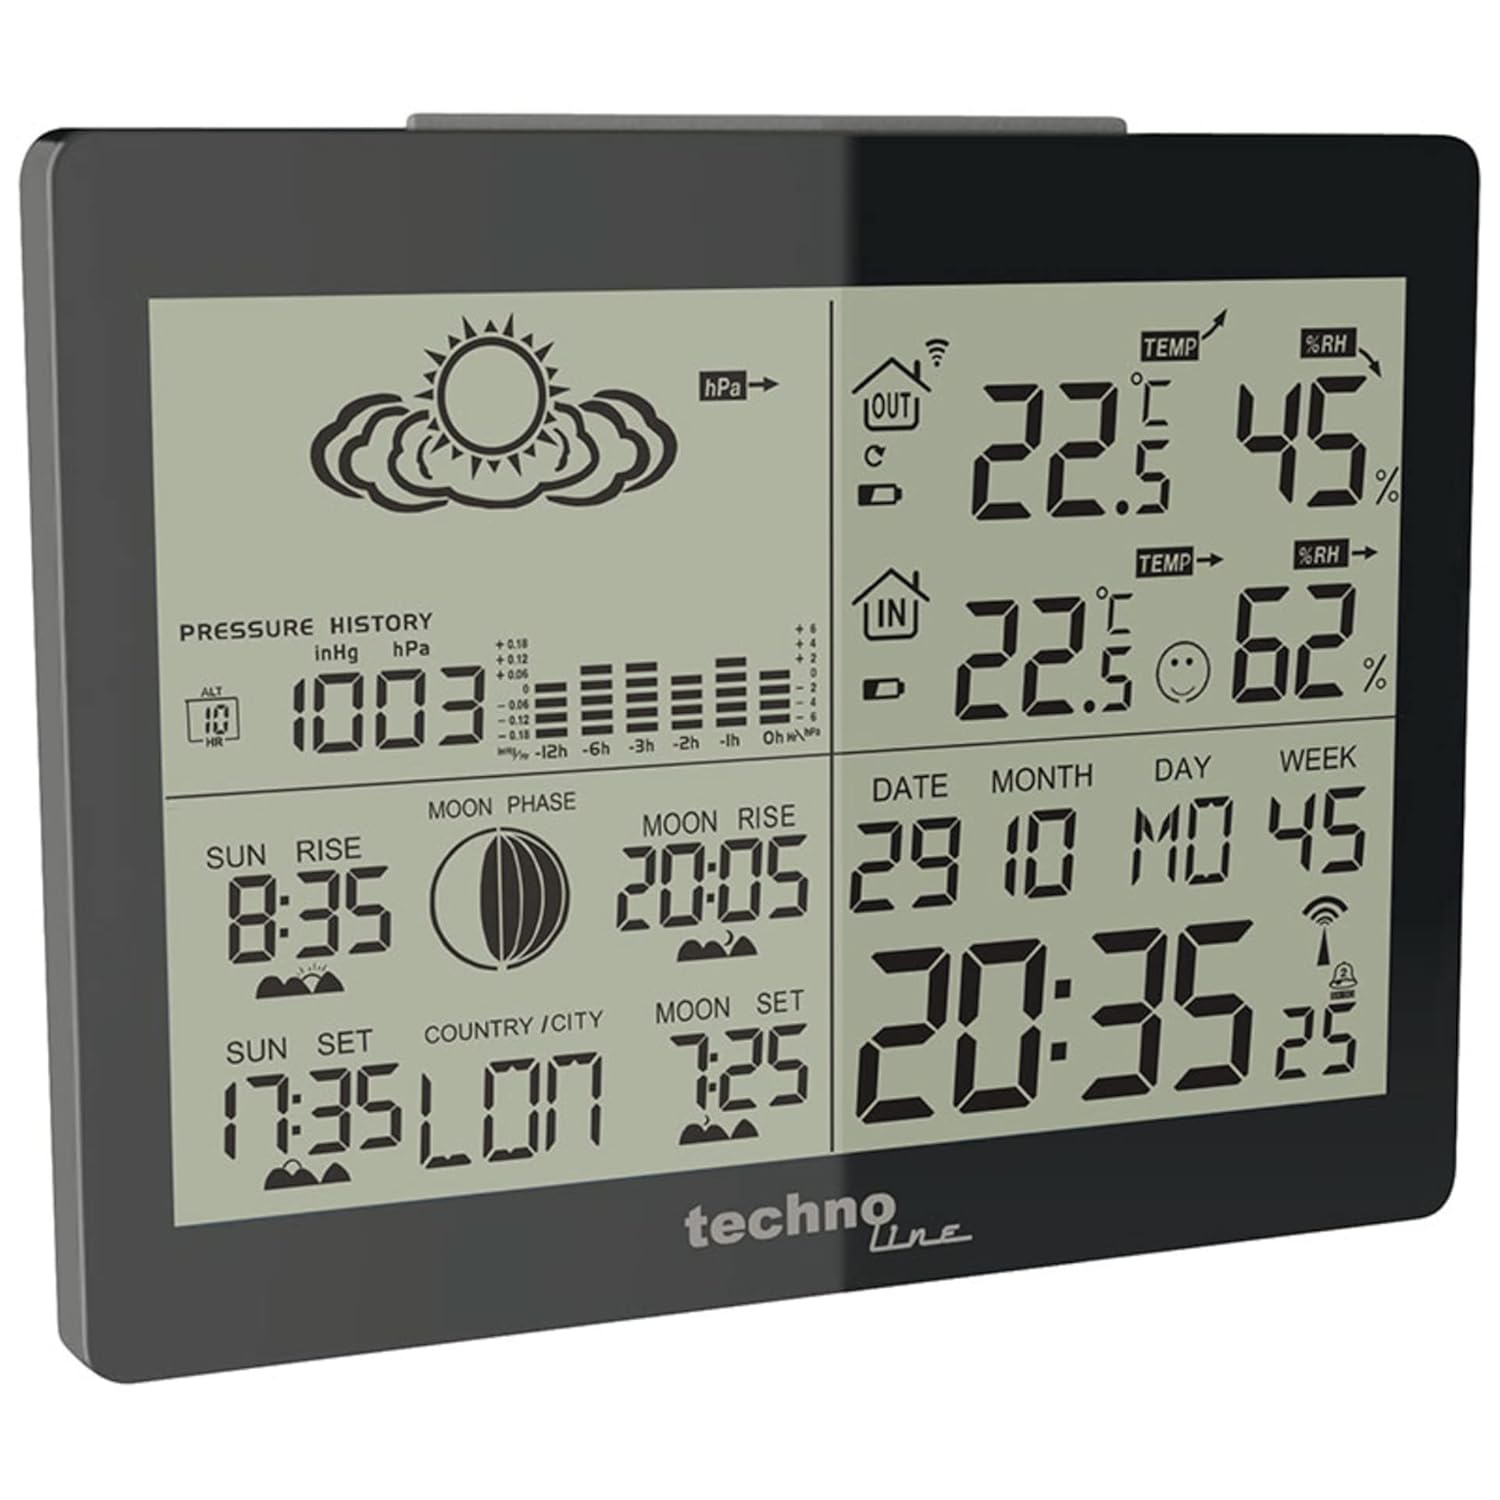
Figure 6.1: The main unit display highlighting the atmospheric pressure history graph and weather forecast icons, which predict future weather conditions.
6.4 Astronomical Data
The WS 6760 provides information related to celestial events.
- Sunrise and Sunset: Displays the local sunrise and sunset times.
- Moon Phases: An icon indicates the current phase of the moon.
- Moonrise and Moonset: Shows the local moonrise and moonset times.
6.5 Alarm Functions
The station includes two programmable alarms with a snooze function.
- Setting Alarms: Press the "ALARM" button to cycle through Alarm 1, Alarm 2, and Alarm Off. Hold "ALARM" to enter setting mode for the selected alarm. Use "UP" and "DOWN" to adjust time and "ALARM" to confirm.
- Snooze Function: When an alarm sounds, press any button (except "ALARM") to activate the snooze function. The alarm will sound again after a few minutes.
6.6 Backlight
The display features a blue backlight for improved visibility in low-light conditions.

Figure 6.2: The main unit display illuminated with its blue backlight, enhancing readability in dark environments.
- Press the "LIGHT" button (usually located on the top or side) to activate the backlight for a few seconds.
7. Maintenance
- Cleaning: Wipe the display and casing with a soft, damp cloth. Do not use abrasive cleaners or solvents.
- Battery Replacement: Replace batteries in both the main unit and the outdoor sensor when the low battery indicator appears on the display. Always replace all batteries at once.
- Sensor Placement: Ensure the outdoor sensor is placed in a shaded, well-ventilated area, protected from direct rain and sunlight, to ensure accurate readings and prolong its lifespan.
8. Troubleshooting
| Problem | Possible Cause | Solution |
|---|---|---|
| No outdoor temperature/humidity reading. |
|
|
| Radio-controlled time not setting. |
|
|
| Inaccurate outdoor readings. |
|
|
| Display is dim or blank. |
|
|
9. Specifications
- Model: Technoline WS 6760
- Main Unit Dimensions (L x W x H): 145 x 45 x 110 mm
- Outdoor Sensor Dimensions (L x W x H): 60 x 99 x 24 mm
- Material: Plastic
- Color: Black
- Power Source (Main Unit): 2 x AA batteries (not included)
- Power Source (Outdoor Sensor): 2 x AA batteries (not included)
- Radio Frequency: 433 MHz
- Radio Control: DCF-77 signal
- Temperature Range (Indoor): 0°C to +50°C (32°F to 122°F) (Assumed, typical)
- Temperature Range (Outdoor): -20°C to +60°C (-4°F to 140°F) (Assumed, typical)
- Humidity Range (Indoor/Outdoor): 20% to 95% RH (Assumed, typical)
- Manufacturer: Technoline
- Country of Origin: China
Note: Temperature and humidity ranges are typical for similar devices and may vary slightly.
10. Warranty and Support
The Technoline WS 6760 Weather Station comes with a 2-year warranty from the date of purchase, covering manufacturing defects. Please retain your proof of purchase for warranty claims.
For technical support, troubleshooting assistance, or warranty inquiries, please contact your retailer or the manufacturer, Technoline, directly. Contact information can typically be found on the manufacturer's official website or product packaging.


