1. Introduction
This manual provides essential information for the safe and efficient use of your Acer B326HK 32-inch UHD 4K monitor. Please read this manual thoroughly before operating the device and retain it for future reference.
The Acer B326HK monitor features a 32-inch Ultra HD (4K2K) display with a resolution of 3840 x 2160 pixels, offering detailed imagery. It includes an ergonomic stand and supports VESA mounting for flexible placement. Connectivity options include DVI, MHL, DisplayPort, Mini DisplayPort, and a 5-port USB 3.0 hub.
2. Safety Information
- Always place the monitor on a stable, level surface to prevent it from falling.
- Ensure proper ventilation around the monitor. Do not block ventilation openings.
- Use only the power adapter and cables supplied by the manufacturer.
- Avoid exposing the monitor to moisture, rain, or extreme temperatures.
- Do not attempt to service the monitor yourself. Refer all servicing to qualified personnel.
- Unplug the monitor from the power outlet before cleaning.
- Keep the monitor away from strong magnetic fields.
3. Package Contents
Verify that all items are present in the package:
- Acer B326HK LED-backlit LCD monitor - 32"
- DisplayPort cable
- DVI cable
- SuperSpeed USB cable
- Power cord
- User Manual (this document)
4. Setup
4.1 Assembling the Monitor Stand
Carefully remove the monitor and stand components from the packaging. Follow the instructions below to attach the stand to the monitor panel.

Figure 4.1: Front view of the Acer B326HK monitor with its ergonomic stand.
- Place the monitor panel face down on a soft, clean cloth to prevent scratches.
- Align the stand arm with the mounting slot on the back of the monitor.
- Secure the stand arm to the monitor using the provided screws.
- Attach the base to the stand arm and tighten the thumb screw or screws from the bottom.
- Carefully lift the assembled monitor and place it on your desired surface.
The monitor also supports VESA compatible mounting (100x100mm) for wall mounts or alternative stands. Refer to your VESA mount's instructions for installation.
4.2 Connecting Cables
Connect the necessary cables to the corresponding ports on the back of the monitor and your computer.
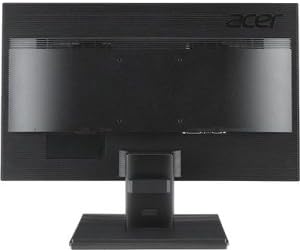
Figure 4.2: Rear view of the Acer B326HK monitor, highlighting the various input ports.
- Video Input: Connect one of the following video cables from your computer's graphics card to the monitor:
- DisplayPort cable (recommended for 4K resolution at 60Hz)
- Mini DisplayPort cable
- DVI cable (supports HDCP)
- MHL cable (for compatible mobile devices)
- USB Upstream: Connect the SuperSpeed USB cable from your computer to the monitor's USB upstream port to enable the monitor's USB 3.0 hub.
- USB Downstream: Use the 5 high-speed USB 3.0 ports on the monitor to connect peripherals like a mouse, keyboard, or for charging mobile devices.
- Power: Connect the power cord to the monitor's power input, then plug the other end into a grounded electrical outlet.
5. Operating the Monitor
5.1 Power On/Off
Press the power button, usually located on the bottom right bezel, to turn the monitor on or off. The power indicator light will illuminate when the monitor is on.
5.2 Adjusting the Display (OSD Menu)
The On-Screen Display (OSD) menu allows you to adjust various monitor settings such as brightness, contrast, color, input source, and more. Use the control buttons located on the monitor's bezel to navigate the OSD menu.
- Press any OSD button to activate the OSD menu.
- Use the navigation buttons (usually arrows) to move through the menu options.
- Press the select button to enter a sub-menu or confirm a setting.
- Use the navigation buttons to adjust values or select options.
- Press the exit button to leave the OSD menu.
5.3 Input Source Selection
The monitor can automatically detect an active input source. If multiple sources are connected, you may need to manually select the desired input via the OSD menu. Navigate to the "Input" or "Source" section in the OSD and select your preferred input (e.g., DisplayPort, DVI, MHL).
5.4 Ergonomic Adjustments
The ergonomic stand allows for various adjustments to optimize your viewing comfort:
- Height Adjustment: Gently push or pull the monitor panel up or down.
- Tilt Adjustment: Tilt the monitor panel forward or backward to find the optimal viewing angle.
- Swivel Adjustment: Rotate the monitor left or right on its base.
- Pivot Adjustment: Rotate the monitor 90 degrees for portrait mode (ensure sufficient clearance).
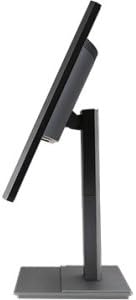
Figure 5.1: Side view of the Acer B326HK monitor, demonstrating its tilt capability.
6. Maintenance
Proper care ensures the longevity of your monitor.
- Cleaning the Screen:
- Turn off the monitor and unplug the power cord.
- Use a soft, lint-free cloth (e.g., microfiber) slightly dampened with water or a non-ammonia, non-alcohol based screen cleaner.
- Wipe the screen gently. Do not spray cleaner directly onto the screen.
- Cleaning the Casing:
- Use a soft, dry cloth to wipe the monitor casing.
- Avoid using abrasive cleaners or solvents.
- Ventilation: Ensure the ventilation openings on the monitor are clear of dust and debris.
7. Troubleshooting
If you encounter issues with your monitor, refer to the following common solutions:
| Problem | Possible Solution |
|---|---|
| No power |
|
| No image / "No Signal" message |
|
| Image is blurry or distorted |
|
| Color issues or incorrect display |
|
| No sound from speakers |
|
8. Specifications
Key technical specifications for the Acer B326HK monitor:
| Feature | Detail |
|---|---|
| Model Number | B326HK ymjdpphz |
| Screen Size | 32 Inches |
| Max Screen Resolution | 3840 x 2160 Pixels (4K UHD 2160p) |
| Aspect Ratio | 16:9 |
| Response Time | 6ms |
| Contrast Ratio | 100,000,000:1 (Dynamic) |
| Signal Inputs | 1 x DVI (w/HDCP), 1 x MHL, 1 x Display Port, 1 x Mini Display Port |
| USB Ports | 5 x USB 3.0 (1 upstream, 4 downstream) |
| VESA Mount Compatible | Yes |
| Item Weight | 26.4 pounds |
| Product Dimensions (LxWxH) | 10.49 x 29.05 x 18.63 inches |
| Manufacturer | Acer Computer |
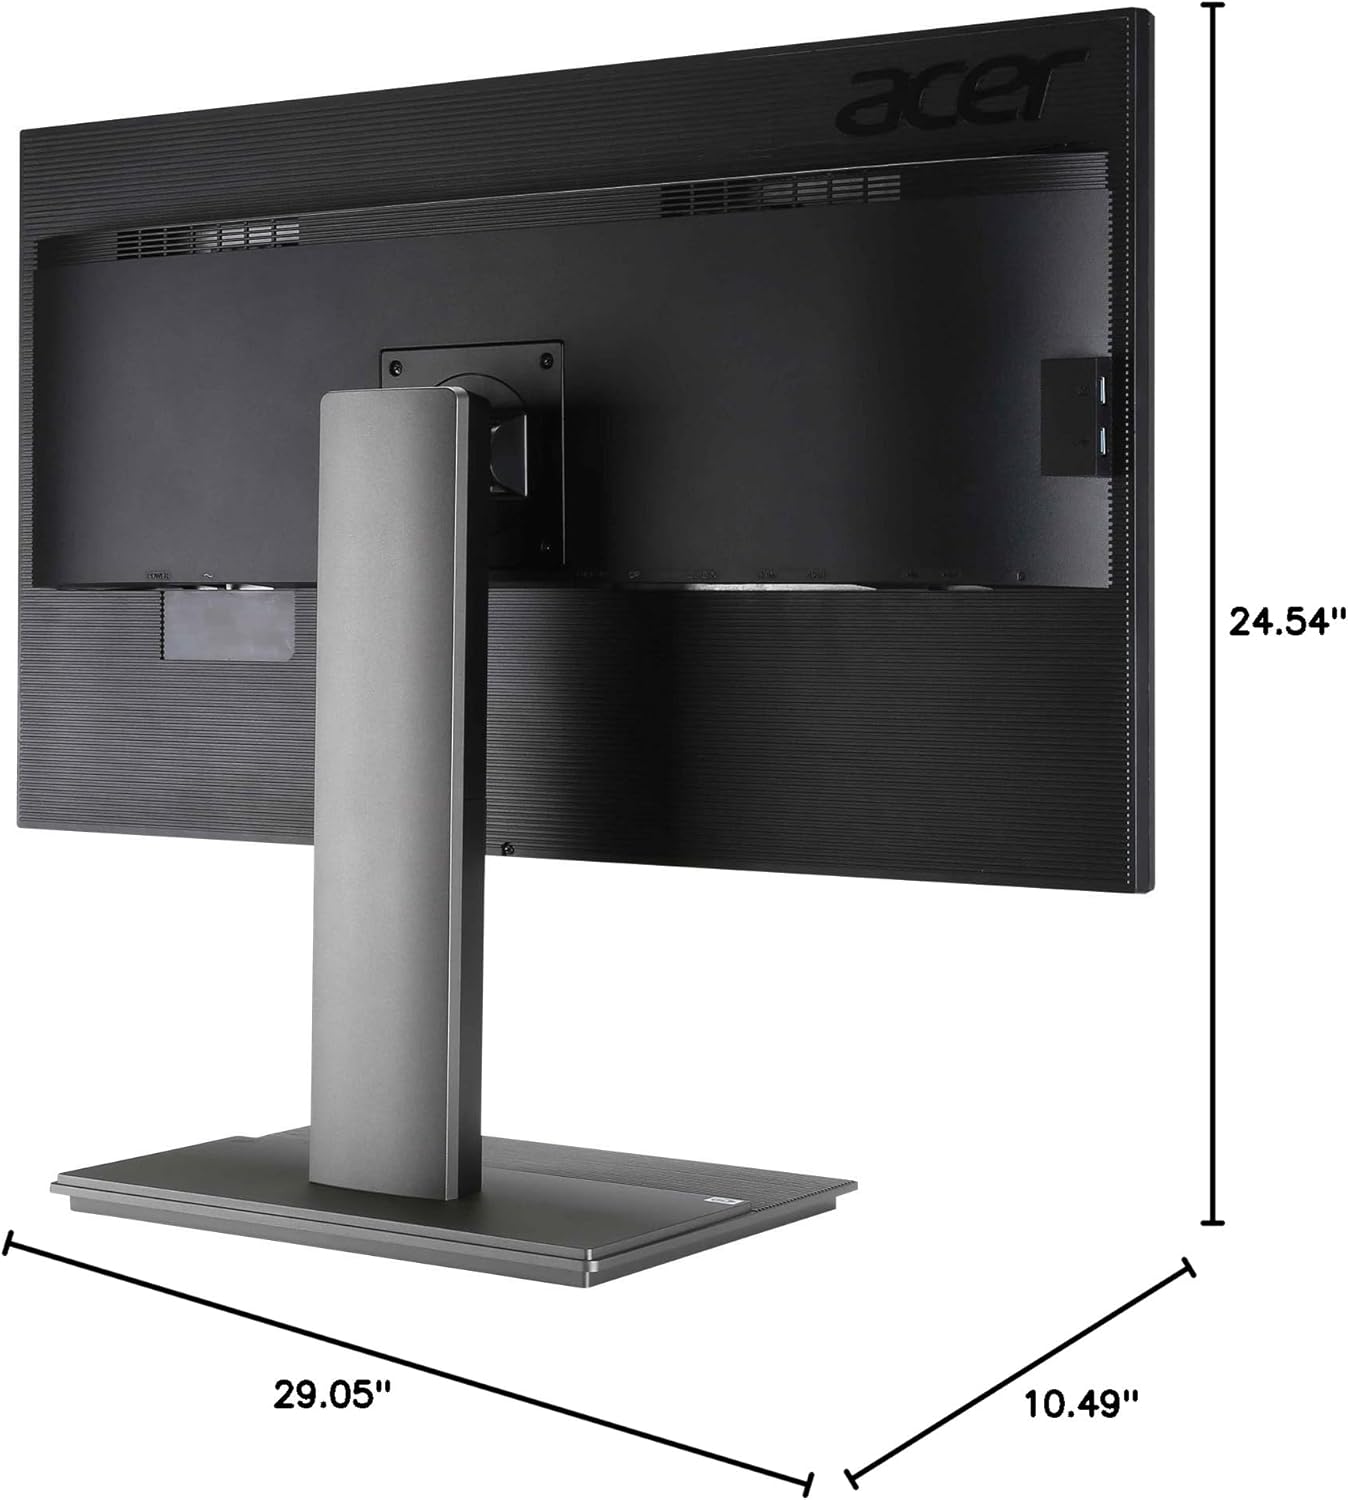
Figure 8.1: Dimensional view of the Acer B326HK monitor.
9. Warranty and Support
For warranty information and technical support, please refer to the warranty card included with your product or visit the official Acer support website. You may need your monitor's serial number, which is typically located on a label on the back of the monitor.
Acer Official Website: https://www.acer.com/support