Introduction
This manual provides instructions for the installation, operation, and maintenance of your Honeywell CT410B1017/E1 Electric Heat Thermostat. This non-programmable thermostat is designed for 4-wire (double pole) electric heat applications, such as baseboard or line volt heaters. It features a simple mechanical dial control for straightforward temperature adjustment.
Important Safety Information
WARNING: Electrical Shock Hazard.
- Always turn off power at the main service panel before installing or servicing this thermostat.
- This thermostat operates on 120-240 Volts. Improper installation can lead to electrical shock or fire.
- Installation should be performed by a qualified electrician or trained service technician.
- Ensure all wiring connections are secure and comply with local electrical codes.
- Do not use this thermostat for applications other than those specified.
This product is UL and CSA listed for safety.
Package Contents
Verify that your package contains the following items:
- Honeywell CT410B1017/E1 Electric Heat Thermostat
- Mounting Screws (typically included, though not explicitly listed in product data)
- Installation Guide (this document)
Installation Instructions
1. Prepare for Installation
- Turn off power to the heating system at the main service panel (circuit breaker or fuse box) before beginning installation.
- Remove the old thermostat (if applicable). Note the wiring connections.
- Unpack the new Honeywell CT410B1017/E1 thermostat.
2. Mounting the Thermostat
The thermostat should be mounted on an inside wall, approximately 5 feet (1.5 meters) above the floor, away from drafts, direct sunlight, and heat-producing appliances.
- Separate the thermostat cover from the base.
- Position the thermostat base against the wall where it will be mounted.
- Mark the locations for the mounting screws.
- Drill pilot holes if necessary.
- Secure the thermostat base to the wall using the provided mounting screws. Do not overtighten.
3. Wiring the Thermostat
This thermostat is designed for 4-wire (double pole) electric heat applications (120-240V). Refer to the diagram below for typical wiring. If you are unsure about wiring, consult a qualified electrician.
- Connect the two incoming line wires (L1 and L2) to the terminals marked "LINE".
- Connect the two load wires (to the heater) to the terminals marked "LOAD".
- Ensure all connections are tight and secure.
- Push excess wire back into the wall opening.
Note: The thermostat has a "Positive Off" feature, meaning it completely disconnects power to the heater when set to the OFF position.
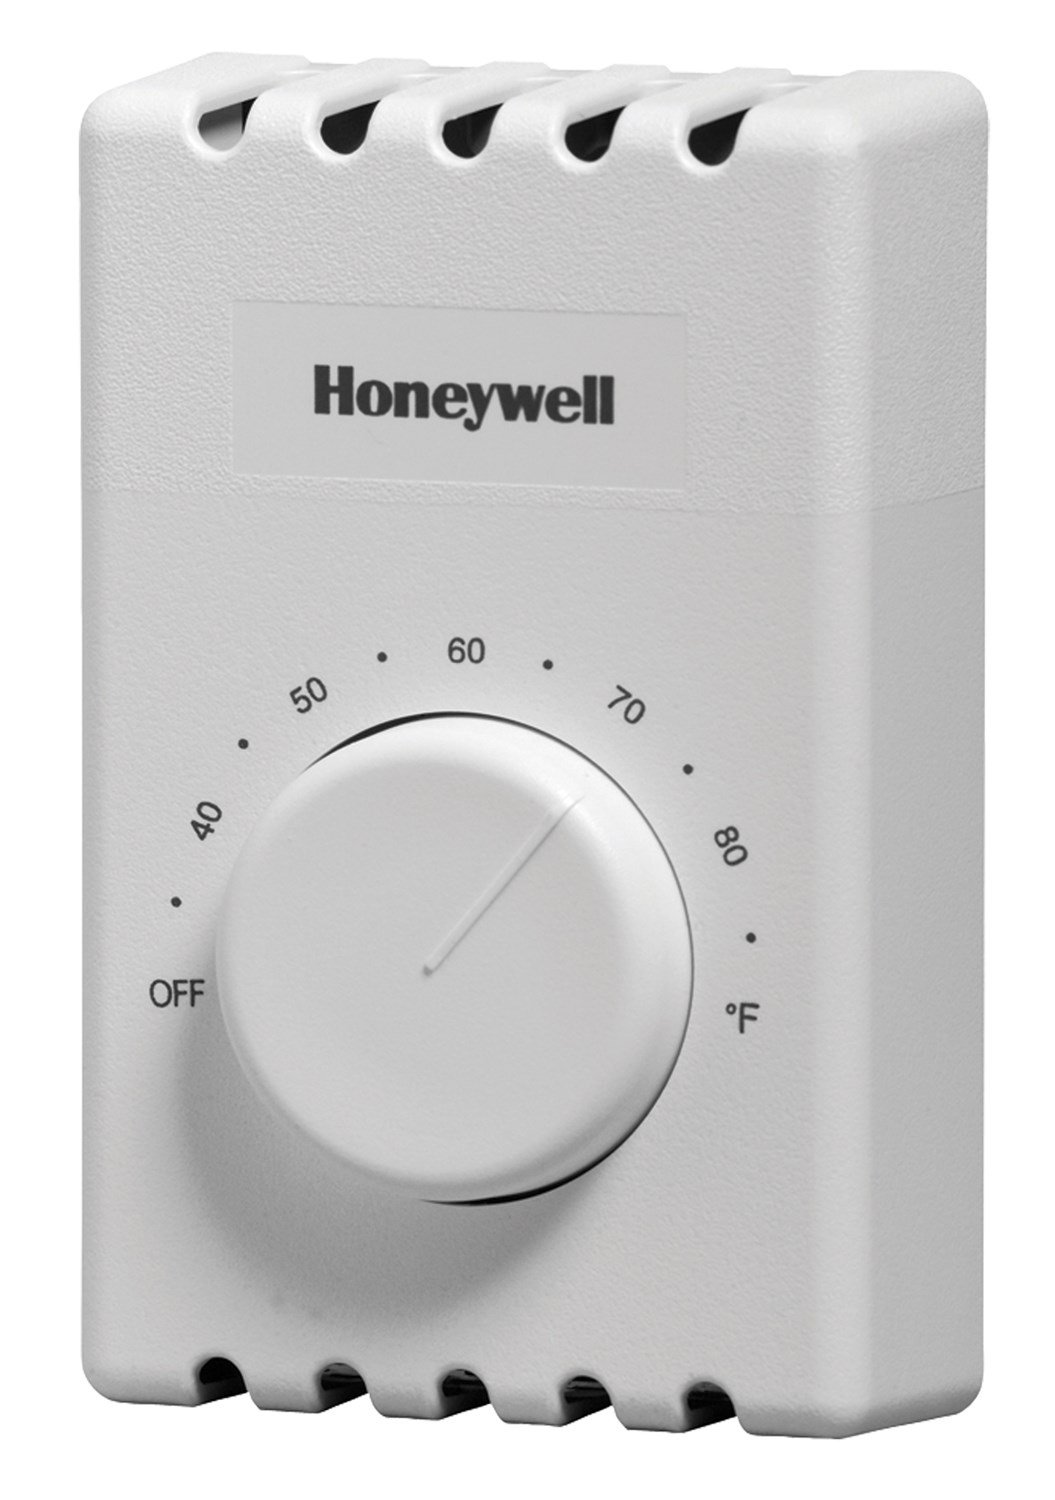
Figure 1: Honeywell CT410B1017/E1 Electric Heat Thermostat. This image shows the front view of the thermostat with its mechanical dial, temperature markings (40-80°F), and the "OFF" position. The dimensions are indicated as 4.5 inches height, 2.75 inches width, and 1.5 inches depth. The Honeywell logo is visible at the top.
4. Complete Installation
- Once wiring is complete and secure, carefully attach the thermostat cover to the base.
- Turn on power to the heating system at the main service panel.
- Test the thermostat operation.
Operating Instructions
The Honeywell CT410B1017/E1 thermostat is a simple, non-programmable mechanical control.
Adjusting Temperature
- To increase the temperature, rotate the dial clockwise.
- To decrease the temperature, rotate the dial counter-clockwise.
- The thermostat will maintain the set temperature by turning the electric heater on and off as needed.
Turning the Heater Off
- To turn off the heating system, rotate the dial completely counter-clockwise until it clicks into the "OFF" position. This will completely disconnect power to the heater.
Maintenance
Your Honeywell thermostat requires minimal maintenance.
- Cleaning: Wipe the exterior of the thermostat with a soft, damp cloth. Do not use abrasive cleaners or solvents.
- No Batteries Required: This thermostat is line-powered and does not require batteries.
- No Lubrication: The mechanical components are factory-lubricated and do not require additional lubrication.
Troubleshooting
| Problem | Possible Cause | Solution |
|---|---|---|
| Heater does not turn on. |
|
|
| Heater does not turn off. |
|
|
| Inaccurate temperature reading. |
|
|
If troubleshooting steps do not resolve the issue, contact a qualified service professional.
Specifications
- Model: CT410B1017/E1
- Application: 4-wire (double pole) electric heat (baseboard or line volt)
- Voltage: 120-240 Volts AC
- Control Type: Mechanical dial, non-programmable
- Temperature Control Type: Manual
- Connectivity Technology: Wired
- Dimensions (H x W x D): 4.5" x 2.75" x 1.5" (11.4 cm x 7 cm x 3.8 cm)
- Color: White
- Special Features: Dual Diaphragm Technology, Versatile Wire Connection, Positive Off
- Certifications: UL and CSA listed
- Item Weight: Approximately 11.3 ounces (320 grams)
Warranty and Support
Honeywell products are manufactured to the highest standards and are designed for reliable operation. For specific warranty information, please refer to the warranty card included with your product or visit the official Honeywell website.
For technical support, product inquiries, or to locate a service professional, please visit the Honeywell support website or contact their customer service department. Contact information can typically be found on the Honeywell website or product packaging.


