Product Overview
The Intermatic HB35K is a durable outdoor plug-in 24-hour mechanical timer designed for automated control of outdoor electrical devices. It is ideal for managing landscape lighting, holiday decorations, and fountains, providing convenience and energy savings. This model features two grounded receptacles and an 8-inch grounded cord for versatile use.
Key Features:
- Controls LED and CFL lights.
- Designed for outdoor decorations, holiday lighting, and Christmas tree lights.
- Equipped with two grounded outlets.
- Allows up to 24 ON/OFF events at 30-minute intervals using captive trippers.
- Features a manual override switch for immediate ON/OFF control.

Image: Front view of the Intermatic HB35K Outdoor Timer, showing the timer dial and the Intermatic logo.
Safety Information
Please read and understand all safety instructions before operating this device. Failure to follow these instructions may result in electric shock, fire, or serious injury.
- Outdoor Use Only: This timer is designed for outdoor use. Ensure it is protected from direct water exposure and extreme weather conditions.
- Grounding: Always plug the timer into a grounded 120V, 60Hz outlet. Do not remove the grounding prong.
- Load Capacity: Do not exceed the maximum electrical ratings: 10A Resistive, 1250W Tungsten, 500VA Electronic Ballast, 1/2HP Motor Load. Overloading can cause overheating and fire.
- Cord Management: Ensure the cord is not pinched or damaged. Keep cords away from heat, sharp edges, and moving parts.
- Children and Pets: Keep the device out of reach of children and pets.
- Maintenance: Do not attempt to open or repair the unit. Refer all servicing to qualified personnel.
Setup and Installation
Follow these steps to properly set up your Intermatic HB35K Outdoor Timer:
- Choose a Location: Select a suitable outdoor location near a grounded 120V, 60Hz electrical outlet. Ensure the location offers some protection from direct heavy rain or snow, such as under an eave or covered patio.
- Mounting (Optional): The timer features a keyhole slot on the back for wall mounting. If desired, secure a screw (not included) into a wall or post, leaving the head slightly out. Hang the timer using the keyhole slot.
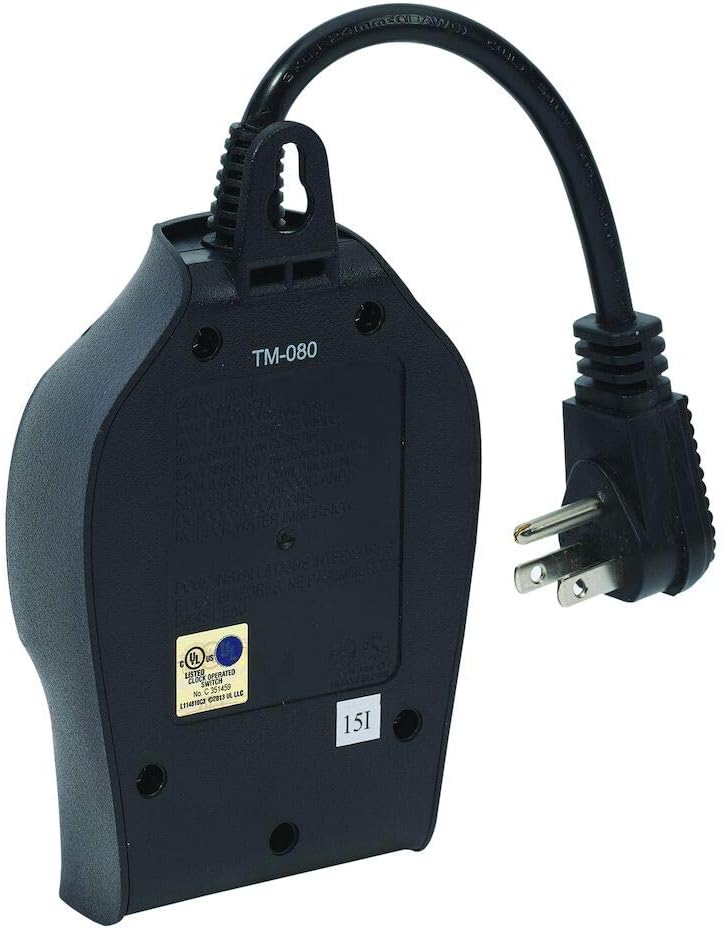
Image: Back view of the timer, highlighting the keyhole slot for mounting.
- Plug in the Timer: Insert the timer's grounded plug into a suitable outdoor electrical outlet.
- Connect Devices: Plug the devices you wish to control into the two grounded receptacles on the bottom of the timer. Ensure the total load does not exceed the timer's specifications.

Image: Bottom view of the timer, showing the two grounded outlets where devices are plugged in.

Image: The timer mounted on an exterior wall, with two electrical cords plugged into its outlets, demonstrating typical outdoor usage.
Operating Instructions
The HB35K timer uses a mechanical dial with captive trippers for programming and a manual override switch.
Setting the Current Time:
- Rotate the entire timer dial clockwise until the current time aligns with the arrow indicator (usually marked "TIME" or a small triangle) on the stationary part of the timer. The dial is marked with 24 hours (1-12 AM, 1-12 PM).
Programming ON/OFF Times:
The timer has captive trippers around the dial. Each tripper represents a 30-minute interval.
- To Set ON Time: Push down the trippers corresponding to the desired ON period. When a tripper is pushed down, the connected device will be ON during that 30-minute interval.
- To Set OFF Time: Leave the trippers in the UP position for the desired OFF period. When a tripper is up, the connected device will be OFF during that 30-minute interval.

Image: Close-up of the timer dial, showing the small segments (trippers) that can be pushed down or pulled up to set ON/OFF intervals.

Image: A finger demonstrating how to push down a tripper on the timer dial to program an ON period.
Using the Manual Override Switch:
The timer features a manual override switch, typically a small lever or button, with three positions: "I" (ON), "T" (Timer), and "O" (OFF).
- "I" (ON): Moves the timer to a continuous ON state, overriding the programmed settings.
- "T" (Timer): Activates the programmed ON/OFF schedule. This is the default position for automated operation.
- "O" (OFF): Moves the timer to a continuous OFF state, overriding the programmed settings.
To return to programmed operation, ensure the switch is set to the "T" position.
Maintenance
The Intermatic HB35K timer requires minimal maintenance. Follow these guidelines to ensure longevity:
- Cleaning: Disconnect the timer from the power source before cleaning. Wipe the exterior with a soft, damp cloth. Do not use harsh chemicals or abrasive cleaners.
- Inspection: Periodically inspect the power cord and plug for any signs of damage, fraying, or corrosion. If damage is found, discontinue use and replace the unit.
- Environmental Protection: While designed for outdoor use, prolonged exposure to extreme weather conditions (e.g., heavy rain, snow, direct sunlight) can reduce its lifespan. Consider additional protection if installed in highly exposed areas.
Troubleshooting
If you encounter issues with your Intermatic HB35K timer, refer to the following common problems and solutions:
| Problem | Possible Cause | Solution |
|---|---|---|
| Device does not turn ON/OFF at programmed times. |
|
|
| Device is always ON or always OFF. |
|
|
| Timer is not receiving power. |
|
|
Specifications
| Attribute | Detail |
|---|---|
| Model Number | HB35K |
| Brand | Intermatic |
| Color | Black |
| Power Input | 120V, 60Hz |
| Resistive Load | 10A |
| Tungsten Load | 1250W |
| Electronic Ballast | 500VA |
| Motor Load | 1/2 HP |
| Number of Outlets | 2 (Grounded) |
| Minimum ON/OFF Time | 30 minutes |
| Daily ON/OFF Events | Up to 24 |
| Cord Length | 8 inches (approx.) |
| Certifications | UL Certified |
| Item Weight | 8 ounces |
| Product Dimensions | 3.25 x 1.75 x 5.75 inches |
Warranty and Support
The Intermatic HB35K Outdoor Timer comes with a 1-year limited warranty from the date of purchase. This warranty covers defects in materials and workmanship under normal use.
For warranty claims, technical support, or further assistance, please contact Intermatic customer service. Refer to the official Intermatic website for the most current contact information.
Visit the Intermatic Store on Amazon for more products and information.


