1. Introduction
Thank you for choosing the iBeam TE-CSC Chrome Push-in Camera. This manual provides detailed instructions for the proper installation, operation, and maintenance of your new vehicle backup camera. Please read this manual thoroughly before installation and use to ensure optimal performance and safety.
The iBeam TE-CSC is designed to enhance parking accuracy and help avoid obstacles when reversing, offering a wide 170-degree view. Its durable, water-resistant chrome housing ensures longevity and a sleek appearance.
2. Safety Information
- Always disconnect the vehicle's battery before performing any electrical work to prevent short circuits and electrical shock.
- Ensure all wiring is properly insulated and secured to prevent damage from vibration, heat, or moisture.
- Do not obstruct the driver's view or interfere with the operation of any vehicle controls or safety features during installation.
- This camera is an aid for reversing and parking; it does not replace the need for careful driving and direct observation of surroundings.
- Consult a professional installer if you are unsure about any part of the installation process.
3. Package Contents
Please check the package for the following items:
- iBeam TE-CSC Chrome Push-in Camera
- 22.5mm Hole Saw
- Power Cord
- 20-foot Video Cable (RCA type)
- Instruction Manual
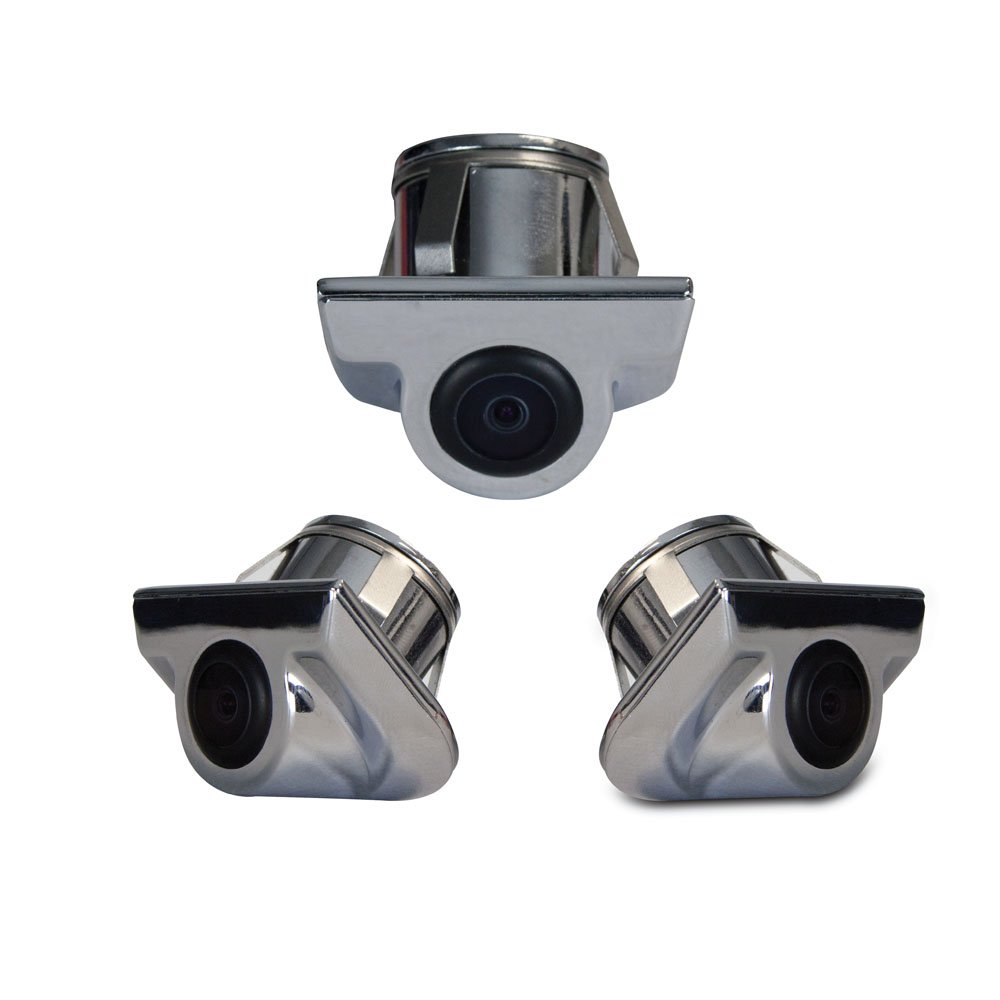
Image 1: iBeam TE-CSC Chrome Push-in Camera with its main components, including the camera unit, power cable, video cable, and hole saw.
4. Setup and Installation
The iBeam TE-CSC camera is designed for a push-in installation, typically above the rear license plate, mimicking an OEM camera setup. The camera is pre-set at a 45-degree angle for optimal viewing.
- Choose Mounting Location: Identify a suitable flat surface above the rear license plate where the camera can be flush-mounted. Ensure there is enough space behind the mounting surface for the camera body and wiring.
- Drill Hole: Use the included 22.5mm hole saw to drill a precise hole at the chosen mounting location. Ensure the hole is clean and free of burrs.
- Insert Camera: Carefully push the camera into the drilled hole until it sits flush with the mounting surface. Ensure the camera's lens is oriented correctly (facing downwards and outwards).
- Connect Power: Connect the camera's power cord to the vehicle's reverse light circuit. This will ensure the camera activates automatically when the vehicle is put into reverse. Connect the red wire to the positive (+) lead of the reverse light and the black wire to a chassis ground (-).
- Connect Video Cable: Route the 20-foot RCA video cable from the camera to your compatible monitor or head unit. Ensure the cable is securely routed away from moving parts, heat sources, and sharp edges. Connect the yellow RCA connector from the camera to the video input of your monitor.
- Test System: Reconnect the vehicle's battery. Turn on the vehicle and engage reverse gear to test the camera's functionality. Adjust the camera's position slightly if needed (though it's fixed at 45 degrees, ensure the housing is seated correctly).
Note: For vehicles with complex wiring or if you are uncomfortable with electrical connections, professional installation is recommended.
5. Operating Instructions
The iBeam TE-CSC camera operates automatically in conjunction with your vehicle's reverse gear and compatible monitor.
- Automatic Activation: When the vehicle's transmission is shifted into reverse, the camera will automatically power on and transmit video to the connected monitor.
- Viewing Angle: The camera provides a wide 170-degree field of view, offering a comprehensive perspective of the area behind your vehicle.
- Parking Assistance: Use the displayed image on your monitor to assist with parking maneuvers and to identify obstacles that may not be visible in your mirrors.
- Deactivation: When the vehicle is shifted out of reverse, the camera will automatically power off, and your monitor will return to its previous display mode.
6. Maintenance
To ensure the longevity and clear performance of your iBeam TE-CSC camera, follow these simple maintenance guidelines:
- Lens Cleaning: Periodically clean the camera lens with a soft, damp cloth to remove dirt, dust, or water spots. Avoid abrasive cleaners or materials that could scratch the lens.
- Housing Inspection: Regularly inspect the camera housing for any signs of damage or loose connections. The chrome finish is designed to withstand elements, but extreme conditions may require more frequent checks.
- Cable Check: Ensure all cables remain securely connected and are not exposed to excessive tension or abrasion.
7. Troubleshooting
| Problem | Possible Cause | Solution |
|---|---|---|
| No image on monitor when in reverse. |
|
|
| Image is distorted or flickering. |
|
|
| Camera lens is foggy or blurry. |
|
|
8. Specifications
| Model Number | TE-CSC |
| Brand | iBeam |
| Manufacturer | iBeam USA |
| Product Dimensions | 40.5 x 17 x 8.5 inches (packaging/shipping dimensions) |
| Item Weight | 3.76 pounds (packaging/shipping weight) |
| Optical Sensor Technology | CMOS |
| Optical Sensor Size | 1/4 inch |
| Lens Type | Fixed, Wide Angle |
| Real Angle of View | 170 Degrees |
| Field Of View | 170 Degrees |
| Installation Type | Surface Mount (Push-in) |
| Connector Type | RCA |
| Compatible Devices | Monitor |
| Other Display Features | Wireless (Note: This might refer to compatibility with wireless video transmitters, but the product includes a 20ft video cable, implying wired connection for this specific model. Clarification needed if "Wireless" refers to a feature of the camera itself or a compatible accessory.) |
9. Warranty and Support
For warranty information and technical support, please contact iBeam USA directly. Details are typically provided with your product packaging or can be found on the official iBeam USA website.
When contacting support, please have your product model number (TE-CSC) and purchase date available.


