1. Product Overview
This manual provides essential information for the installation, operation, and maintenance of your NAGD OEM Heated Sliding Back Window Glass Power Slider. This product is designed as a direct replacement for specific Ford F150 Pickup models, ensuring compatibility and functionality.

Figure 1.1: Overview of the NAGD OEM Heated Sliding Back Window Glass Power Slider, including the butyl sealant roll.
The window features tempered glass, solar control, and factory privacy tinting. It includes a power slider mechanism and integrated heating elements for defrosting.
2. Compatible Models
This product is specifically designed for the following Ford F150 Pickup models:
- 2004-2014 F150
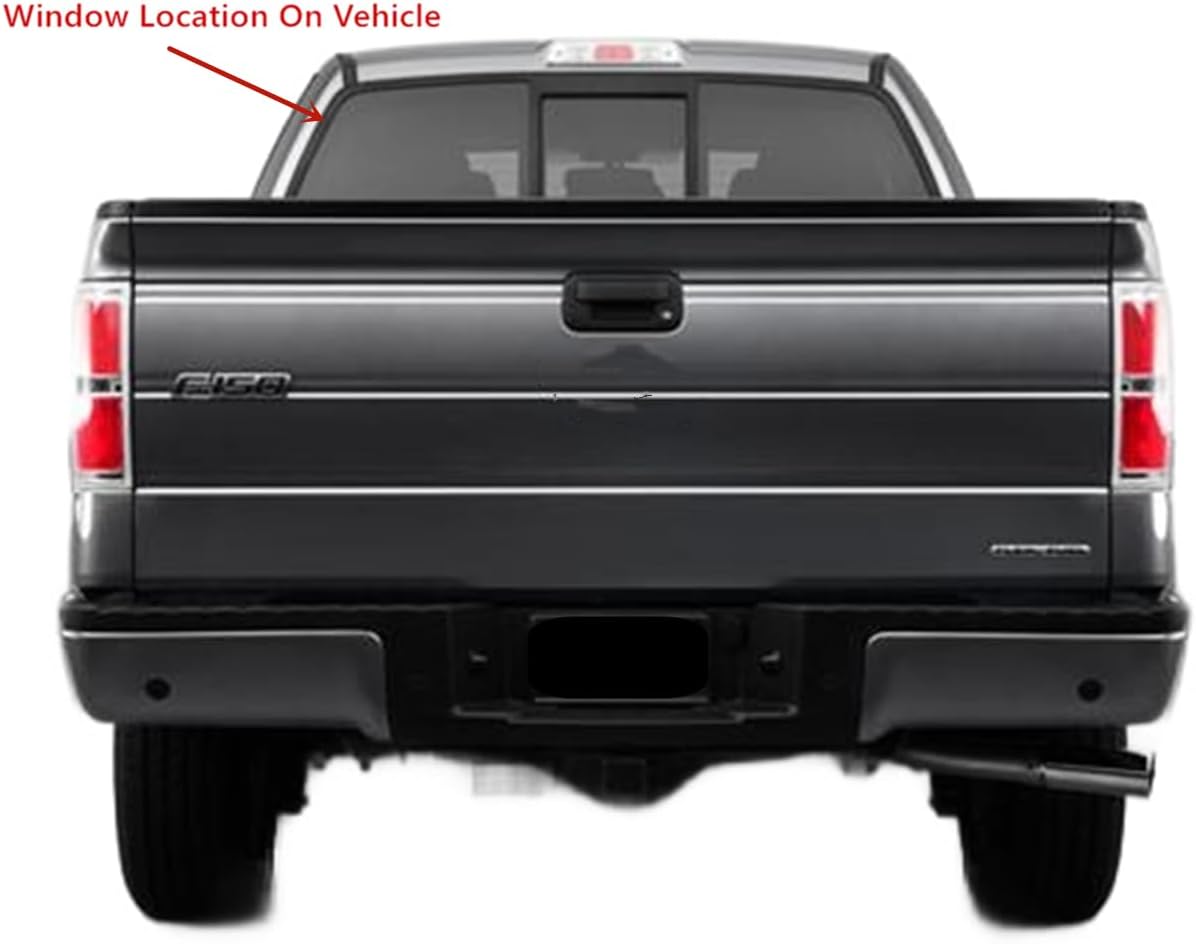
Figure 2.1: Visual representation of compatible Ford F150 models.
Ensure your vehicle's year and model match the specifications to guarantee proper fit and function.
3. Specifications
| Feature | Detail |
|---|---|
| Model Number | DB12147YPY |
| Manufacturer | Carlite |
| Glass Type | Tempered Glass |
| Features | Heated, Power Slider, Solar Controlled, Factory Privacy Tinted |
| Location | Back of Vehicle |
| Item Weight | Approximately 33 pounds |
| Package Dimensions | Approximately 67 x 21 x 4 inches |
| UPC | 618930407419 |

Figure 3.1: Close-up of the manufacturer's stamp on the glass, indicating Carlite and FoMoCo.
4. Installation Guide
Installation of the rear sliding window requires careful attention and specific tools. While some users with mechanical experience may perform this as a DIY project, professional installation is recommended for optimal results and to prevent damage.
4.1. Pre-Installation Steps
- Review Resources: It is highly recommended to watch relevant online video tutorials for your specific Ford F150 model (2004-2014) before beginning. Search for "Ford F150 rear window replacement" or "F150 power slider installation".
- Gather Tools: You will likely need deep socket wrenches (various sizes), a T50 star bit wrench for seat belt brackets, and tools for removing old sealant.
- Inspect Components: Verify that all components, including the new window, power motor, and butyl sealant rolls, are present and undamaged. This product typically includes two rolls of sealant and necessary hardware for the electric window.
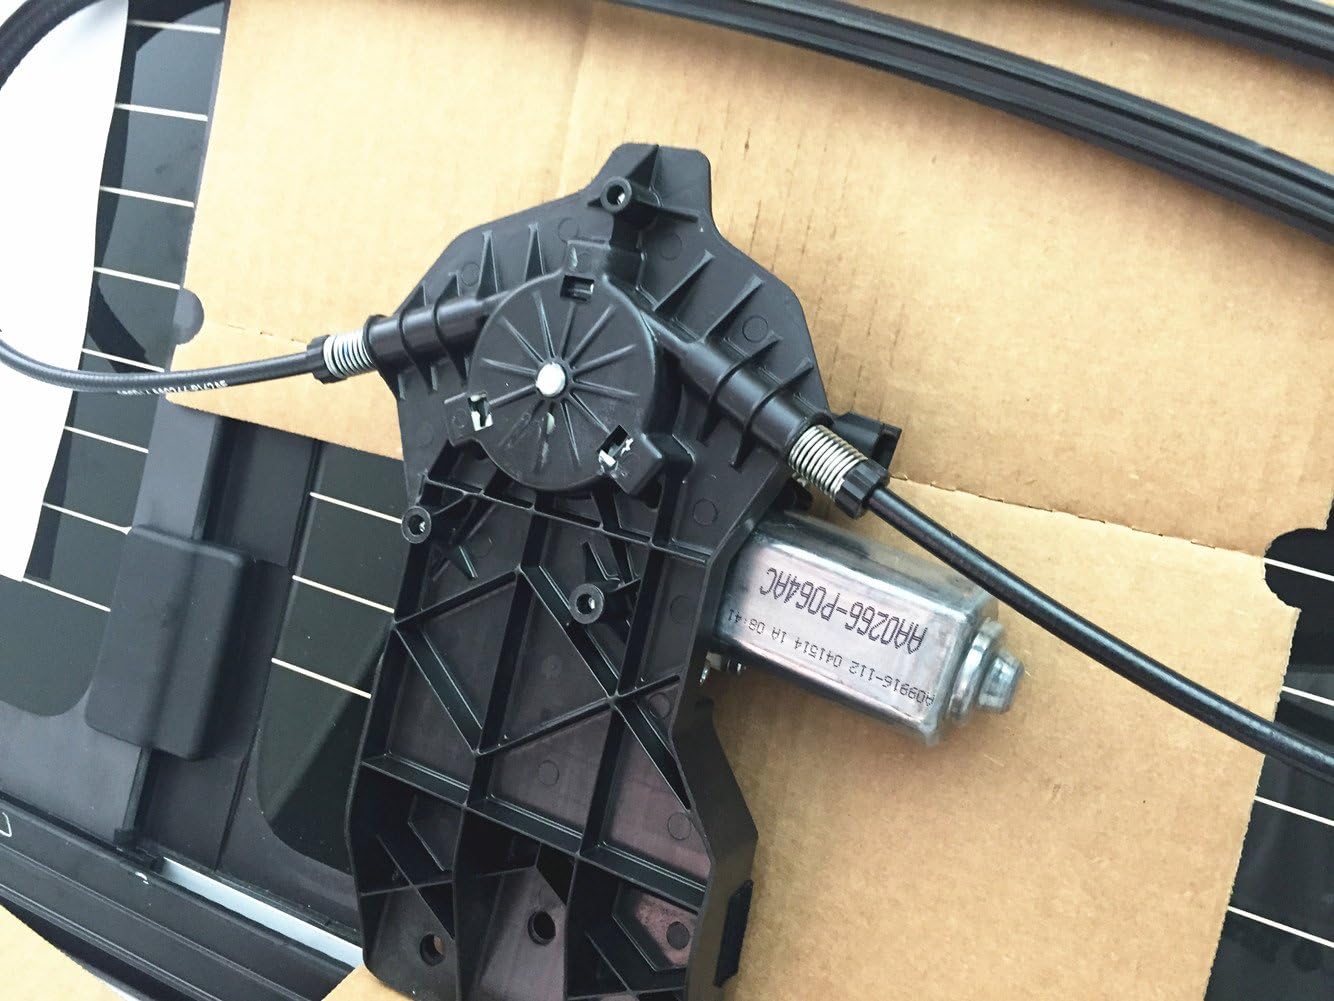
Figure 4.1: Rear view of the window assembly, showing wiring and general layout for installation.
4.2. Removal of Old Window
- Disconnect Power: Ensure the vehicle's battery is disconnected before working with electrical components.
- Interior Disassembly: Carefully remove interior trim panels and any components obstructing access to the rear window, such as seat belt brackets.
- Sealant Removal: The most time-consuming part is often the removal of the old butyl sealant. This may involve scraping with a razor blade and picking. Isopropyl alcohol can assist in cleaning residue from surfaces and hands.
4.3. New Window Installation
- Apply Sealant: Apply the new butyl sealant evenly around the window frame. Ensure the surface is clean and dry before application.
- Position Window: Carefully lift and position the new window into the opening. A helper is highly recommended to prevent the sealant from sticking to unintended areas of the vehicle body.
- Secure Window: Fasten the window securely using the provided hardware.
- Electrical Connections: Connect the power slider and heated glass electrical harnesses. These are typically simple plug-in connections, requiring no soldering.
- Reassemble Interior: Reinstall all interior trim panels and components removed earlier.

Figure 4.2: Detail of the power window motor and cable assembly.

Figure 4.3: Illustration indicating the rear window location on a Ford F150 Pickup.
5. Operating Instructions
5.1. Power Sliding Window
The power sliding window operates via a switch located within your vehicle's cabin, typically near the driver's controls. Activate the switch to open or close the center glass panel. Ensure no obstructions are in the path of the sliding glass during operation.
5.2. Heated Rear Window
The integrated heating elements are designed to defrost or defog the rear window. This function is typically activated by a dedicated button on your vehicle's dashboard, often marked with a rear window defrost symbol. Activate this feature in cold or humid conditions to improve visibility.

Figure 5.1: Rear view of the window, highlighting the horizontal heating element lines.
6. Maintenance
Regular maintenance ensures the longevity and optimal performance of your rear window.
- Glass Cleaning: Clean the glass surfaces regularly using standard automotive glass cleaner and a soft cloth. Avoid abrasive cleaners or tools that could scratch the glass or heating elements.
- Sealant Inspection: Periodically inspect the sealant around the window for any signs of wear, cracking, or detachment. Address any issues promptly to maintain a watertight seal.
- Sliding Mechanism: Keep the tracks of the power slider clean from dirt and debris. Lubricate the tracks with a silicone-based lubricant if the sliding action becomes stiff or noisy.
- Electrical Connections: Ensure all electrical connections remain secure and free from corrosion.
7. Troubleshooting
This section addresses common issues you might encounter with your power sliding rear window.
| Problem | Possible Cause | Solution |
|---|---|---|
| Power slider does not move or moves slowly. | Electrical connection issue, motor malfunction, obstructed track, or fuse blown. | Check vehicle's fuse box for a blown fuse. Inspect electrical connections for looseness or corrosion. Clear any debris from the sliding tracks. If the issue persists, the motor may require inspection or replacement by a qualified technician. |
| Center window panel comes out of track or jams. | Misalignment, worn components, or debris in the track. | Carefully inspect the track for any foreign objects or damage. If the panel is misaligned, gently guide it back into the track. If components are worn, professional repair or replacement may be necessary. |
| Heated function not working. | Blown fuse, damaged heating element grid, or electrical connection issue. | Check the vehicle's fuse for the rear defrost system. Inspect the heating element lines on the glass for visible breaks or damage. Verify electrical connections to the heating elements. |
| Water leak around the window. | Improperly sealed window during installation or degraded sealant over time. | Inspect the butyl sealant around the entire perimeter of the window. Reapply or reinforce sealant in affected areas. Professional re-sealing may be required. |
8. Warranty and Support
For specific warranty information regarding your NAGD OEM Heated Sliding Back Window Glass, please refer to the documentation provided at the time of purchase or contact the seller directly. The seller, National Auto Glass, can provide assistance with product inquiries, technical support, and warranty claims.
For further assistance, please contact the seller through the platform where the product was purchased.