1. Introduction
This manual provides detailed instructions for the proper installation and connection of the X-PRO Main Wire Harness for 110cc and 125cc ATVs. Adhering to these instructions is crucial for safe and correct operation of your ATV's electrical system. Please read this guide thoroughly before beginning any installation procedures.
2. Safety Information
- Always disconnect the ATV's battery before working on the electrical system to prevent electrical shock or damage to components.
- Wear appropriate personal protective equipment, including safety glasses and gloves.
- Ensure all connections are secure and properly insulated to prevent short circuits.
- If you are unsure about any step, consult a qualified technician.
3. Package Contents
Verify that all items listed below are present in your package:
- Main Wire Harness
- Ignition Coil
- Functional Switch
- 5 Pin AC Box (CDI)
- Rectifier
- Ignition Switch
- Solenoid Relay
- Spark Plug
- Fuel Line & Oil Filter
- Snap Ring
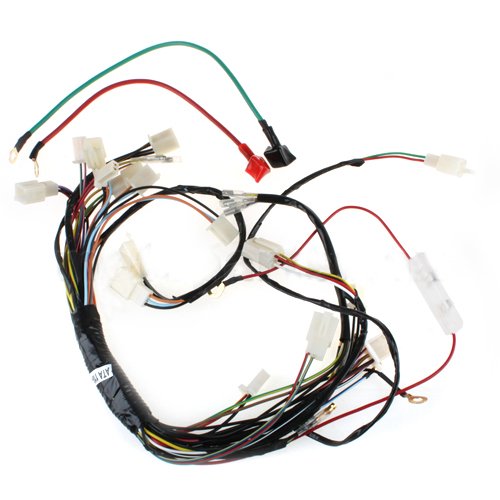
Figure 1: X-PRO Main Wire Harness as packaged.
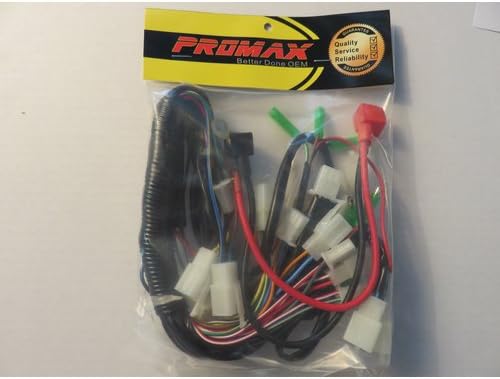
Figure 2: Detailed view of the X-PRO Main Wire Harness components.
4. Compatibility
This X-PRO Main Wire Harness is designed for use with 110cc and 125cc ATVs. It is commonly used for TaoTao ATA-110L and ATA-125L ATVs. Please ensure your ATV model is compatible before installation.
5. Installation Guide
Follow these steps carefully to install the main wire harness:
- Prepare the ATV: Ensure the ATV is turned off and the battery is disconnected. Remove any necessary body panels to access the existing wiring.
- Remove Old Harness (if applicable): Carefully disconnect and remove the old wire harness, noting the connections for reference.
- Connect Stator: Locate the stator on your ATV's engine. Connect the corresponding wires from the new main harness to the stator. Ensure a firm connection.
- Connect CDI Box: Plug the 5-pin AC CDI box into its designated connector on the main harness.
- Connect Rectifier: Attach the rectifier to its connector on the main harness.
- Connect Ignition Coil and Spark Plug: Connect the ignition coil to the harness, then attach the spark plug cap to the spark plug.
- Connect Solenoid Relay: Connect the solenoid relay to the main harness. Ensure the positive and negative terminals are correctly identified and connected.
- Connect Switches: Connect the ignition switch and any functional switches (e.g., kill switch, light switch) to their respective connectors on the harness.
- Route Wiring: Carefully route the new harness along the ATV frame, securing it with cable ties to prevent chafing or interference with moving parts.
- Battery Connection: Reconnect the ATV battery, ensuring the positive (+) and negative (-) terminals are connected correctly.
- Initial Test: Before reassembling body panels, perform a basic test of the electrical system (e.g., turn on ignition, check lights, attempt to start).
Video 1: General overview of connecting a complete electrics wiring harness for 50cc-125cc ATVs. This video demonstrates the connection points for various components.
Video 2: Demonstration of connecting various parts of an electric wiring harness. This video highlights the process of connecting different electrical components.
6. Wiring Diagram
For specific wiring configurations and detailed circuit paths, always refer to the wiring diagram provided with your ATV or consult the manufacturer's service manual. The X-PRO Main Wire Harness is designed to integrate with standard 110cc/125cc ATV electrical systems.
7. Troubleshooting
If you encounter issues after installation, consider the following:
- No Power: Check battery connections, ensure the fuse is intact, and verify the ignition switch is functioning.
- Engine Not Starting: Confirm spark plug connection, check CDI unit, and ensure the kill switch is in the 'run' position.
- Lights Not Working: Inspect bulb integrity, check wiring connections to the light assembly, and verify the rectifier is properly connected.
- Intermittent Issues: Look for loose connections, damaged wires, or corrosion.
8. Specifications
| Brand | X-PRO |
| Model Number | 274-999002 |
| Item Weight | 8.8 ounces |
| Package Dimensions | 6 x 4.5 x 2.5 inches |
| Material | Copper (Core), PVC (Insulation) |
| Connector Type | Ring Terminal, Spade Connector |
| Wire Diameter | 1.63 Millimeters |
9. Warranty and Support
For warranty information or technical support, please refer to the documentation included with your purchase or contact X-PRO customer service directly. Keep your proof of purchase for any warranty claims.