1. Introduction
This manual provides detailed instructions for the installation, operation, and maintenance of your Ideal Standard A4275AA Bath Shower Mixer Complete Assembly Set. This product is designed for wall-mount installation and features a single lever for controlling both water flow and temperature. Please read this manual thoroughly before installation and use to ensure proper function and longevity of your mixer.
2. Safety Information
Always observe the following safety precautions during installation and use:
- Professional Installation Recommended: If you are not experienced in plumbing installations, it is highly recommended to seek assistance from a qualified professional.
- Water Supply: Ensure the main water supply is turned off before beginning any installation or maintenance work to prevent water damage.
- Tools: Use appropriate tools for the task. Wear protective eyewear and gloves when necessary.
- Hot Water: Be aware of hot water temperatures. Test water temperature before use, especially for children or individuals with sensitive skin.
- Cleaning: Use only mild, non-abrasive cleaners for maintenance to avoid damaging the chrome finish.
- Leak Checks: After installation, thoroughly check all connections for leaks.
3. Package Contents
Verify that all components are present before beginning installation:
- Bath Shower Mixer Unit (Model A4275AA)
- Aerator
- Mounting Hardware
- Supply Lines
- Instruction Manual (this document)
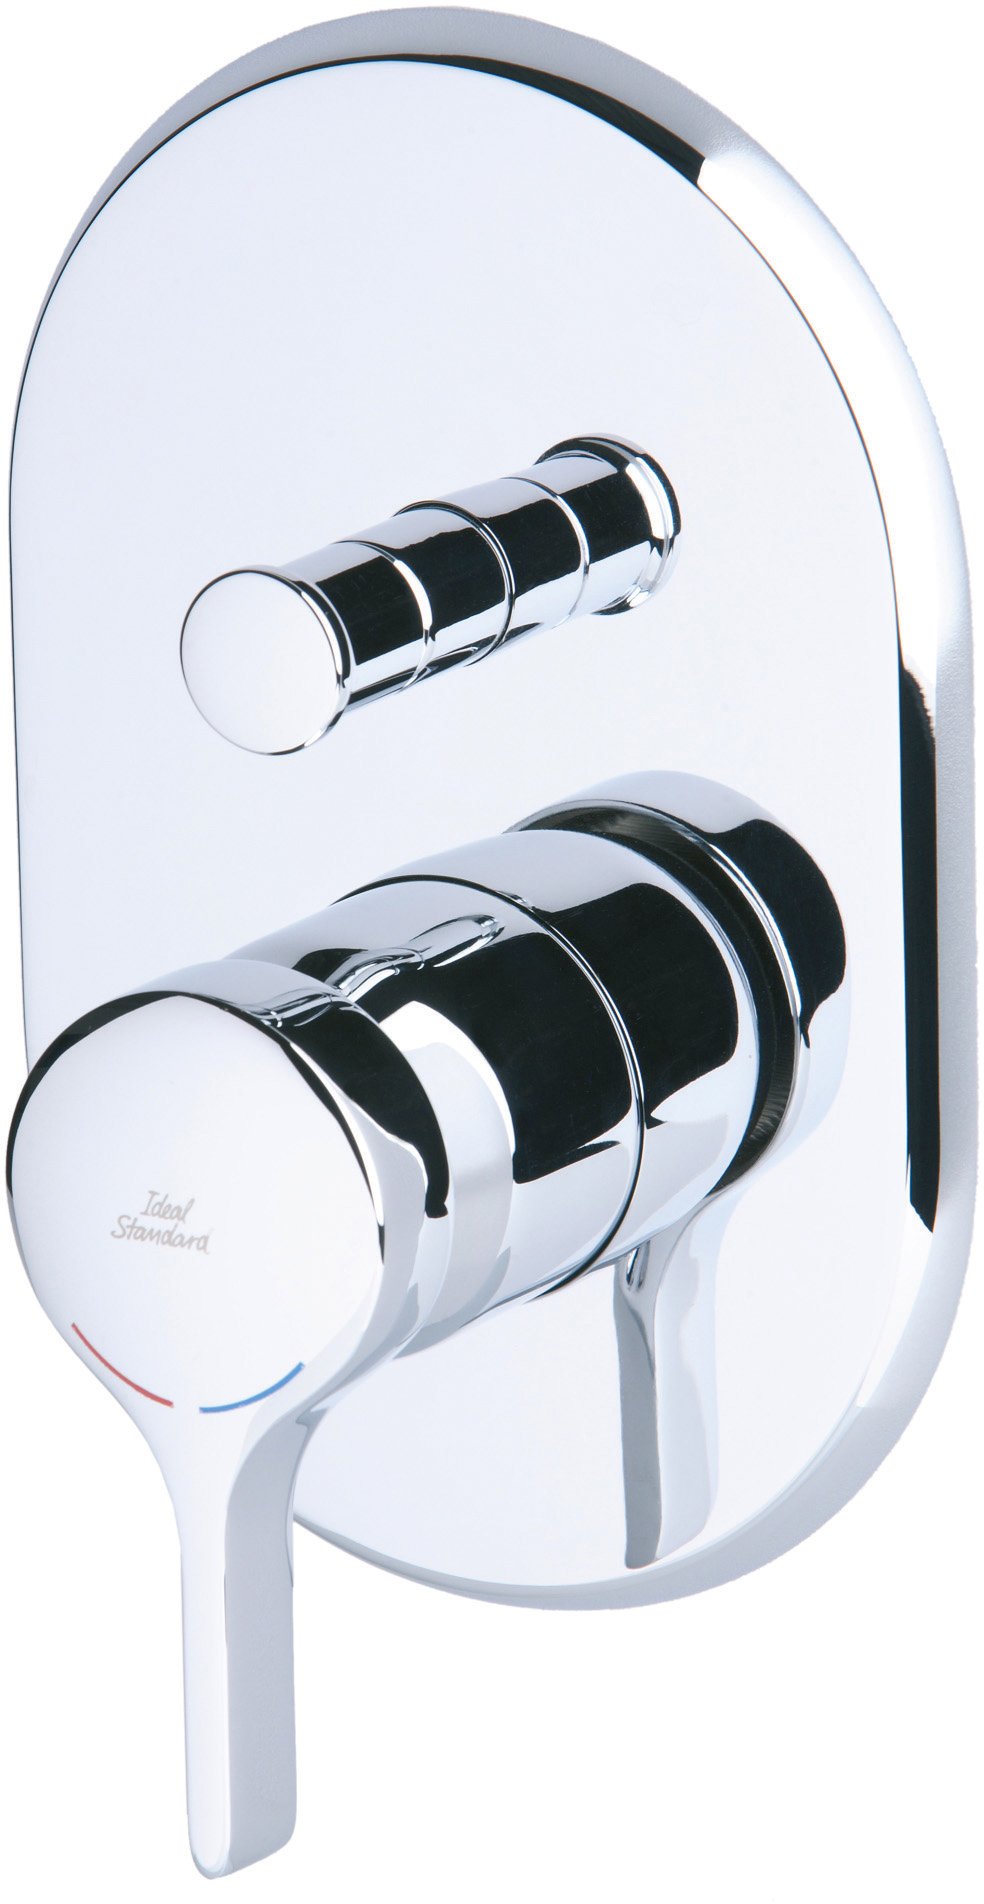
Figure 1: Ideal Standard A4275AA Bath Shower Mixer. This image displays the complete assembly set, including the main mixer body, single lever handle, and spout, all in a polished chrome finish.
4. Product Overview
The Ideal Standard A4275AA is a single-handle bath shower mixer designed for wall-mount installation. It features a durable stainless steel construction with a polished chrome finish, ensuring both aesthetic appeal and long-lasting performance. The single lever handle, located on the left, allows for precise control over water temperature and flow. The traditional curve mixer spout provides efficient water delivery for bath filling, while an integrated diverter (not explicitly mentioned but implied for a bath/shower mixer) allows switching to a shower function (shower head not included).
Key Features:
- Model Name: A4275AA
- Mounting Type: Wall Mount
- Finish Type: Polished Chrome
- Material: Stainless Steel (main body), Metal (handle)
- Number of Handles: 1 (Lever style)
- Hole Count: 1
- Spout Design: Traditional curve mixer
5. Installation Instructions
Follow these steps for proper installation of your bath shower mixer. Ensure the main water supply is turned off before starting.
Tools and Materials (Not Included):
- Adjustable wrench
- Pipe sealant tape (PTFE tape)
- Screwdriver (if needed for mounting hardware)
- Level
- Drill (if new mounting holes are required)
Installation Steps:
- Prepare the Installation Area: Turn off the main water supply. Clear the area where the mixer will be installed. If replacing an existing mixer, remove the old unit.
- Mounting Hardware: Secure the mounting hardware to the wall according to the provided template (if applicable) or existing plumbing connections. Ensure the mounting points are level and secure.
- Connect Supply Lines: Attach the hot and cold supply lines to the corresponding inlets on the mixer body. Use pipe sealant tape on threaded connections to ensure a watertight seal. Hand-tighten, then use an adjustable wrench for a final quarter-turn, being careful not to overtighten.
- Secure the Mixer: Position the mixer onto the wall mounts and secure it using the provided screws or fasteners. Ensure the mixer is firmly attached and level.
- Install Aerator: Screw the aerator onto the spout.
- Check for Leaks: Slowly turn on the main water supply. Check all connections for any signs of leaks. If leaks are detected, turn off the water supply, tighten the connections, and re-check.
- Test Operation: Once no leaks are present, test the mixer's operation by adjusting the lever for both flow and temperature.
6. Operating Instructions
The Ideal Standard A4275AA Bath Shower Mixer features a single lever for intuitive control.
- Turning On/Off: Lift the lever upwards to turn on the water flow. Push the lever downwards to turn off the water flow.
- Adjusting Water Flow: The further the lever is lifted, the greater the water flow.
- Adjusting Water Temperature: Move the lever to the left for hotter water and to the right for colder water. The mixer is designed to blend hot and cold water to your desired temperature.
- Diverter Function (if applicable): If your model includes a diverter for a shower function, typically a pull-up knob on the spout, pull it up to divert water to the shower head. Push it down to return water flow to the bath spout.
Always test the water temperature with your hand before stepping into the bath or shower to prevent scalding.
7. Maintenance
Regular cleaning and simple maintenance will help preserve the appearance and functionality of your Ideal Standard mixer.
Cleaning the Chrome Finish:
- Use a soft cloth and mild soap or a non-abrasive cleaner specifically designed for chrome finishes.
- Avoid abrasive cleaners, scouring pads, or harsh chemicals (e.g., ammonia, bleach, acid-based cleaners) as these can damage the chrome finish.
- Rinse thoroughly with clean water after cleaning and dry with a soft cloth to prevent water spots.
Aerator Cleaning:
If water flow becomes restricted or uneven, the aerator may be clogged with sediment. Periodically unscrew the aerator from the spout, clean any debris, and rinse it under running water before reattaching.
Leak Checks:
Periodically inspect all connections for any signs of leaks. Tighten connections if necessary, but do not overtighten.
8. Troubleshooting
Refer to the table below for common issues and their potential solutions.
| Problem | Possible Cause | Solution |
|---|---|---|
| Low water flow | Clogged aerator; partially closed stopcock; low water pressure in the building. | Clean the aerator. Ensure stopcocks are fully open. Consult a plumber if building water pressure is consistently low. |
| Water leaks from connections | Loose connections; insufficient pipe sealant tape; damaged O-rings/washers. | Turn off water supply. Tighten connections. Reapply pipe sealant tape. Replace damaged O-rings/washers. |
| Inconsistent water temperature | Imbalance in hot/cold water pressure; faulty cartridge. | Check hot and cold water supply pressures. If problem persists, the internal cartridge may need replacement by a qualified plumber. |
| Dripping from spout | Worn cartridge. | The internal ceramic cartridge may need replacement. Contact customer support or a qualified plumber. |
If you encounter issues not listed here or if the suggested solutions do not resolve the problem, please contact Ideal Standard customer support.
9. Specifications
| Feature | Detail |
|---|---|
| Brand | Ideal Standard |
| Model Name | A4275AA |
| Mounting Type | Wall Mount |
| Finish Type | Polished Chrome |
| Material | Stainless Steel (body), Metal (handle) |
| Color | Chrome |
| Number of Handles | 1 |
| Handle Style | Lever |
| Hole Count | 1 |
| Included Components | Aerator, Mounting Hardware, Supply Lines |
| Item Weight | 2.01 Pounds (approx. 0.91 kg) |
| Product Dimensions | 9.84 x 9.84 x 9.84 inches (approx. 25 x 25 x 25 cm) |
| GTIN | 04015413316682 |
| ASIN | B00O7I4FHA |
10. Warranty and Support
For warranty information and customer support, please refer to the official Ideal Standard website or contact their customer service department directly. Keep your proof of purchase for any warranty claims.
Contact Information:
- Website: www.idealstandard.com (Please check for your regional website)
- Refer to your product packaging or the Ideal Standard website for specific regional contact details.


