1. Introduction
The FLYCAM HD-3000 is a precisely engineered handheld stabilizer designed to provide smooth, floating camera movements for DSLR video cameras. Its robust aluminum construction and micro-balancing mechanisms ensure stable footage, eliminating shakes and jitters often associated with handheld shooting. This manual provides detailed instructions for assembly, balancing, operation, and maintenance to help you maximize the performance of your stabilizer.
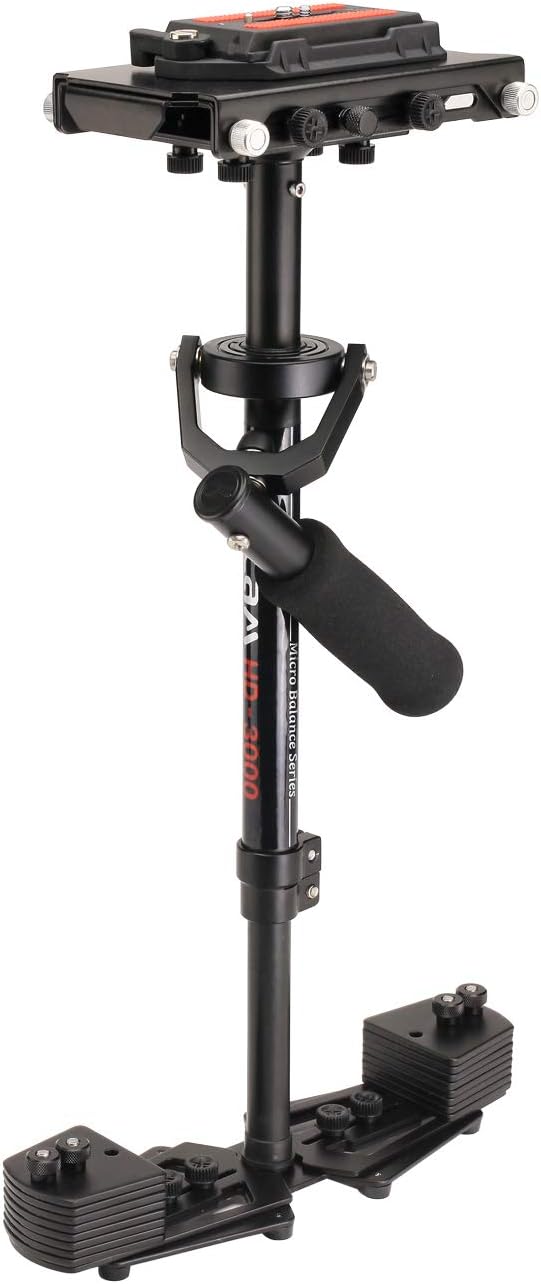
Figure 1: Fully assembled FLYCAM HD-3000 Handheld Stabilizer.
2. What's in the Box
Verify that all components are present before beginning assembly:
- FLYCAM HD-3000 Hand Held Stabilizer (FLCM-HD-3)
- Heavy Duty Table Clamp (TC-030-00)
- Unico Quick Release Plate (FLCM-UQR)
- Storage Case

Figure 2: All components included in the FLYCAM HD-3000 package.

Figure 3: The included high-quality storage bag for protecting your stabilizer.
3. Setup and Balancing
3.1 Assembly
The stabilizer consists of a camera platform, a central post with a gimbal handle, and a base platform with counterweights. Assemble by screwing the base platform onto the central post, then attach the camera platform to the top of the central post.
3.2 Attaching Your Camera
Secure your DSLR camera to the Unico Quick Release Plate. This plate then slides into the camera platform on the stabilizer. Ensure the safety lock is engaged after attaching the plate.
3.3 Horizontal Balancing
Achieve quick horizontal balance using the fine-tuning knobs on the camera platform. These knobs allow for precise front-to-back and side-to-side adjustments of your camera's position.

Figure 4: The camera platform features fine-tuning knobs for precise horizontal adjustments.
3.4 Vertical Balancing
The tool-less telescopic central post allows you to adjust the camera's vertical balance. Extend or retract the post to find the optimal center of gravity for your camera setup. The adjustable base platform with weight discs further aids in achieving perfect dynamic balance.

Figure 5: The telescopic central post can be adjusted from 40cm to 60cm for vertical balancing.

Figure 6: The tool-less telescopic center post allows for easy vertical counterbalance adjustments.

Figure 7: The base platform includes 16 weight plates to achieve optimal counterbalance for various camera loads.

Figure 8: The expandable base further assists in achieving precise counterbalancing.
3.5 Using the Table Clamp
The included heavy-duty table clamp can be used to securely hold the stabilizer during the balancing process, freeing your hands for adjustments.

Figure 9: The table clamp provides a stable platform for balancing your stabilizer.
3.6 Video Guide: Assembly and Balancing
Video 1: A detailed guide on assembling and balancing the Flycam HD-3000 stabilizer.
4. Operating Instructions
Once balanced, the FLYCAM HD-3000 allows for fluid camera movements. The 3-axis gimbal with ball bearings ensures smooth operation, enabling you to capture dynamic shots without unwanted camera shake.

Figure 10: The 3-axis gimbal with ball bearings provides smooth, precise control over camera movements.
4.1 Handheld Operation
Hold the gimbal handle firmly but gently. Practice walking and moving with the stabilizer to develop a smooth, consistent motion. The stabilizer is designed to isolate camera movement from your body's natural motion.
4.2 Achieving Smooth Shots
To achieve the smoothest shots, maintain a relaxed grip and use your body as a natural shock absorber. Avoid sudden movements. The telescopic post can be adjusted during operation for high or low angle shots, allowing for creative framing.
4.3 Video Guide: Operation Examples
Video 2: Example footage demonstrating smooth camera movements achieved with the HD-3000 stabilizer.
5. Maintenance
- Cleaning: Wipe down the aluminum surfaces with a soft, dry cloth after each use to remove dust and fingerprints.
- Storage: Store the stabilizer in its provided storage case to protect it from dust, moisture, and physical damage.
- Gimbal Care: Ensure the gimbal's ball bearings remain free of debris. Avoid applying excessive force or lubricants unless specifically recommended by the manufacturer.
- Screw Tightness: Periodically check all screws and knobs to ensure they are securely tightened, especially before and after extensive use.
6. Troubleshooting
- Difficulty Balancing: Ensure your camera is centered on the quick release plate. Make small, incremental adjustments with the fine-tuning knobs and counterweights. Refer to the assembly and balancing video for visual guidance.
- Unstable Footage: Re-check your balance. Even slight imbalances can lead to unstable shots. Ensure all components are securely fastened. Practice smooth walking techniques.
- Gimbal Sticking: Check for any debris around the gimbal's ball bearings. If the issue persists, ensure no components are overtightened, which could impede free movement.
7. Specifications
| Feature | Detail |
|---|---|
| Construction Material | Aluminum, black anodized |
| Weighing Capacity | Up to 3.5kg / 8lbs |
| Head Dimensions | 7.5 x 4.2 inches |
| Base Platform Dimensions (Shortest) | 9.5 x 4 inches |
| Base Platform Dimensions (Longest) | 14.5 x 4 inches |
| Stabilizer Length (Min) | 40cm |
| Stabilizer Length (Max) | 60cm |
| Number of Weight Plates | 16 pcs |
| Weight of Single Weight Plate | 90grm |
| Stabilizer Weight (without plates) | Appx. 1.2kg |
| Product Dimensions | 7.48 x 6.69 x 21.26 inches |
| Item Weight | 3 pounds |
8. Warranty and Support
FLYCAM offers a 100% Customer Satisfaction Guarantee. For any support needs or inquiries, please refer to the manufacturer's official website or contact their customer service directly.


