Introduction
This manual provides essential instructions for the safe and efficient operation, setup, and maintenance of your Juki DNU-1541-7 single needle lockstitch industrial sewing machine. Please read this manual thoroughly before operating the machine to ensure proper usage and to prevent damage or injury.
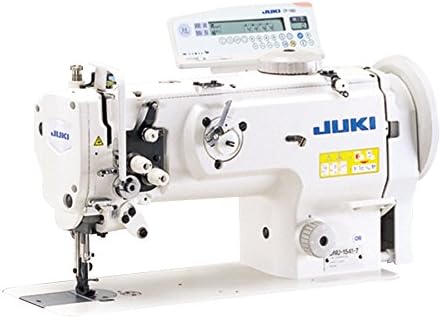
Image: The Juki DNU-1541-7 industrial single needle lockstitch machine, featuring a white body, a control panel at the top, and various operational components visible on the front and side.
Setup
1. Unpacking and Inspection
- Carefully remove all components from the packaging.
- Inspect all parts for any signs of damage during transit. Contact your supplier immediately if any damage is found.
- Ensure all listed accessories are present.
2. Table and Machine Head Installation
The machine table is typically supplied assembled. Follow these steps for machine head placement:
- Place the machine head onto the designated cut-out in the table.
- Secure the machine head using the provided mounting screws and washers. Ensure it is stable and level.
3. Motor Connection
- Connect the clutch motor to the power supply according to local electrical codes and safety regulations.
- Ensure the motor belt is correctly installed and tensioned between the motor pulley and the machine's handwheel.
4. Thread Stand Assembly
- Assemble the thread stand and place it behind the machine, ensuring it is stable.
- Route the thread through the guides on the thread stand.
5. Needle Installation
- Turn the handwheel to raise the needle bar to its highest position.
- Loosen the needle clamp screw.
- Insert a new needle (correct type and size for your material) with the flat side facing the back of the machine, pushing it up as far as it will go.
- Tighten the needle clamp screw securely.
6. Bobbin Winding and Threading
- Bobbin Winding: Place an empty bobbin onto the bobbin winder spindle. Route the thread from the spool through the tension disc and around the bobbin. Engage the winder and operate the machine at a moderate speed until the bobbin is full.
- Upper Threading: Follow the numbered threading path indicated on the machine, passing the thread through all guides, tension discs, the take-up lever, and finally through the needle eye from front to back.
- Lower Threading: Insert the wound bobbin into the bobbin case, ensuring the thread feeds correctly. Place the bobbin case into the shuttle hook.
- Bringing Up Bobbin Thread: Hold the upper thread, turn the handwheel towards you to lower and raise the needle, catching the bobbin thread. Pull both threads under the presser foot and towards the back.
Operating Instructions
1. Power On/Off
- Turn on the main power switch located on the motor or control box.
- To turn off, switch off the main power.
2. Stitch Length Adjustment
The stitch length can be adjusted using the stitch length dial or lever, typically located on the front of the machine head. Rotate the dial to increase or decrease the stitch length as desired. Refer to the markings for specific lengths.
3. Reverse Stitching
To perform reverse stitching (backtack), press and hold the reverse lever or button. The machine will sew backward as long as the lever is engaged. Release to resume forward stitching.
4. Presser Foot Lift
The presser foot can be lifted manually using the knee lifter lever or a hand lever, allowing for placement and removal of fabric.
5. Speed Control
The sewing speed is controlled by the foot pedal. Press gently for slower speeds and apply more pressure for faster speeds. Practice to achieve consistent speed control.
6. Basic Sewing Procedure
- Place the fabric under the presser foot.
- Lower the presser foot.
- Begin sewing by gently pressing the foot pedal.
- Guide the fabric smoothly through the machine.
- At the end of a seam, use the reverse stitch function to secure the stitches.
- Raise the presser foot and remove the fabric, cutting the threads.
Maintenance
1. Cleaning
- Regularly clean lint and dust from the bobbin area, feed dogs, and tension discs using a brush or vacuum.
- Wipe down the machine exterior with a soft, dry cloth.
2. Lubrication (Oiling)
- Refer to the machine's oiling points, typically marked with red dots or specific instructions in the full service manual.
- Use only high-quality sewing machine oil.
- Oil regularly based on usage, typically daily for heavy use.
3. Needle Replacement
Replace the needle frequently, especially when sewing dense materials or if stitches become irregular. A dull or bent needle can cause skipped stitches and fabric damage.
4. Tension Adjustment
Adjust upper and lower thread tension as needed to achieve balanced stitches. Test on scrap fabric before sewing your project. The upper tension dial controls the upper thread, and a screw on the bobbin case adjusts the lower thread tension.
Troubleshooting
- Skipped Stitches: Check needle installation (flat side to back), ensure needle is not bent or dull, re-thread the machine, check thread tension.
- Thread Breakage: Verify correct threading path, check for burrs on needle plate or bobbin case, ensure proper thread tension, use appropriate thread type and size for the needle.
- Uneven Stitches: Adjust thread tension (both upper and lower), ensure consistent fabric feeding, check for proper needle and thread combination.
- Machine Jamming: Remove fabric, clear any tangled threads from the bobbin area, check for foreign objects.
- No Power: Check power cord connection, ensure main power switch is on, verify power outlet functionality.
Specifications
- Brand: JUKI
- Model: DNU-1541-7
- Type: Single Needle Lockstitch Industrial Sewing Machine
- Motor: Clutch Motor (Table Comes Assembled)
- UPC: 796354896344
- First Available: April 2, 2017
Warranty and Support
For specific warranty information, please refer to the documentation provided at the time of purchase or contact your authorized Juki dealer. For technical support or service, please reach out to your product supplier or an authorized Juki service center.


