1. Introduction
This manual provides detailed instructions for the assembly, installation, operation, and maintenance of your Digitus DN-19 07-U-S-SW 7U Eco Line wall-mounted network cabinet. This cabinet is designed for housing IT and telecommunications equipment, offering a secure and organized solution for your networking needs. Please read this manual thoroughly before beginning assembly or installation to ensure proper and safe use of the product.
2. Safety Information
- Always ensure the cabinet is securely mounted to a suitable wall structure capable of supporting the cabinet's weight plus the weight of all installed equipment (maximum 60 kg).
- Wear appropriate personal protective equipment (PPE) during assembly, such as gloves, to prevent cuts or pinches.
- Assembly requires at least two people due to the size and weight of components.
- Keep small parts and packaging materials away from children.
- Do not overtighten screws during assembly to avoid damaging components.
- Ensure proper grounding of the cabinet as per local electrical codes. A screw kit for grounding is included.
- Avoid placing the cabinet in areas with high humidity, extreme temperatures, or direct sunlight.
- The front door is made of safety glass. Handle with care to prevent breakage.
3. Package Contents
The Digitus DN-19 07-U-S-SW wall cabinet is shipped disassembled for efficient transport. Please verify that all components are present and undamaged before beginning assembly.
- Cabinet frame components (top, bottom, side panels, rear panel)
- Front door with safety glass, steel frame, and key lock
- 2 x 19-inch vertical side struts
- Assembly screw kit (various screws, nuts, washers)
- Grounding kit
- Keys for the front door lock
- Dust protection for cable entry points
4. Setup (Assembly Instructions)
Assembly of the cabinet requires careful attention to detail. It is recommended to have a second person assist with the assembly process.
- Prepare the Workspace: Clear a spacious, flat, and clean area for assembly. Lay down a protective sheet to prevent scratches to the cabinet components.
- Identify Components: Unpack all parts and identify them using the provided parts list (if available, otherwise refer to the package contents section).
- Assemble the Base and Top: Attach the side panels to the bottom and top frame components using the appropriate screws from the kit. Ensure all connections are secure but do not fully tighten until the entire frame is assembled.
- Install Rear Panel: Secure the rear panel to the assembled frame.
- Install 19-inch Vertical Struts: Mount the two 19-inch vertical side struts inside the cabinet. These are adjustable; position them according to the depth requirements of your equipment. Ensure they are level and securely fastened.
- Attach Front Door: Carefully attach the front door to the cabinet frame. The door features safety glass and a key lock. Ensure the hinges are properly aligned and the door opens and closes smoothly. Install the rubber mats for glass protection if provided.
- Grounding: Connect the grounding wire from the grounding kit to the designated grounding point on the cabinet frame. Ensure it is securely fastened.
- Final Tightening: Once all components are in place and aligned, systematically tighten all screws to ensure the cabinet is rigid and stable.
- Wall Mounting:
- Choose a suitable wall location, ensuring it can support the cabinet and its maximum load (60 kg).
- Mark the drilling points on the wall using the cabinet's mounting holes as a template.
- Drill holes and insert appropriate wall anchors (not included, as wall types vary).
- Lift the cabinet onto the wall mounts and secure it firmly using suitable screws.
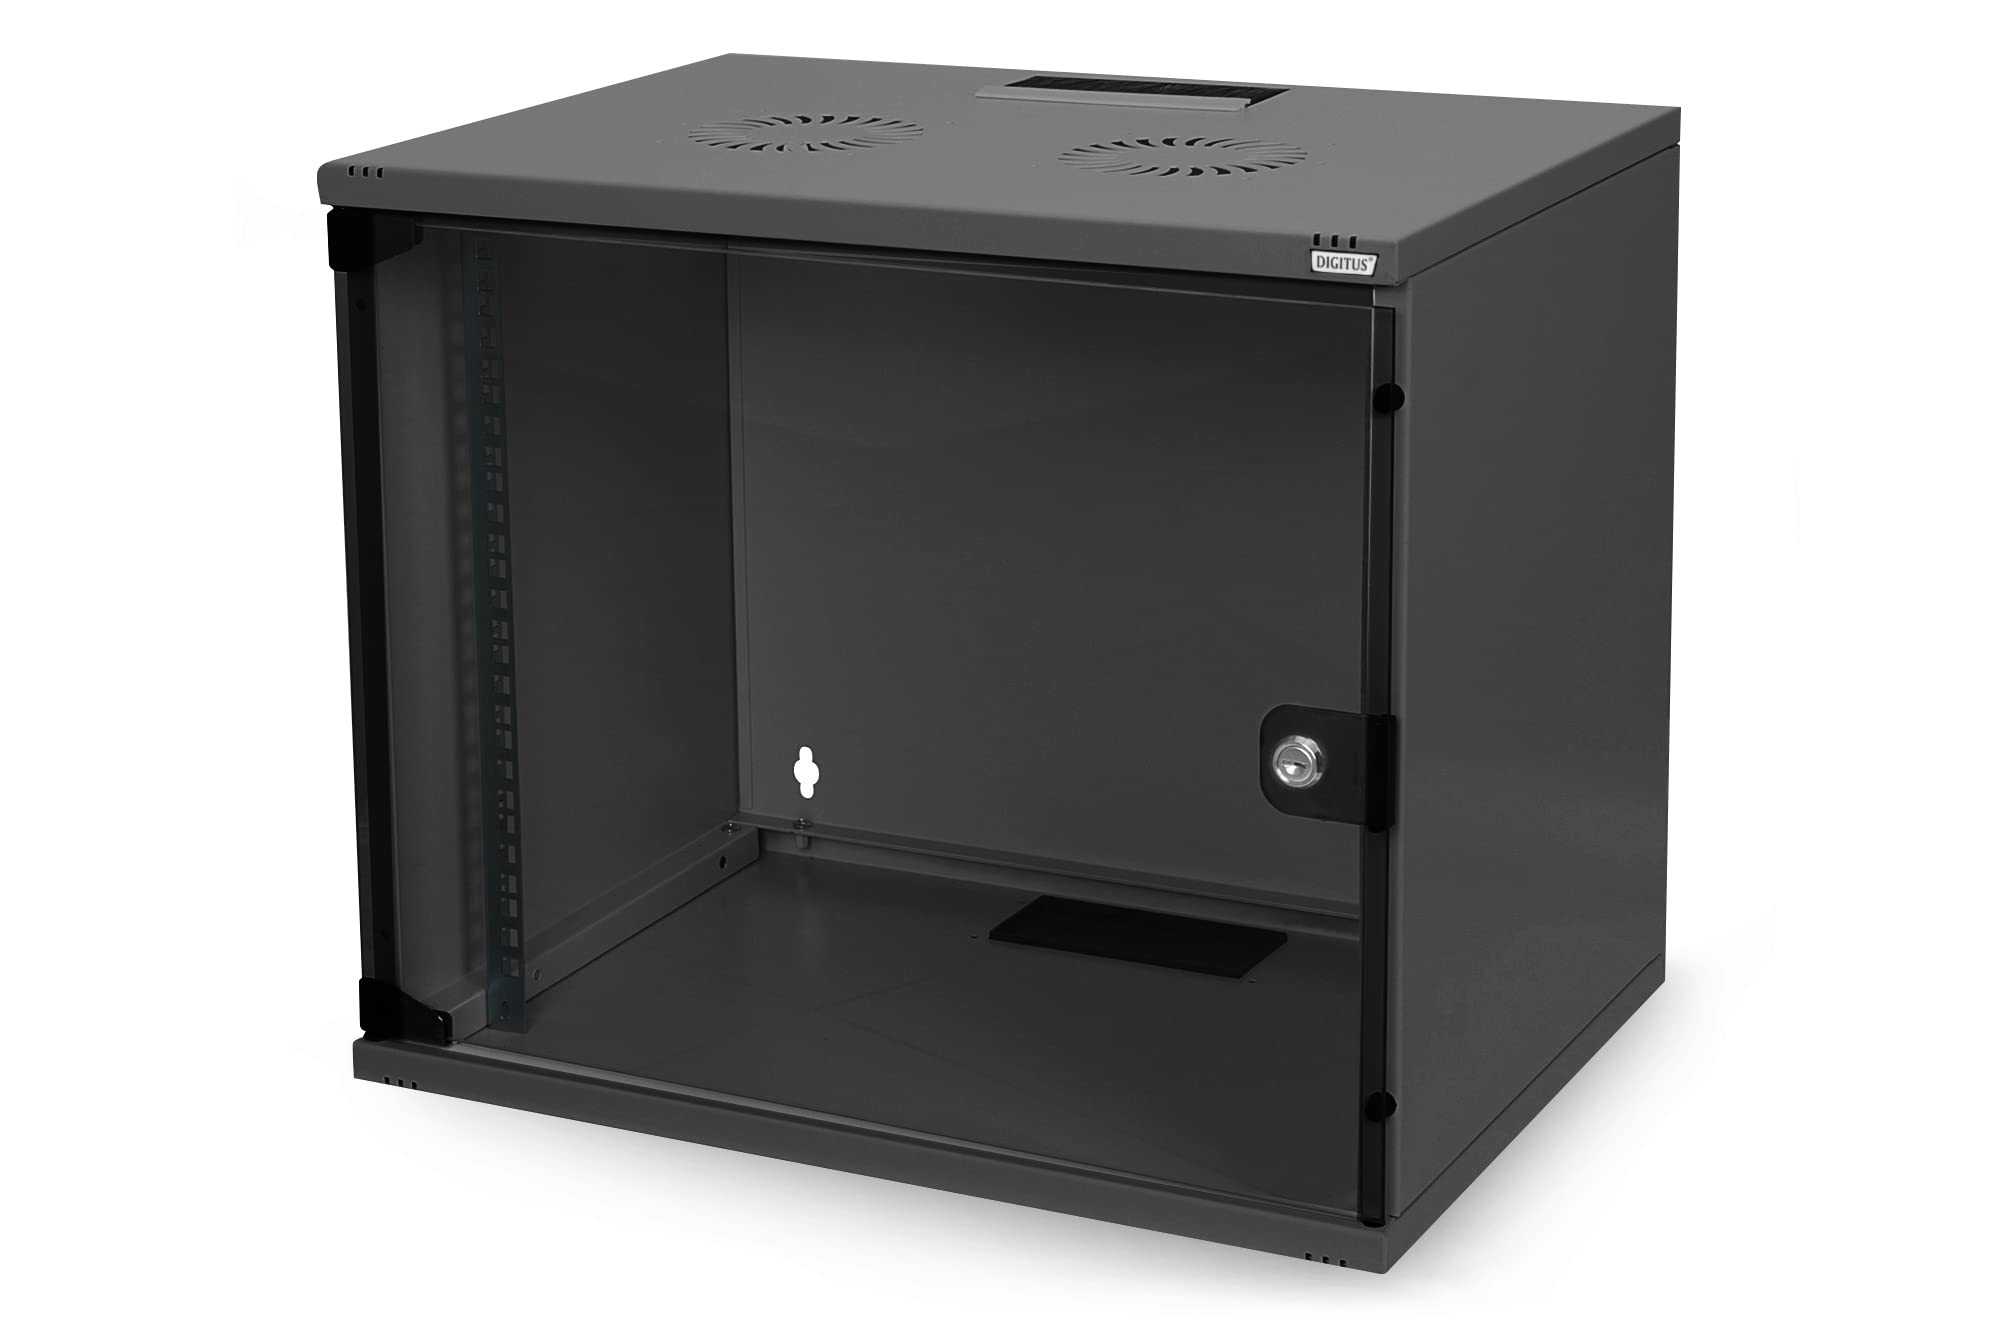
Figure 1: Assembled Digitus DN-19 07-U-S-SW 7U Wall Cabinet showing overall dimensions (approx. 53cm width, 39cm depth, 40cm height). This image illustrates the fully assembled unit with the front glass door and side panels.
5. Operating (Equipment Installation)
Once the cabinet is securely mounted, you can begin installing your network and server equipment.
- Access: Unlock and open the front glass door to access the interior of the cabinet.
- Install Equipment: Mount your 19-inch compatible devices (servers, switches, patch panels, etc.) onto the vertical side struts using appropriate rack screws (often supplied with the equipment or available separately). Ensure equipment is evenly distributed to maintain balance.
- Cable Management: Utilize the cable entry points located at the top and bottom of the cabinet. These points include dust protection to maintain a clean environment. Route cables neatly to prevent obstruction of airflow and to facilitate future maintenance.
- Ventilation: The cabinet features ventilation slots for both active and passive airflow. Ensure these slots are not blocked by equipment or cables to maintain optimal operating temperatures for your devices. Consider adding active ventilation units if your equipment generates significant heat.
- Security: Close and lock the front door to secure your equipment.
6. Maintenance
Regular maintenance ensures the longevity and optimal performance of your Digitus wall cabinet.
- Cleaning: Periodically wipe down the exterior surfaces with a soft, damp cloth. For the glass door, use a non-abrasive glass cleaner. Avoid harsh chemicals that could damage the powder coating.
- Dust Removal: Regularly inspect the interior and ventilation slots for dust accumulation. Use compressed air or a vacuum cleaner with a brush attachment to remove dust, ensuring proper airflow.
- Hardware Check: Annually, check all screws and mounting hardware for tightness. Retighten any loose fasteners to maintain structural integrity.
- Door and Lock: Ensure the door hinges operate smoothly and the lock functions correctly. Lubricate hinges with a silicone-based spray if necessary.
7. Troubleshooting
| Problem | Possible Cause | Solution |
|---|---|---|
| Cabinet feels unstable after assembly. | Screws not fully tightened; components misaligned. | Ensure all assembly screws are securely tightened. Disassemble and reassemble sections if significant misalignment is observed. |
| Front door does not close or lock properly. | Hinges misaligned; frame slightly warped during assembly; lock mechanism obstructed. | Check hinge alignment and adjust if possible. Ensure the cabinet frame is square. Inspect the lock mechanism for any obstructions. |
| Equipment does not fit into 19-inch struts. | Equipment is not 19-inch standard; struts are incorrectly positioned. | Verify equipment dimensions. Ensure the 19-inch vertical struts are correctly installed and spaced according to standard rack unit measurements. Adjust strut depth if necessary. |
| Overheating of internal equipment. | Blocked ventilation slots; insufficient airflow; too much heat-generating equipment. | Clear any obstructions from ventilation slots. Ensure proper cable management. Consider installing active cooling fans in the cabinet. |
8. Specifications
| Brand | Digitus |
| Model Number | DN-19 07-U-S-SW |
| Type | Wall-Mounted Network Cabinet, Eco Line |
| Rack Units | 7U |
| Dimensions (D x W x H) | 360 mm x 520 mm x 400 mm (14.2 in x 20.5 in x 15.7 in) (Note: Visual representation in image shows approx. 39cm depth x 53cm width x 40cm height) |
| Material | Alloy Steel (1.1 to 1.5 mm thick), Powder Coated |
| Color | Black (RAL9005) |
| Front Door | Safety Glass with Steel Frame and Key Lock |
| Vertical Struts | 2 x 19-inch, adjustable |
| Ventilation | Slots for active and passive ventilation |
| Cable Entry | Top or bottom with dust protection |
| Mounting Type | Wall Mount |
| Maximum Weight Capacity | 60 kg (132 lbs) |
| Item Weight | 10.72 kg (23.6 lbs) |
| Assembly Required | Yes |
| Standards Compliance | IEC 297-2, DIN 41494 art 7, DIN 41491 part 1, EN 60950, VDE 0100 |
9. Warranty Information
Specific warranty details for the Digitus DN-19 07-U-S-SW wall cabinet are not provided in this document. Please refer to the warranty card included with your product or visit the official Digitus website for comprehensive warranty terms and conditions.
10. Support
For technical assistance, missing parts, or further inquiries regarding your Digitus DN-19 07-U-S-SW wall cabinet, please contact Digitus customer support. Contact information can typically be found on the manufacturer's website or on the product packaging.


