1. Introduction
This manual provides essential information for the safe and efficient operation, installation, and maintenance of your Lowara Multistage Horizontal Centrifuge, Model 2HM4 / A HP 0.6. Please read this manual thoroughly before attempting to install, operate, or service the unit. Retain this manual for future reference.
The Lowara 2HM4 / A HP 0.6 is a robust multistage horizontal centrifugal pump designed for various applications requiring reliable fluid transfer. Its compact design and efficient operation make it suitable for domestic, agricultural, and industrial uses.
2. Safety Instructions
Always observe the following safety precautions to prevent injury and damage to the equipment:
- Electrical Safety: Ensure the power supply matches the unit's requirements. All electrical connections must be performed by a qualified electrician and comply with local regulations. Disconnect power before any maintenance or service.
- Fluid Compatibility: Do not use the pump with flammable, explosive, or corrosive liquids unless specifically designed for such applications.
- Pressure: Be aware of system pressure. Always relieve pressure before disconnecting pipes or performing maintenance.
- Moving Parts: Keep hands, hair, and loose clothing away from moving parts during operation.
- Temperature: The pump surface may become hot during operation. Avoid direct contact.
- Ventilation: Ensure adequate ventilation around the motor to prevent overheating.
- Children and Unauthorized Personnel: Keep children and unauthorized personnel away from the operating unit.
3. Setup and Installation
Proper installation is crucial for the performance and longevity of your centrifuge. Refer to the image below for visual reference of the product.
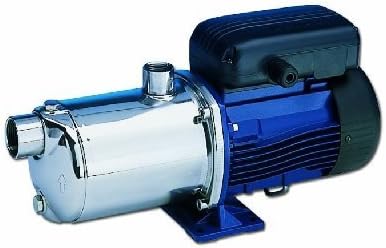
Figure 3.1: Lowara Multistage Horizontal Centrifuge, Model 2HM4 / A HP 0.6. This image shows the complete pump unit, featuring a blue motor housing on the right and a shiny, chrome-like pump body on the left. The pump body has an inlet connection at the front and an outlet connection on top. The unit is mounted on a sturdy blue base.
3.1 Unpacking and Inspection
Carefully remove the unit from its packaging. Inspect for any visible damage that may have occurred during transit. Report any damage to your supplier immediately.
3.2 Placement
Install the pump on a firm, level, and stable surface capable of supporting its weight when full of fluid. Ensure the location is dry, well-ventilated, and protected from extreme temperatures, direct sunlight, and frost. Allow sufficient space around the unit for ventilation and future maintenance.
3.3 Plumbing Connections
Connect the suction and discharge pipes to the pump's inlet and outlet ports. Use appropriate fittings and sealants to ensure leak-free connections. Avoid putting strain on the pump's ports by supporting the piping independently. Ensure the suction line is as short and straight as possible and free from air pockets.
3.4 Electrical Connection
Before connecting to the power supply, verify that the voltage and frequency match the specifications on the pump's nameplate. Connect the unit to a properly grounded electrical circuit with appropriate overcurrent protection. All wiring must comply with local electrical codes.
3.5 Priming the Pump
Before initial startup, the pump must be primed. Remove the priming plug (if present) or fill the pump casing through the discharge port until the pump body is completely filled with the liquid to be pumped. Replace the plug securely. This step is critical to prevent dry running and damage to the pump.
4. Operating Instructions
4.1 Initial Start-up
After ensuring the pump is properly primed and all connections are secure, switch on the power supply. The pump should start smoothly. Monitor for unusual noises, vibrations, or leaks during the first few minutes of operation.
4.2 Normal Operation
Allow the pump to run within its specified operating range. Avoid continuous dry running, as this can cause severe damage to the mechanical seal and other components. Periodically check system pressure and flow rates to ensure optimal performance.
4.3 Shutting Down
To stop the pump, simply switch off the power supply. For extended periods of non-use, especially in freezing conditions, drain the pump and piping to prevent damage from ice expansion.
5. Maintenance
Regular maintenance ensures the longevity and efficiency of your Lowara centrifuge.
- Routine Checks: Regularly inspect the pump for leaks, unusual noises, excessive vibration, or overheating. Address any issues promptly.
- Cleaning: Keep the exterior of the pump clean, especially the motor's cooling fins, to ensure proper heat dissipation.
- Winterization: If the pump is installed in an area subject to freezing temperatures, drain all water from the pump and associated piping to prevent frost damage.
- Professional Service: For internal repairs or replacement of wear parts (e.g., mechanical seals, bearings), it is recommended to contact a qualified service technician or the manufacturer's authorized service center.
6. Troubleshooting
This section outlines common issues and their potential solutions. Always disconnect power before attempting any troubleshooting or repair.
| Problem | Possible Cause | Solution |
|---|---|---|
| Pump does not start | No power; tripped circuit breaker; faulty motor. | Check power supply; reset breaker; consult electrician. |
| Pump runs but no water/low flow | Pump not primed; air in suction line; clogged impeller/pipes; suction lift too high. | Re-prime pump; check for air leaks; clear obstructions; reduce suction lift. |
| Excessive noise or vibration | Cavitation; worn bearings; misaligned coupling; loose mounting. | Check suction conditions; inspect bearings; ensure proper alignment and mounting. |
| Water leaks from pump | Damaged mechanical seal; loose pipe connections. | Inspect/replace mechanical seal; tighten connections. |
7. Specifications
Key technical specifications for the Lowara Multistage Horizontal Centrifuge, Model 2HM4 / A HP 0.6:
- Brand: Lowara
- Model Number (P&B Reference): 004042
- Manufacturer: P & B
- Type: Multistage Horizontal Centrifuge
- Quantity of Items: 1
- Batteries Included: No
- Batteries Required: No
- ASIN: B00NFESM9O
- Note: Spare parts availability information is not available.
8. Warranty and Support
For information regarding warranty coverage, technical support, or authorized service centers, please contact your original point of purchase or refer to the official Lowara website. Keep your purchase receipt as proof of purchase.


