
Solong Tattoo TK453
Contents
Solong Tattoo Complete Tattoo Kit User Manual
Model: TK453
Introduction
This user manual provides comprehensive instructions for the Solong Tattoo Complete Tattoo Kit, Model TK453. It covers setup, operation, maintenance, and troubleshooting to ensure safe and effective use of your tattoo equipment. This kit is designed for both beginners and experienced tattoo artists, offering a complete solution for various tattooing needs.

Image: Overview of the Solong Tattoo Complete Tattoo Kit, showing all included components such as machines, inks, power supply, and accessories.
Safety Information
Always prioritize safety when operating tattoo equipment. Improper use can lead to injury or infection. Please read and understand all safety guidelines before use.
- Sterilization: Ensure all needles, grips, and tips are properly sterilized before each use. Use only single-use, pre-sterilized needles.
- Hygiene: Maintain a clean and sterile working environment. Wear disposable gloves and use barrier protection on all equipment.
- Power Supply: Connect the power supply to a grounded outlet. Do not operate with wet hands or in damp conditions.
- Ink Safety: The included inks are for practice use. For human skin, always use professional-grade, sterile tattoo inks from reputable suppliers.
- Needle Handling: Dispose of used needles in a sharps container immediately after use. Never recap, bend, or break used needles.
- First Aid: Have a first aid kit readily available. In case of accidental needle stick or injury, seek medical attention immediately.
- Supervision: This kit is not a toy. Keep out of reach of children and pets.
Package Contents
The Solong Tattoo Complete Tattoo Kit TK453 includes the following components:
- 4 Pro Tattoo Machine Guns (for Liner and Shader)
- 1 LCD Digital Tattoo Power Supply
- 1 Foot Pedal
- 1 Clip Cord
- 54 Bottles of Practice Tattoo Ink (5ml/bottle, various colors)
- Assorted Tattoo Needles
- Disposable Grips and Tips
- Aluminum Alloy Grips
- Tattoo Machine Adjustment Tools
- Practice Skin
- Transfer Paper
- Disposable Gloves
- O-rings, Rubber Bands, Grommets
- Cleaning Brushes
- Carry Case

Image: A detailed view of the various components included in the Solong Tattoo Kit, such as inks, needles, grips, and tools.
Setup Instructions
Follow these steps to set up your Solong Tattoo Kit for operation.
1. Power Supply Setup
- Connect the power cord to the back of the LCD Digital Tattoo Power Supply.
- Plug the power cord into a suitable grounded electrical outlet.
- Connect the foot pedal to the designated "FOOT" jack on the power supply.
- Connect the clip cord to the "CLIP CORD" jack on the power supply.

Image: The LCD Digital Tattoo Power Supply unit.

Image: The foot pedal for controlling power to the tattoo machine.

Image: The clip cord used to connect the tattoo machine to the power supply.
2. Tattoo Machine Assembly
- Select the appropriate tattoo machine (liner or shader) for your task.
- Attach a clean, sterilized grip to the machine.
- Insert a new, sterile tattoo needle into the needle bar. Ensure the needle loop is securely placed over the armature bar nipple.
- Slide the needle bar through the tube of the grip until the needle tip protrudes slightly from the end of the tip.
- Secure the needle bar with a rubber band around the machine frame and needle bar to prevent lateral movement.
- Connect the clip cord to the binding posts of the tattoo machine. Ensure a secure connection for proper power flow.

Image: Two tattoo machines, one blue and one yellow, connected to a power supply and resting on the carry case, demonstrating the setup.

Image: A blue tattoo machine with a black grip and needle attached, ready for use.
Operating Instructions
Once your kit is set up, follow these steps for operation.
1. Powering On and Voltage Adjustment
- Turn on the power supply. The LCD display will illuminate.
- Use the voltage adjustment knob to set the desired voltage. Liners typically operate at higher voltages (7-9V) for crisp lines, while shaders use lower voltages (5-8V) for smooth shading.
2. Machine Operation
- Press the foot pedal to activate the tattoo machine. Release the pedal to stop.
- Observe the needle's movement. It should move smoothly and consistently.
- For practice, apply a small amount of practice ink to a clean ink cap. Dip the needle into the ink, ensuring it picks up enough pigment.
- Begin practicing on the provided practice skin. Maintain a consistent hand speed and depth for optimal results.
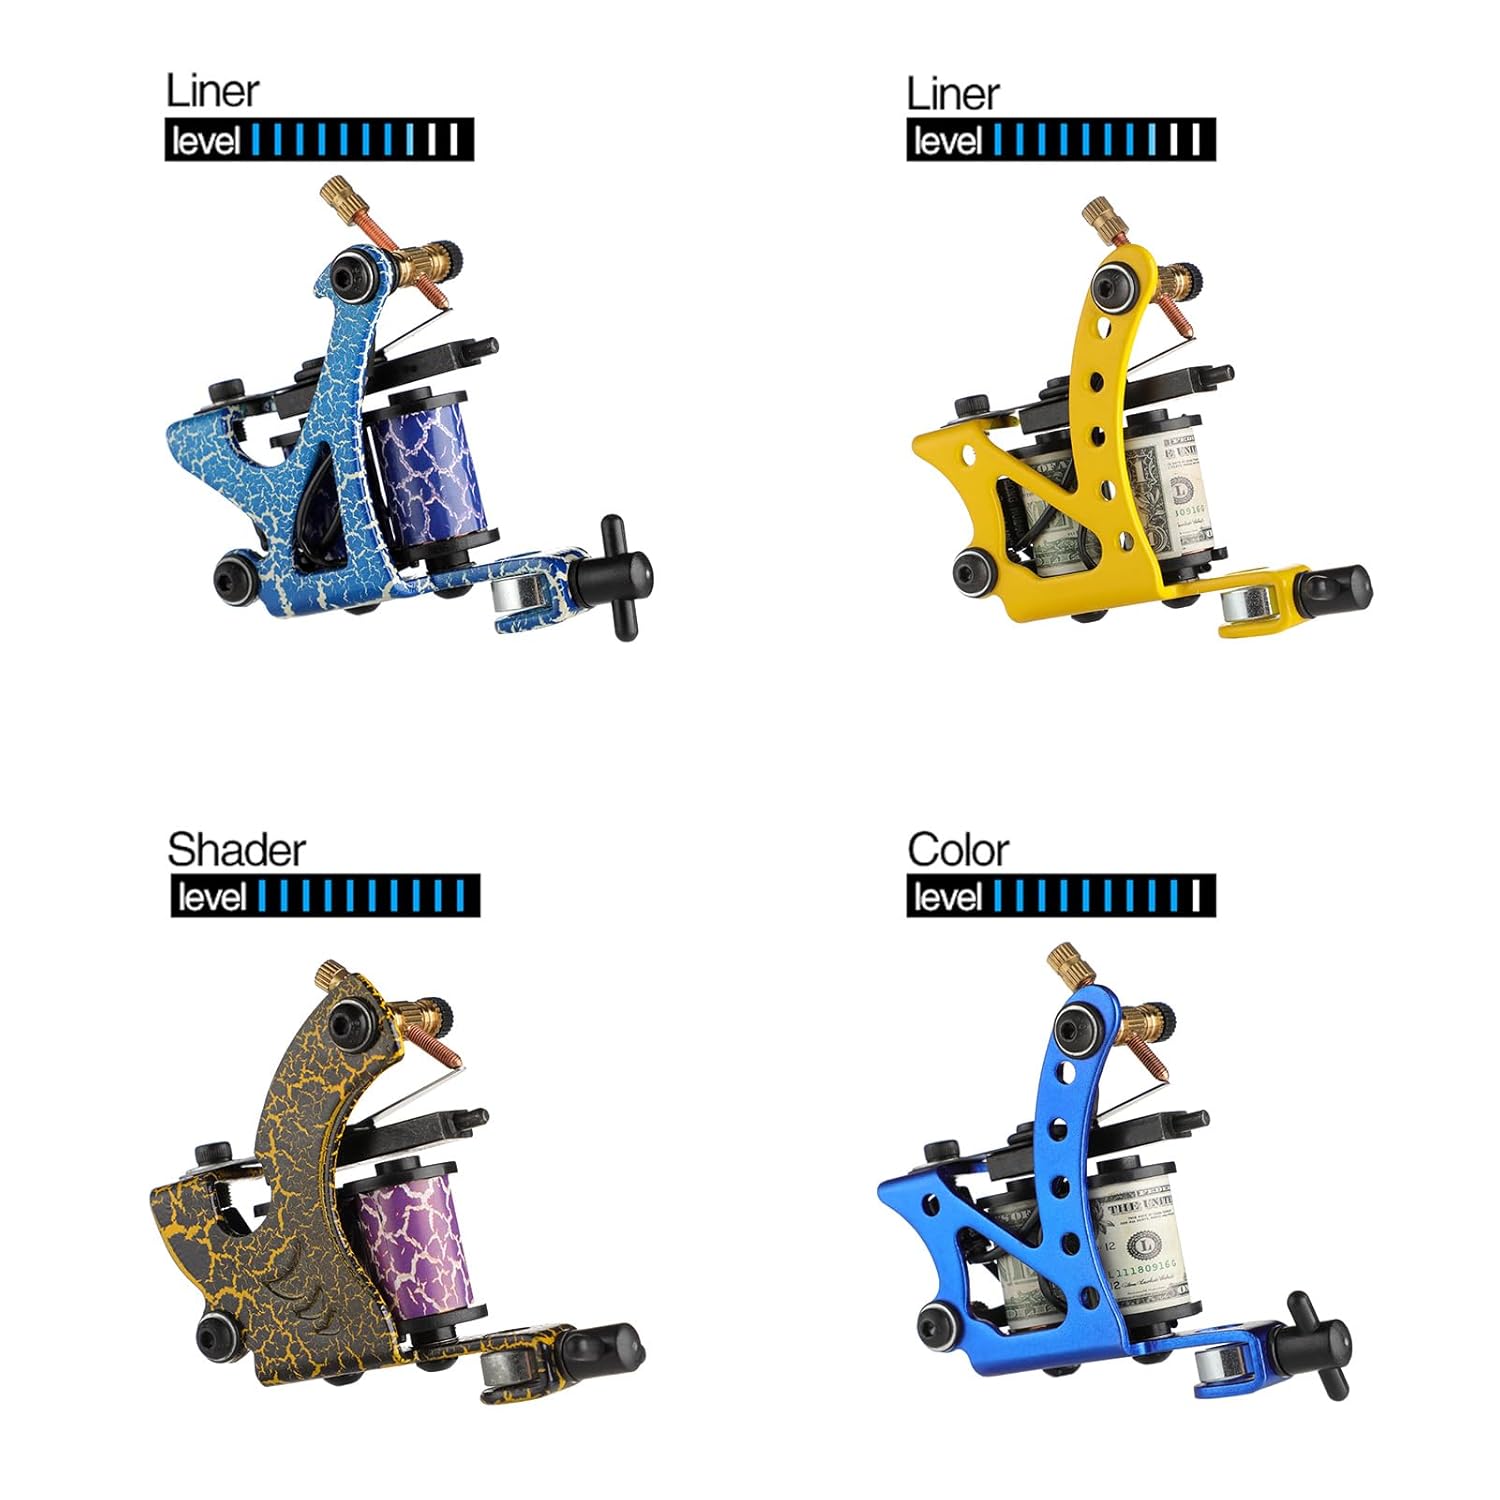
Image: Close-up view of four different tattoo machines, two designated as liners and two as shaders, highlighting their distinct characteristics.
Maintenance
Proper maintenance extends the life of your tattoo equipment and ensures safe operation.
- Cleaning Machines: After each use, wipe down the tattoo machine frame with a disinfectant solution. Avoid getting liquids into the coils or motor.
- Grip and Tip Cleaning: Reusable grips and tips must be thoroughly cleaned and sterilized. Use an ultrasonic cleaner followed by an autoclave if available, or appropriate cold sterilization solutions.
- Needle Disposal: Always dispose of used needles immediately into a designated sharps container.
- Lubrication: Periodically apply a small amount of machine oil to moving parts of the tattoo machine, such as the armature bar pivot and springs, to ensure smooth operation.
- Storage: Store all components in the provided carry case in a clean, dry place away from direct sunlight and extreme temperatures.
Troubleshooting
Here are solutions to common issues you might encounter.
| Problem | Possible Cause | Solution |
|---|---|---|
| Machine not running | Loose connections, power supply off, faulty foot pedal/clip cord. | Check all cable connections. Ensure power supply is on. Test foot pedal and clip cord. |
| Weak or inconsistent machine operation | Low voltage setting, worn springs, dirty contact points, loose needle bar. | Increase voltage. Inspect and replace springs if worn. Clean contact points. Secure needle bar with rubber band. |
| Needle not picking up ink | Ink too thick, needle not dipping deep enough, clogged needle. | Ensure ink consistency is appropriate. Adjust needle depth. Clean or replace needle. |
| Excessive vibration or noise | Loose components, worn grommets/O-rings, improper setup. | Tighten screws. Replace worn grommets/O-rings. Re-check machine assembly. |
Specifications
Technical specifications for the Solong Tattoo Complete Tattoo Kit TK453.
- Model Number: TK453
- Product Dimensions: 12.99 x 10.63 x 5.91 inches
- Item Weight: 6.61 Pounds
- Power Supply: LCD Digital Tattoo Power Supply
- Tattoo Machines: 4 Pro Machine Guns (Liner and Shader)
- Ink Quantity: 54 bottles, 5ml each (practice ink)
- Manufacturer: Solong Tattoo
- UPC: 701413860297
Warranty and Support
Solong Tattoo is committed to customer satisfaction. If you encounter any issues or have questions regarding your tattoo kit, please contact us.
- Warranty: Solong Tattoo offers support for tattoo machines within three years of purchase. Please retain your proof of purchase.
- Customer Service: For assistance with setup, operation, or troubleshooting, please contact Solong Tattoo customer service. Refer to the contact information provided with your purchase or visit the official Solong Tattoo website.
- Additional Resources: A detailed user manual in PDF format may be available for download. You can find it at: Solong Tattoo User Manual (PDF)
Ask a question about this manual
Ask about setup, troubleshooting, compatibility, parts, safety, or missing instructions. Manuals+ will review the question and use this page’s manual context to help answer it.