
Product Overview
The Kingwin EZ-DOCK 3 is a USB 3.0 Dual Bay Hard Drive Docking Station designed for convenient access, backup, and cloning of 2.5-inch and 3.5-inch SATA HDDs and SSDs. It supports high-speed data transfer and features an offline cloning function.
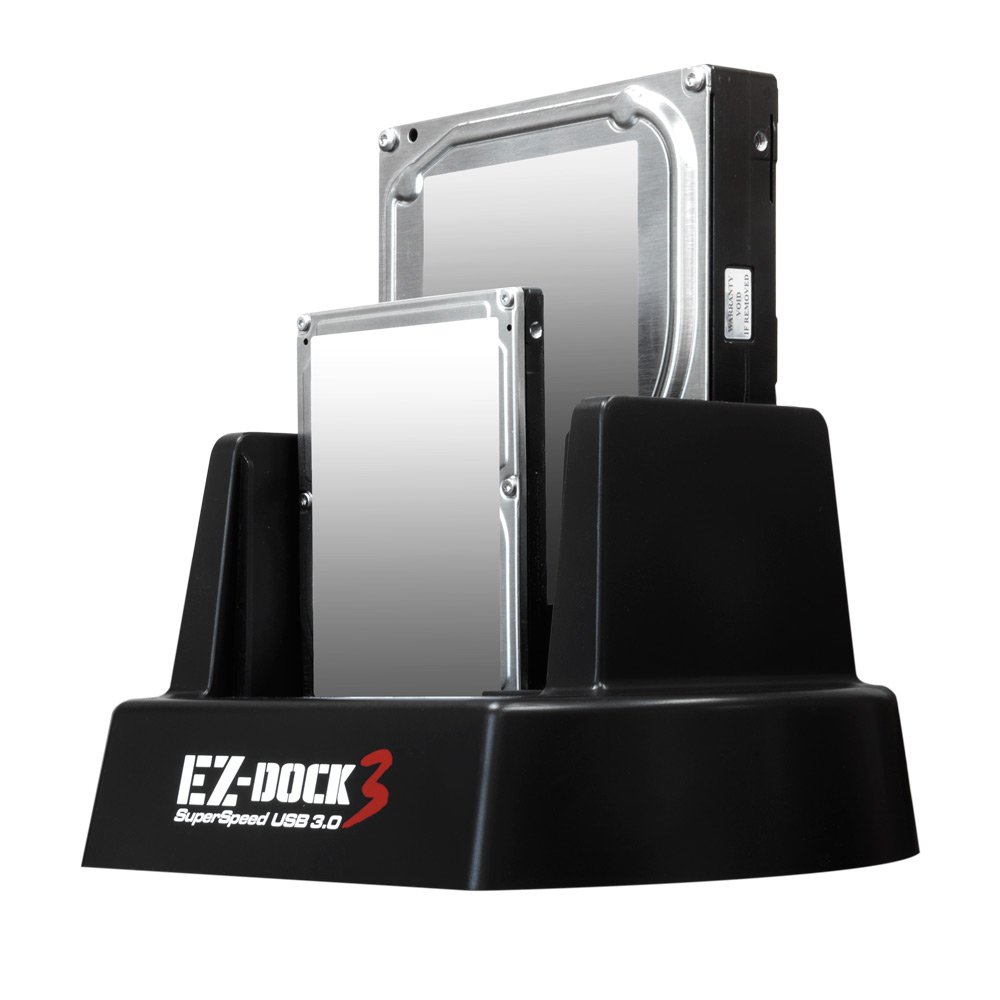
Image: Kingwin EZ-DOCK 3 Dual Bay Hard Drive Docking Station with a 2.5-inch and a 3.5-inch hard drive inserted, connected to a laptop.
Key Features:
- USB 3.0 High-Speed Transfer: Achieves up to 5Gbps transfer speeds, suitable for PC backup, data transfer, and file storage.
- Wide Drive Compatibility: Supports both 2.5-inch and 3.5-inch SATA I/II/III HDDs and SSDs.
- UASP Technology: Enhances SSD read/write performance for faster data transfers compared to traditional USB 3.0.
- Tool-Free & Hot-Swap Design: Allows for quick installation and removal of drives without tools or rebooting.
- Offline Clone Function: Enables direct disk duplication without requiring a computer connection.
- Universal Compatibility: Works with Windows, Mac, and Linux operating systems.
- Stable Power & Safety: Includes a 12V power adapter for 3.5-inch HDDs and built-in protection against over-current, over-voltage, short circuits, and overheating.

Image: A chart illustrating the speed benefits of UASP technology over standard USB 3.0 and USB 2.0.
Setup Instructions
Follow these steps to set up your Kingwin EZ-DOCK 3 docking station:
- Connect Power: Plug the provided 12V power adapter into the "DC IN" port on the back of the docking station. Connect the other end to a power outlet.
- Connect to Computer (for data transfer): If you intend to use the docking station for data transfer with a computer, connect the supplied USB 3.0 cable from the "USB 3.0" port on the docking station to an available USB 3.0 port on your computer.
- Insert Hard Drives:
- Ensure the docking station is powered off before inserting drives.
- Gently slide your 2.5-inch or 3.5-inch SATA HDD/SSD into an available bay until it firmly connects with the SATA connector at the bottom of the bay.
- For 3.5-inch drives, the bay mechanism will adjust to secure the drive. For 2.5-inch drives, the mechanism will hold them in place.

Image: Top-down view of the docking station bays, illustrating the top-loading design for hard drive insertion.
- Power On: Flip the power switch on the back of the docking station to the "ON" position. The power LED on the front will illuminate.

Image: Rear view of the docking station showing the USB 3.0 port, Clone button, DC IN port, and Power switch. A hand is connecting the USB 3.0 cable.
Operating Instructions
A. Data Transfer Mode (Connected to Computer)
Once the docking station is set up and powered on, your computer should automatically detect the inserted hard drives. They will appear as removable storage devices.
- Access Drives: Open "This PC" (Windows) or "Finder" (Mac) to locate and access your drives.
- Transfer Data: Drag and drop files between your computer and the drives in the docking station, or between drives in different bays.
- Eject Safely: Before removing any drive, always safely eject it from your operating system to prevent data corruption.
B. Offline Clone Function (Stand-alone Duplication)
The EZ-DOCK 3 allows you to clone a source drive to a target drive without a computer connection.

Image: The docking station with an arrow showing data flow for drive duplication, highlighting its stand-alone capability.
- Prepare Drives:
- Ensure the docking station is powered OFF and disconnected from your computer.
- Insert the Source Drive (the drive you want to copy FROM) into the "HARD DISK 1" bay.
- Insert the Target Drive (the drive you want to copy TO) into the "HARD DISK 2" bay.
- Important: The target drive must be equal to or larger in capacity than the source drive. All data on the target drive will be erased during the cloning process.
- Start Cloning:
- Power ON the docking station.
- Press and hold the "CLONE" button on the back of the unit for approximately 3-5 seconds until the progress LEDs (25%, 50%, 75%, 100%) begin to flash.
- Release the button. The cloning process will begin.
- Monitor Progress: The progress LEDs on the front of the docking station will illuminate sequentially (25%, 50%, 75%, 100%) to indicate the cloning status.
- Completion: Once all four progress LEDs are solid blue, the cloning process is complete.
- Power Off & Remove: Power OFF the docking station before removing the cloned drives.
Maintenance
To ensure the longevity and optimal performance of your Kingwin EZ-DOCK 3, follow these maintenance guidelines:
- Keep Clean: Regularly wipe the exterior of the docking station with a soft, dry cloth. Avoid using liquid cleaners or solvents.
- Dust Prevention: Keep the bays free of dust and debris. Use compressed air if necessary, ensuring the device is powered off.
- Proper Handling: Handle hard drives carefully when inserting or removing them to avoid damaging the SATA connectors.
- Storage: When not in use, store the docking station in a cool, dry place away from direct sunlight and extreme temperatures.
Troubleshooting
If you encounter issues with your Kingwin EZ-DOCK 3, refer to the following common problems and solutions:
- Issue: Drives not detected by computer.
- Ensure the docking station is powered on and the USB 3.0 cable is securely connected to both the dock and your computer.
- Try connecting to a different USB port on your computer.
- Verify that the hard drives are properly seated in the bays.
- Check Disk Management (Windows) or Disk Utility (Mac) to see if the drives are recognized but uninitialized or unformatted.
- Restart your computer.
- Issue: Offline cloning does not start or fails.
- Ensure the docking station is disconnected from the computer before initiating an offline clone.
- Verify that the source drive is in "HARD DISK 1" and the target drive is in "HARD DISK 2".
- Confirm that the target drive's capacity is equal to or greater than the source drive's capacity.
- Press and hold the "CLONE" button for the specified 3-5 seconds until the LEDs flash.
- Try using different drives to rule out a faulty drive.
- Issue: Slow data transfer speeds.
- Ensure you are connected to a USB 3.0 port on your computer. USB 2.0 ports will result in slower speeds.
- Verify that your operating system and drivers support UASP (USB Attached SCSI Protocol) for optimal SSD performance.
- Check the health of your hard drives. Faulty drives can cause slow transfers.
Specifications
| Feature | Detail |
|---|---|
| Brand | Kingwin |
| Model | EZ-DOCK 3 (B00N1QL9K0) |
| Hardware Interface | USB 3.0 |
| Compatible Drive Types | 2.5" & 3.5" SATA HDD/SSD (SATA I/II/III) |
| Supported Devices Quantity | 2 |
| Data Transfer Rate | Up to 5000 Megabytes Per Second (5Gbps) |
| UASP Support | Yes |
| Offline Clone Function | Yes |
| Hardware Platform | Windows, Mac, Linux |
| Color | Black |
| Material | Stainless Steel (Enclosure) |
| Item Weight | 370 Grams |

Image: Diagram showing the dimensions of the Kingwin EZ-DOCK 3 docking station: 7 1/8" length, 5 5/16" width, and 3 3/4" height.
Warranty Information
The Kingwin EZ-DOCK 3 comes with a 1-year warranty from the date of purchase. This warranty covers manufacturing defects and ensures the product functions as described under normal use. Please retain your proof of purchase for warranty claims.
For detailed warranty terms and conditions, please refer to the official Kingwin website or contact customer support.
Customer Support
For technical assistance, troubleshooting, or warranty inquiries, please contact Kingwin customer support:
- Online Support: Visit the official Kingwin website for FAQs, driver downloads, and support resources.
- Contact Information: Refer to the product packaging or the official Kingwin website for the most current contact details (phone, email).
When contacting support, please have your product model (EZ-DOCK 3) and ASIN (B00N1QL9K0) readily available.