Introduction
Welcome to the user manual for your new Radiant Saunas BSA6310 Rejuvenator Portable Sauna. This manual provides essential information for the safe and effective use of your portable sauna, including setup instructions, operating procedures, maintenance guidelines, and troubleshooting tips. Please read this manual thoroughly before operating the unit and retain it for future reference.

Figure 1: The Radiant Saunas BSA6310 Rejuvenator Portable Sauna in its compact, ready-to-use state.
Safety Information
Important Safety Precautions:
- Always consult with a healthcare professional before using the sauna, especially if you have pre-existing medical conditions, are pregnant, or are taking medication.
- Do not use the sauna if you are feeling unwell, dizzy, or nauseous.
- Ensure the sauna is placed on a flat, stable, and dry surface.
- Do not operate the sauna with wet hands or while standing in water.
- Keep children and pets away from the sauna during operation.
- Unplug the sauna from the power outlet when not in use or before cleaning.
- Do not modify the sauna or its components. Use only original replacement parts.
- Avoid prolonged exposure to high temperatures. Limit sessions to recommended durations.
- Stay hydrated by drinking water before, during, and after sauna use.
- If any unusual odors, sounds, or malfunctions occur, immediately unplug the unit and contact customer support.
Product Components
Your Radiant Saunas BSA6310 Rejuvenator Portable Sauna comes with the following components:
- Portable Sauna Tent
- Foldable Chair
- Foot Heating Pad
- Handheld Controller
- Electronic Control Box
- Power Cord

Figure 2: Exploded view of the portable sauna components, including the tent, chair, foot pad, and control unit.
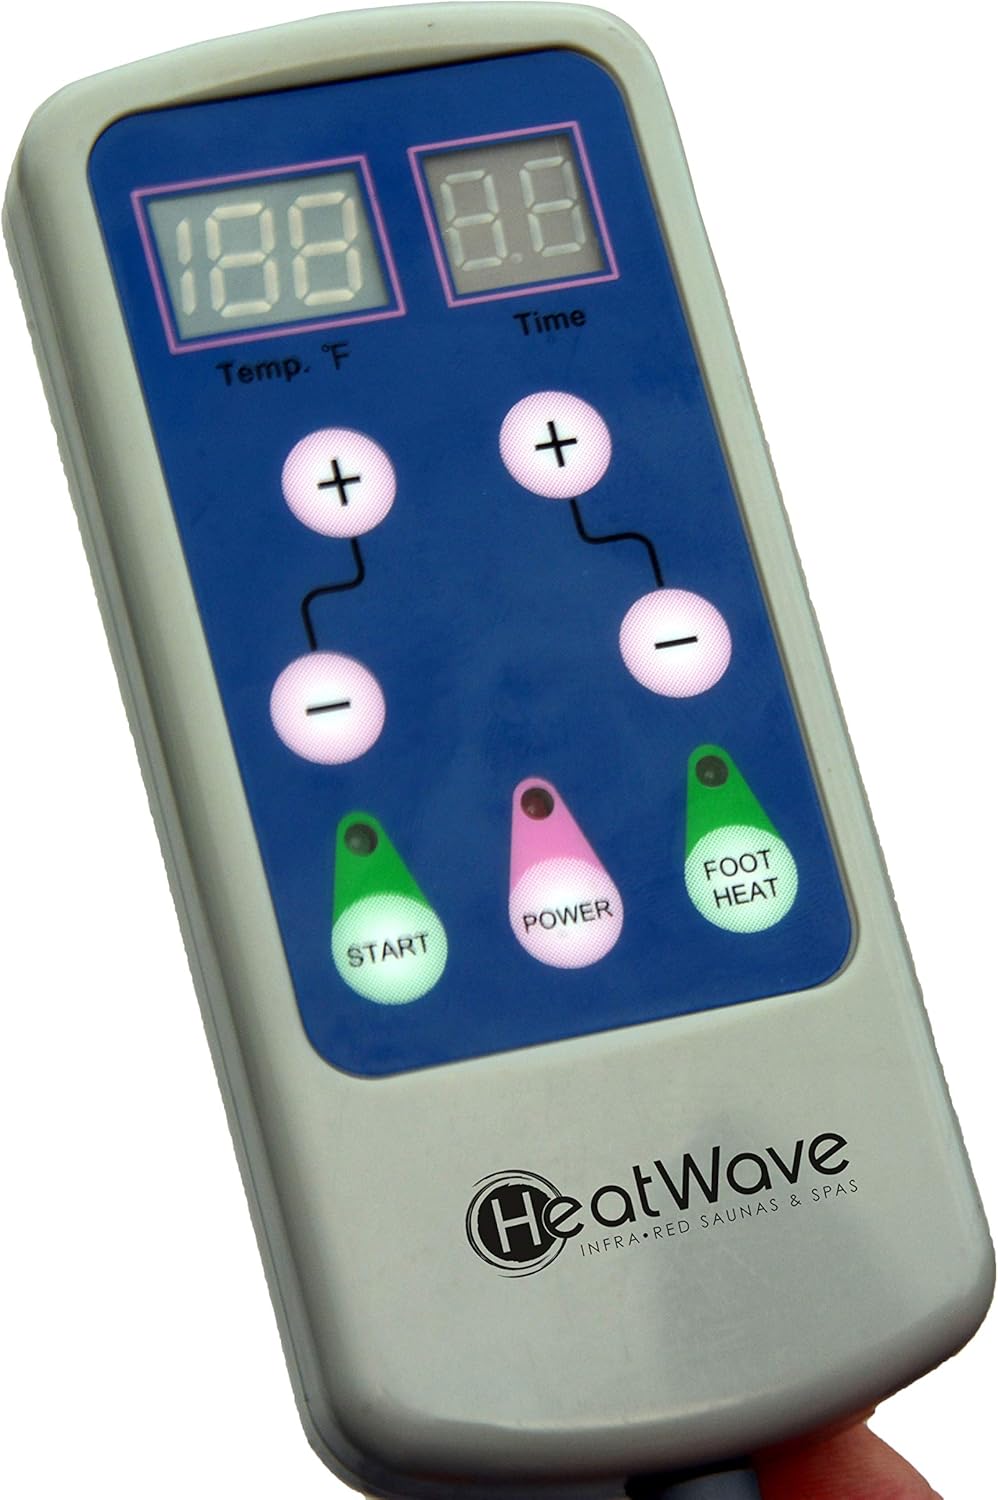
Figure 3: The handheld controller for adjusting temperature and time settings.

Figure 4: The foot heating pad, designed for additional warmth and comfort.
Setup Instructions
The Radiant Saunas BSA6310 is designed for quick and easy setup. Follow these steps:
- Remove the portable sauna from its storage bag and unfold it on a flat, stable surface.
- Insert the foldable chair into the sauna tent. Ensure it is stable and centered.
- Place the foot heating pad on the floor inside the sauna, ensuring its cable can reach the electronic control box.
- Connect the handheld controller to the electronic control box.
- Connect the electronic control box to the sauna tent's heating panels.
- Plug the power cord from the electronic control box into a standard 110V electrical outlet.
- Ensure all zippers are closed except for the neck opening, which will be used when entering.

Figure 5: Visual guide for the one-minute setup process of the portable sauna.

Figure 6: Inside the sauna, showing the placement of the foldable chair and foot pad.
Operating Instructions
Once the sauna is set up, you can begin your session.
- Power On: Press the "POWER" button on the handheld controller. The display will light up.
- Set Temperature: Use the "+" and "-" buttons under "Temp. F" to adjust the desired temperature. The maximum temperature is typically 150°F (65°C).
- Set Time: Use the "+" and "-" buttons under "Time" to set the desired session duration. Sessions typically range from 15 to 60 minutes.
- Start Heating: Press the "START" button to begin the heating process. The sauna will start to warm up.
- Preheat (Optional): For optimal results, allow the sauna to preheat for 5-10 minutes before entering.
- Enter Sauna: Carefully open the front zipper, sit on the chair inside, and close the zipper around your body, leaving your head outside the neck opening.
- Foot Heat (Optional): Press the "FOOT HEAT" button on the controller to activate the foot heating pad for additional warmth.
- During Session: Relax and enjoy your sauna session. You can use the armholes to read a book or use a device.
- End Session: The sauna will automatically shut off once the set time expires. You can also press the "POWER" button to turn it off manually at any time.
- Exit Sauna: Carefully unzip the sauna and exit.
Note: It is recommended to start with shorter sessions (e.g., 15-20 minutes) and gradually increase the duration as your body adjusts. Always listen to your body and discontinue use if you feel uncomfortable.

Figure 7: User demonstrating proper posture and use of the armholes during a sauna session.
Maintenance
Proper maintenance ensures the longevity and hygiene of your portable sauna.
- Cleaning: After each use, wipe down the interior of the sauna with a clean, damp cloth. For deeper cleaning, use a mild, non-abrasive cleaner. Ensure the sauna is completely dry before folding or storing.
- Drying: Allow the sauna to air dry completely after cleaning to prevent mold or mildew growth.
- Storage: When not in use, unplug the sauna and allow it to cool down. Fold the sauna neatly and store it in its original storage bag in a cool, dry place away from direct sunlight.
- Foot Pad Care: The foot heating pad can be wiped clean with a damp cloth. Do not immerse it in water.

Figure 8: The portable sauna in its folded state, demonstrating its compact storage capability.
Troubleshooting
If you encounter any issues with your portable sauna, refer to the following common problems and solutions:
| Problem | Possible Cause | Solution |
|---|---|---|
| Sauna does not turn on. | Not plugged in; power outlet issue; controller not connected. | Ensure power cord is securely plugged into a working outlet. Check all connections to the electronic control box and handheld controller. |
| Sauna is not heating. | Temperature not set; "START" button not pressed; heating panels disconnected. | Verify temperature setting on controller. Press "START". Check connections of heating panels to the control box. |
| Foot pad is not heating. | "FOOT HEAT" button not pressed; foot pad disconnected. | Press the "FOOT HEAT" button. Ensure the foot pad is properly connected to the control box. |
| Insufficient sweating. | Session too short; room temperature too low; individual variation. | Increase session duration. Ensure the room is not excessively cold. Allow for preheating. Hydrate well. |
If the problem persists after trying these solutions, please contact customer support.
Specifications
Key technical specifications for the Radiant Saunas BSA6310 Rejuvenator Portable Sauna:
- Model Number: BSA6310
- Dimensions (Product): Approximately 79.76 x 96.77 x 67.82 cm (31.4 x 38.1 x 26.7 inches)
- Weight: Approximately 8.16 kg (18 lbs)
- Heating Elements: Far Infrared Carbon Heating Panels (3 panels)
- Power Requirement: 110V
- Manufacturer: Radiant Saunas (HeatWave)
- First Available: September 6, 2014
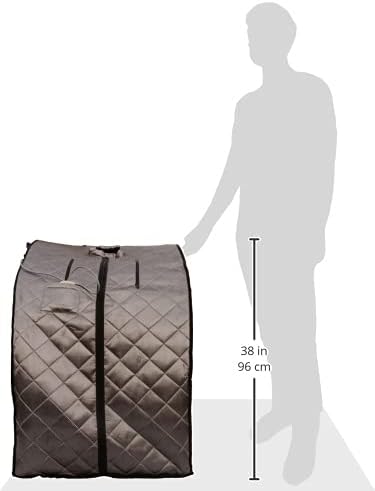
Figure 9: Approximate dimensions of the portable sauna.
Warranty and Support
For information regarding warranty coverage, product registration, or technical support, please refer to the warranty card included with your purchase or visit the official HeatWave website. Keep your proof of purchase for warranty claims.
Contact Information:
Please refer to the contact details provided in your product packaging or on the manufacturer's official website for the most up-to-date support information.


