
1. Introduction
The BN-LINK Heavy Duty Mechanical 24 Hour Timer (Model FD60-U2) is designed to automate the operation of indoor electrical appliances. This timer features a simple, mechanical dial with built-in pins for setting precise ON/OFF schedules, repeating every 24 hours. It is ideal for controlling lamps, fans, holiday lights, and other small appliances, helping to conserve energy and enhance convenience.

Image 1.1: Front view of the BN-LINK Mechanical Timer, showing the dial and one of the two outlets.
2. Safety Instructions
- Indoor Use Only: This timer is designed exclusively for indoor applications. Do not use it outdoors or in wet conditions.
- Electrical Rating: Ensure that the connected appliance does not exceed the timer's maximum rating of 125VAC, 60 Hz, 1875W, 15A (Tungsten & Resistive), or 1/2HP. Overloading can cause damage or fire.
- Grounded Connection: This timer features a 3-prong grounded plug and outlets for safety. Always plug it into a properly grounded 3-prong wall receptacle.
- ETL Listed: The product is ETL listed, indicating compliance with North American safety standards.
- Children and Pets: Keep the timer out of reach of children and pets.
- Cleaning: Disconnect from power before cleaning. Use a dry cloth; do not immerse in water or use liquid cleaners.
3. Product Features
- Integrated Pins: Features a built-in pin dial for setting ON/OFF times, eliminating loose parts.
- Dual Outlets: Equipped with two 3-prong grounded outlets to control multiple devices simultaneously.
- 15-Minute Intervals: Program schedules in 15-minute increments over a 24-hour period.
- Manual Override Switch: A convenient switch allows you to bypass the timer function and keep the connected appliance continuously ON.
- Energy Saving: Automate appliance operation to reduce energy consumption.
- Wide Compatibility: Suitable for various indoor appliances such as lamps, fans, coffee makers, and hydroponic equipment.

Image 3.1: The timer connected to a wall outlet, controlling a floor lamp, illustrating its key features.
4. Setup
- Plug In the Timer: Insert the timer into a standard 3-prong 125VAC wall outlet.
- Set Current Time: Rotate the entire clock dial clockwise until the arrow on the inner dial aligns with the current time. For example, if it is 3 PM, align the arrow with '3 PM' on the dial.
- Connect Appliance: Plug the appliance(s) you wish to control into the outlets on the side of the timer. Ensure the appliance's power switch is in the 'ON' position.
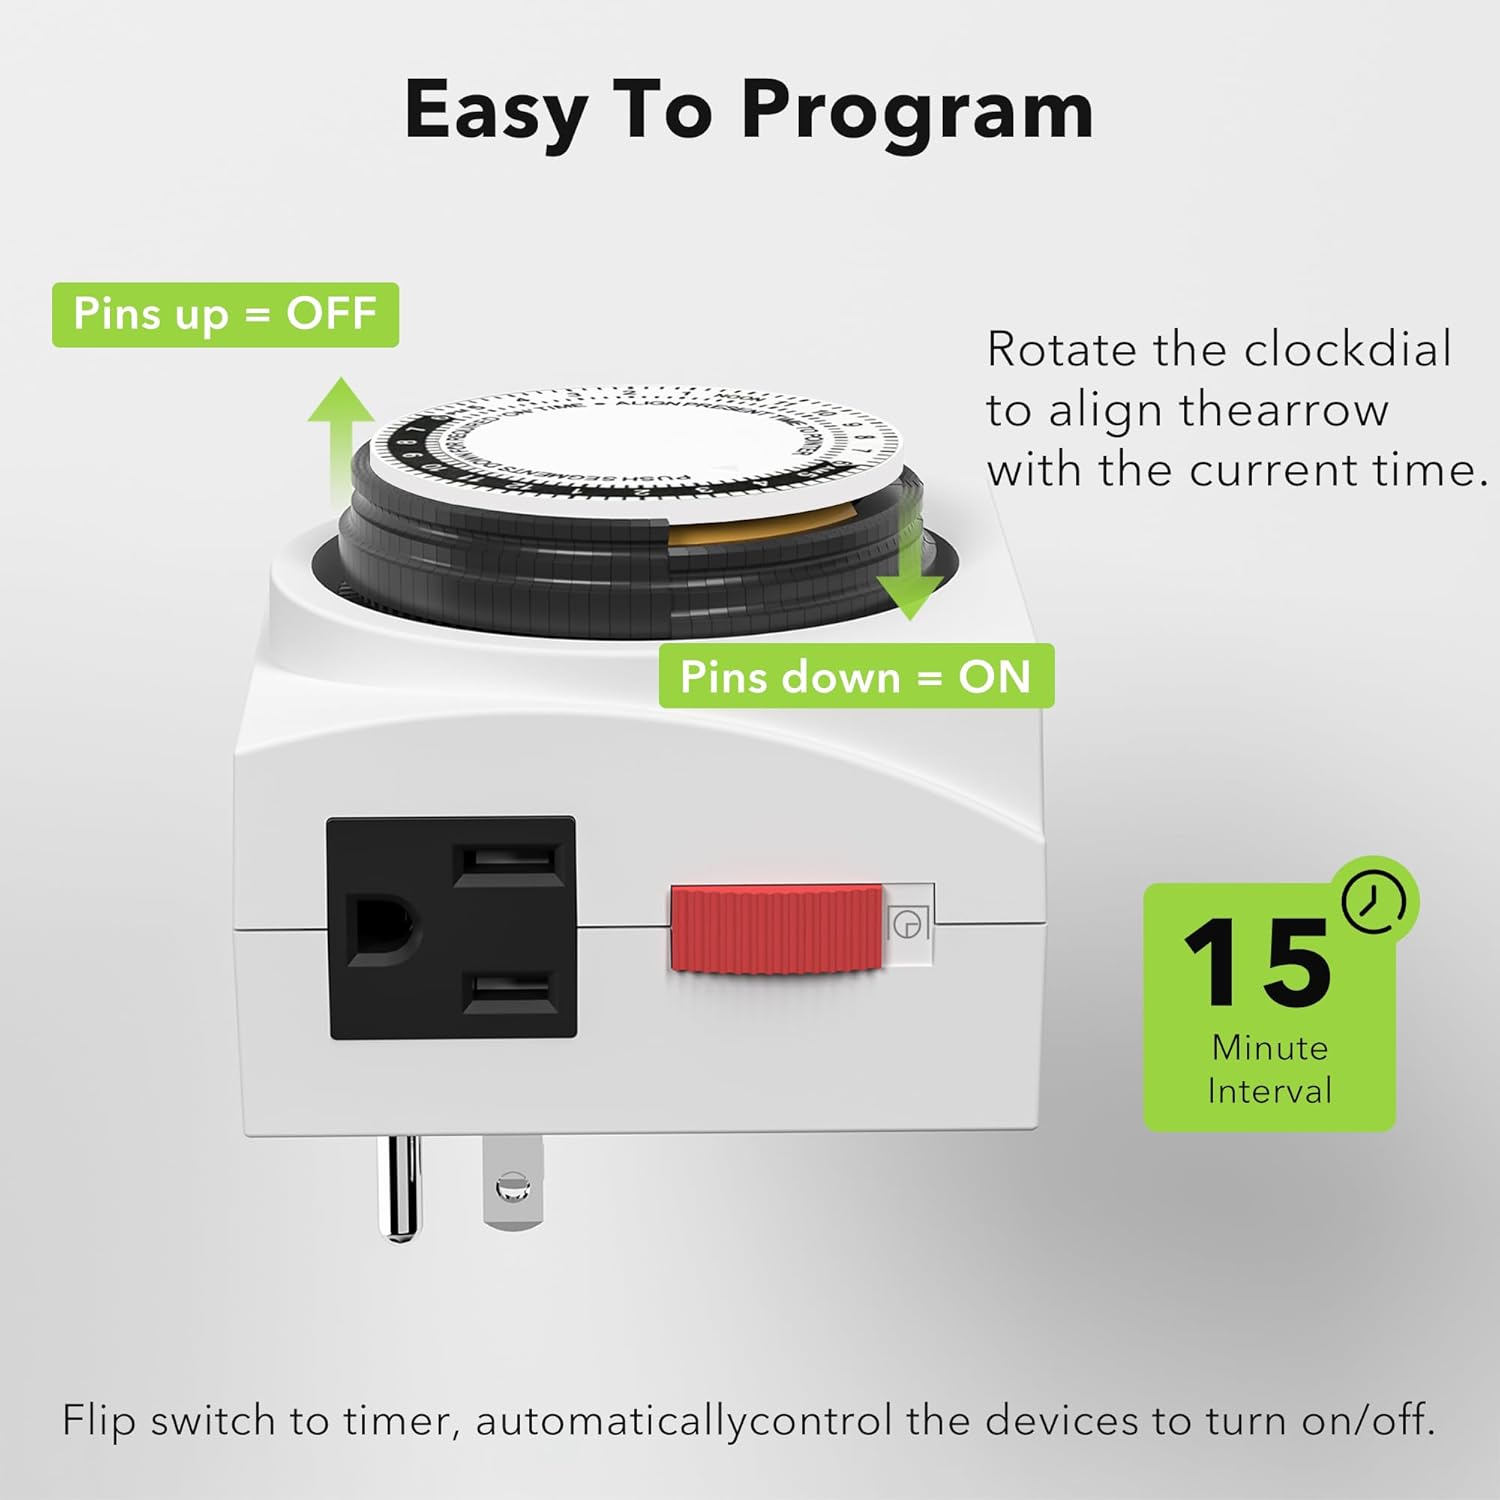
Image 4.1: Visual guide for setting the timer, indicating pins up for OFF and pins down for ON, and aligning the dial with the current time.
5. Operating Instructions
5.1 Setting ON/OFF Times
The timer dial is divided into 15-minute segments. Each segment represents 15 minutes. To program the timer:
- To Turn ON: Push down the black pins corresponding to the time periods you want the appliance to be ON. Each pushed-down pin represents 15 minutes of ON time.
- To Turn OFF: Keep the black pins in the UP position for the time periods you want the appliance to be OFF.
The programmed schedule will repeat every 24 hours. For example, to turn an appliance ON from 6:00 AM to 9:00 AM, push down all pins between '6 AM' and '9 AM' on the dial.
5.2 Using the Manual Override Switch
The red switch on the side of the timer allows you to manually control the power to the outlets, overriding the set program:
- Timer Mode: Slide the switch to the clock icon position to enable the programmed ON/OFF schedule.
- Always ON: Slide the switch to the 'I' position to keep the connected appliance(s) continuously ON, bypassing the timer function.

Image 5.1: Illustrative examples of the timer automating a coffee machine and an aquarium light.
6. Maintenance
- Cleaning: To clean the timer, first unplug it from the wall outlet. Use a soft, dry cloth to wipe the exterior. Do not use abrasive cleaners, solvents, or immerse the timer in water.
- Storage: When not in use, store the timer in a cool, dry place away from direct sunlight and moisture.
- Inspection: Periodically inspect the timer and its cord for any signs of damage. If damage is found, discontinue use and replace the unit.
7. Troubleshooting
- Appliance Not Turning ON/OFF:
- Check if the timer is plugged securely into a live wall outlet.
- Ensure the appliance connected to the timer is switched to the 'ON' position.
- Verify that the manual override switch is set to the clock icon position (Timer Mode).
- Confirm that the pins for the desired ON/OFF times are correctly pushed down (ON) or up (OFF).
- Check if the current time on the dial is accurately set.
- Timer Dial Not Rotating:
- Ensure the timer is plugged into a live power source. The motor requires power to rotate the dial.
- Overheating:
- Immediately unplug the timer and any connected appliances.
- Check if the total wattage of connected appliances exceeds the timer's maximum rating (1875W). Reduce the load if necessary.
8. Specifications
| Specification | Detail |
|---|---|
| Model Number | FD60-U2 |
| Voltage | 125VAC |
| Frequency | 60 Hz |
| Max Load | 1875W Resistive / 15A Tungsten / 1/2 HP |
| Minimum Setting Time | 15 minutes |
| Number of Settings | 48 ON/OFF programs per 24 hours |
| Outlets | 2 x 3-Prong Grounded Outlets |
| Material | Plastic (High Flame-Retardant PC) |
| Dimensions | 3.2"D x 3.2"W x 3"H |
| Certifications | ETL Listed |

Image 8.1: Detailed dimensions of the timer unit.
9. Warranty and Support
For warranty information or technical support, please contact BN-LINK customer service. Refer to the product packaging or the official BN-LINK website for the most current contact details.
Manufacturer: BN-LINK
Date First Available: August 20, 2014