
1. Introduction
The Otamatone is a unique Japanese electronic musical instrument known for its distinctive eighth note-shaped body, expressive moving mouth, and characteristic sound. Developed by Maywa Denki, it offers a novel way to create music through touch and pressure. This manual provides essential information for setting up, operating, and maintaining your Otamatone.

Text Description: A white Otamatone musical instrument is displayed both out of its packaging and within its blue and yellow retail packaging. The instrument resembles an eighth note with a round head and a long stem. The packaging highlights its Japanese origin and features images of people playing it.
Official Product Introduction
Video Description: An official introduction video for the Otamatone Regular, demonstrating its features and how it creates sound. The video showcases various colors of the instrument and highlights its unique musical capabilities.
2. Setup
Before playing your Otamatone, proper setup is required, primarily involving battery installation.
2.1 Unboxing and Contents

Text Description: The image displays the contents of the Otamatone package: the white Otamatone instrument, a folded instruction manual, and a practice song sheet. The packaging itself is also visible.
Your Otamatone package should contain:
- One Otamatone instrument
- Instruction Manual
- Practice Song Sheet
Please note that 3 AAA batteries and a small Phillips head screwdriver are required for operation and are not included in the package.
2.2 Battery Installation
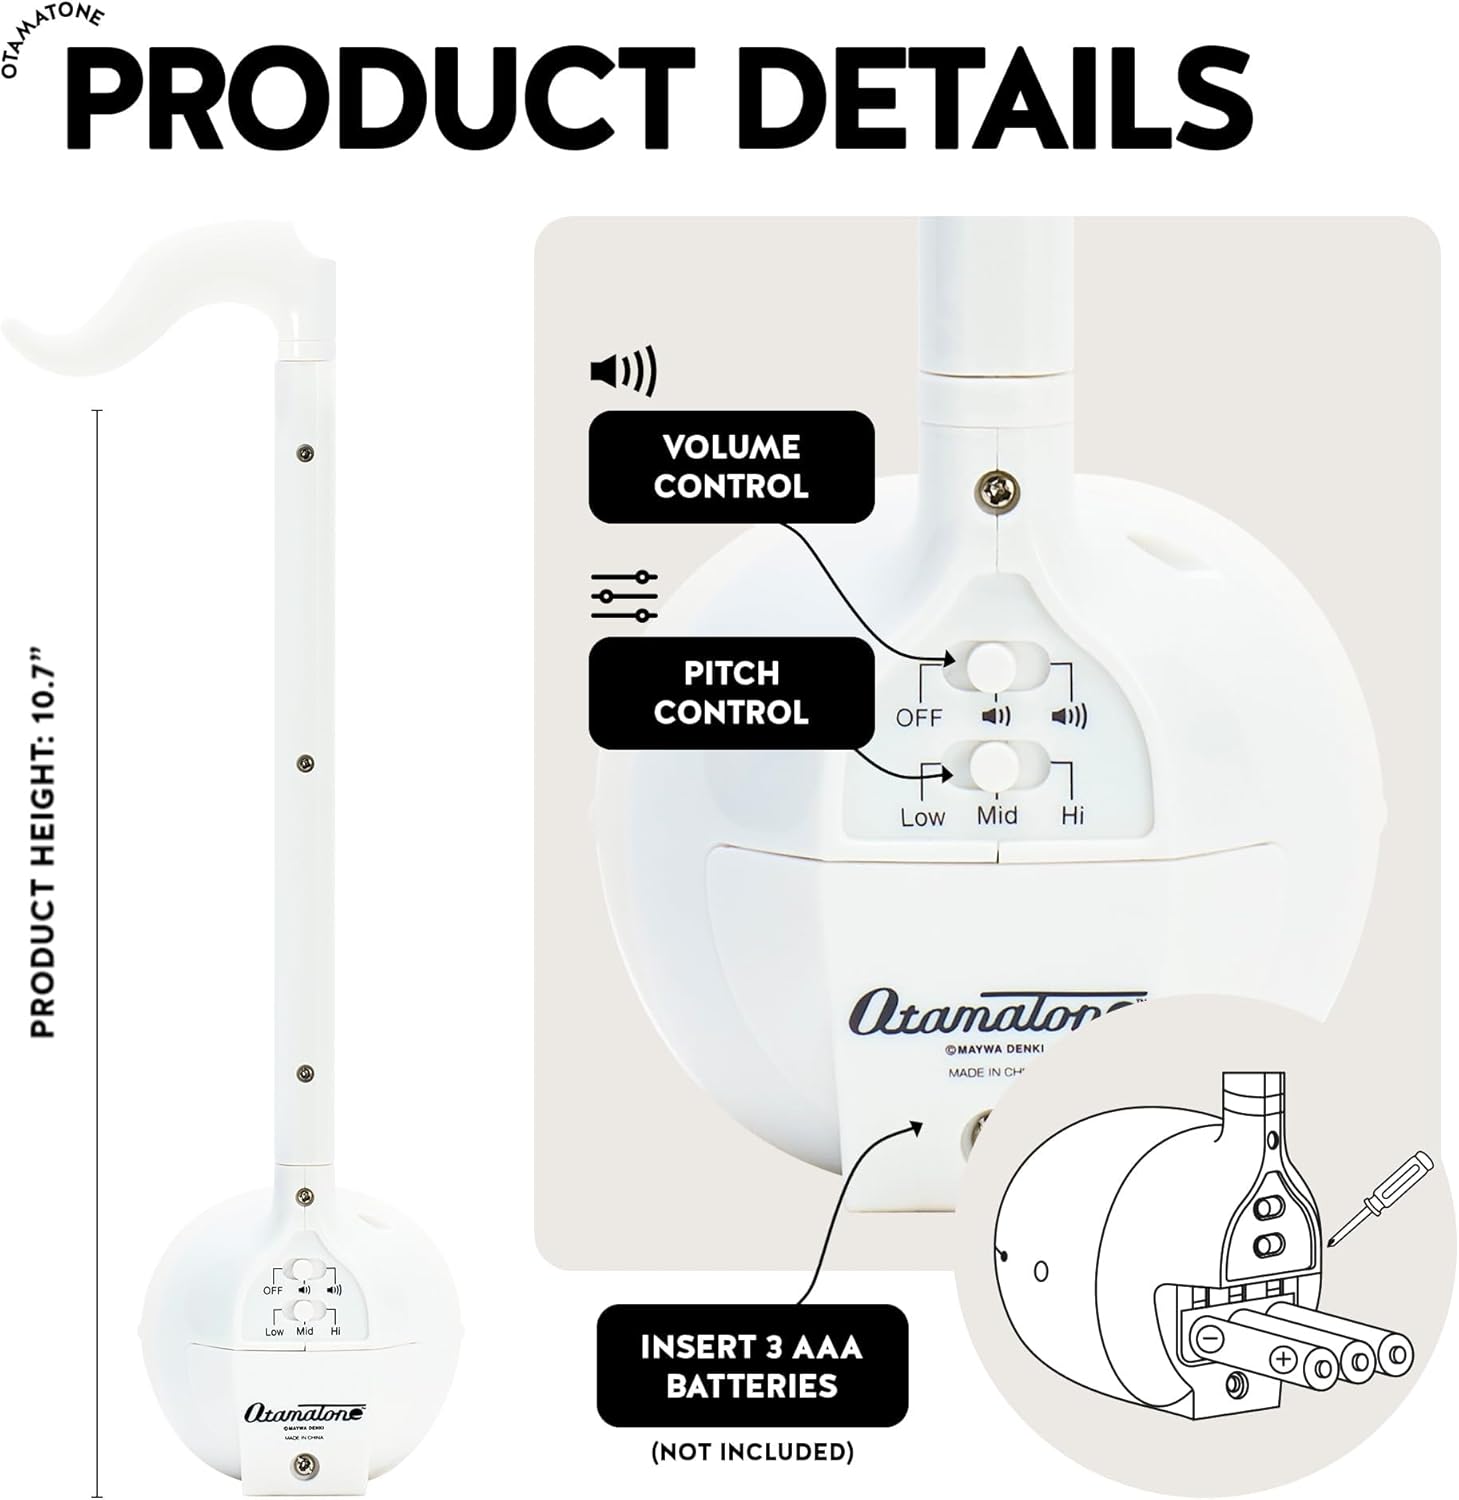
Text Description: A detailed view of the back of the Otamatone's head, showing the battery compartment cover, the ON/OFF switch, and the Low/Mid/High pitch switches. An illustration indicates where to insert AAA batteries.
- Locate the battery compartment cover on the back of the Otamatone's head.
- Using a small Phillips head screwdriver, unscrew the screw securing the battery cover.
- Carefully remove the battery cover.
- Insert 3 new AAA batteries, ensuring correct polarity (+/-).
- Replace the battery cover and secure it with the screw. Ensure the cover slides back correctly before tightening.
Setup Demonstration Video
Video Description: A short video demonstrating the unboxing and setup process of the Otamatone, including battery installation and initial power-on.
3. Operating Instructions
The Otamatone is designed for intuitive play. Follow these steps to produce sounds and melodies.
3.1 Basic Play Techniques

Text Description: A collage of four images illustrating how to play the Otamatone. The images show hands holding the instrument, pressing on the stem, sliding fingers along the stem, and squeezing the mouth to create different sounds.
- Power On: Locate the power switch on the back of the Otamatone's head (refer to Figure 3). Slide it to the 'ON' position.
- Produce Sound: Hold the Otamatone by its stem. Press or slide your finger along the black touch-sensitive strip on the stem to produce different pitches. Higher positions on the strip produce higher notes, and lower positions produce lower notes.
- Vibrato: While pressing the touch strip, gently squeeze the