1. Introduction
The Timex T231W2 is an AM/FM dual alarm clock radio designed for convenience and reliability. It features a large 1.2-inch green LED display for clear visibility, dual alarms that can be set independently, and a programmable sleep timer. An auxiliary input allows connection of external audio devices. A battery backup system maintains time and alarm settings during power interruptions.
2. Key Features
- Wake to AM/FM radio or buzzer
- 20 Station preset memory (10 AM, 10 FM)
- Large, easy-to-read 1.2-inch green LED display
- Line-in jack to connect auxiliary audio sources
- 2-inch dynamic speaker for clear sound
- Programmable 90-minute Sleep Timer
- Battery backup for time and alarm settings
3. Package Contents
- Timex T231W2 AM/FM Dual Alarm Clock Radio (White)
4. Controls and Indicators
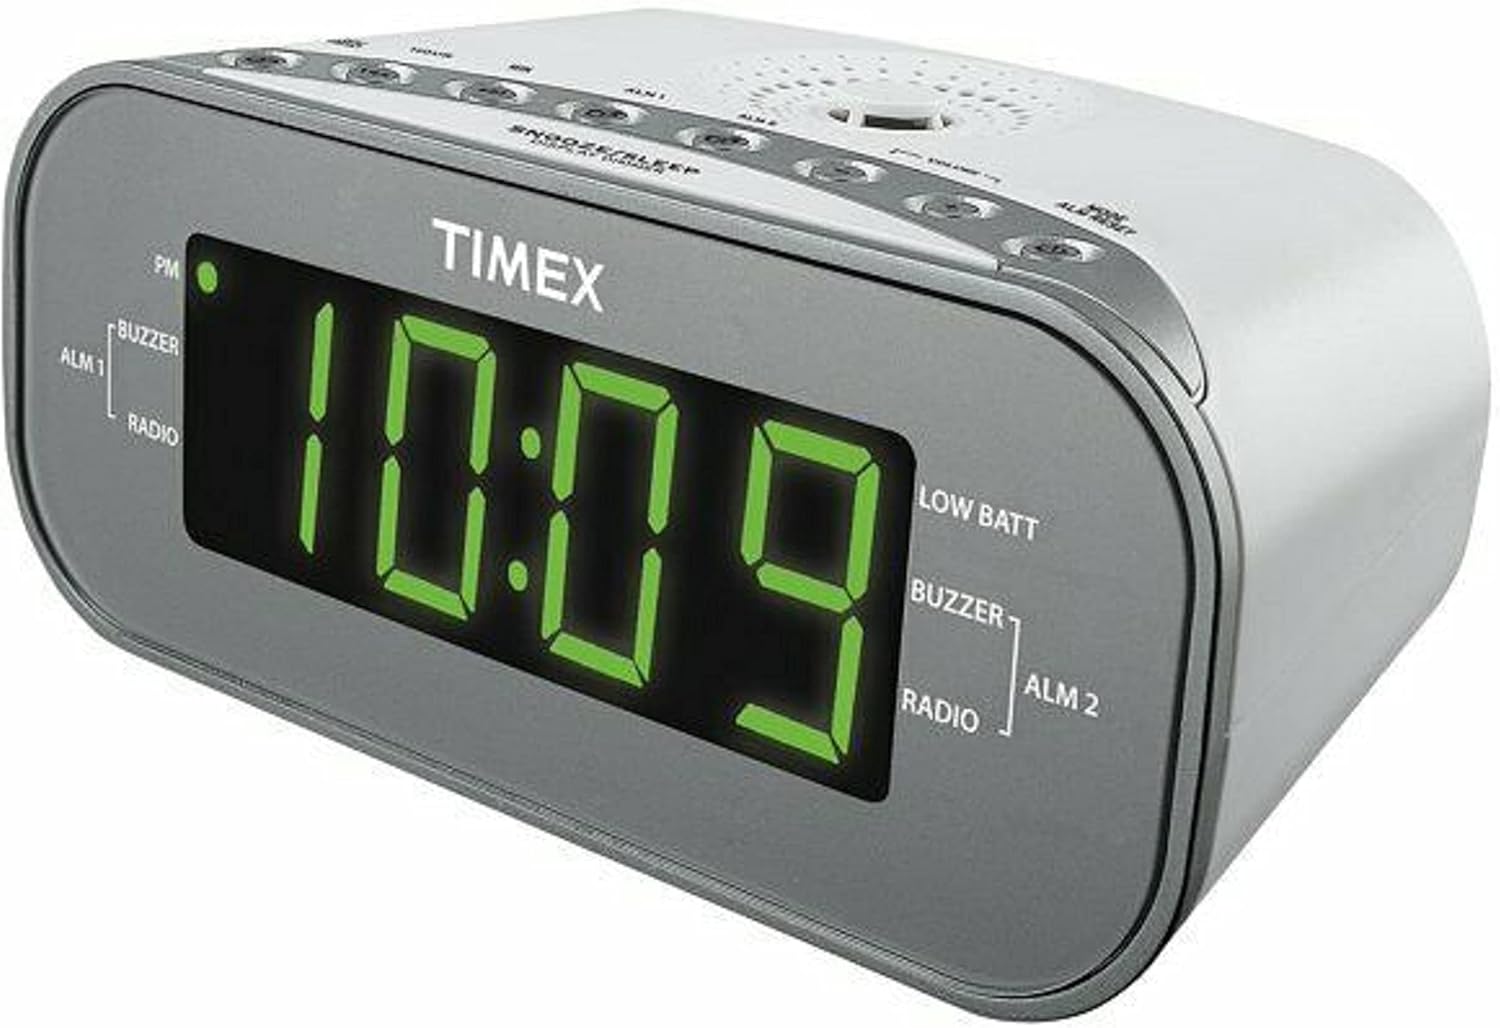
Figure 1: Front View of the Timex T231W2. This image displays the clock radio from a slight angle, highlighting the large green LED display showing the time '10:09'. Indicators for PM, ALM1 (Buzzer/Radio), ALM2 (Buzzer/Radio), and LOW BATT are visible on the display. The top panel shows several control buttons.

Figure 2: Top View of the Timex T231W2 Controls. This image provides a clear view of the control buttons located on the top panel of the clock radio. Buttons include HOUR, MIN, ALM1, ALM2, VOLUME, MODE, ALM RESET, SNOOZE/SLEEP/DISPLAY DIMMER, PRESET, and TUNING controls.
4.1. Display Indicators
- Time Display: Large green LED digits show current time.
- PM Indicator: Lights up when the time is in the PM hours.
- ALM 1 / ALM 2: Indicates which alarm is active.
- BUZZER / RADIO: Indicates if the active alarm is set to buzzer or radio.
- LOW BATT: Lights up when backup batteries are low and need replacement.
4.2. Control Buttons (Top Panel)
- HOUR / MIN: Used to set time and alarm hours/minutes.
- ALM 1 / ALM 2: Used to set and activate Alarm 1 and Alarm 2.
- VOLUME +/-: Adjusts the radio volume.
- MODE / ALM RESET: Switches between functions (e.g., radio, AUX) and resets active alarms.
- SNOOZE / SLEEP / DISPLAY DIMMER: Activates snooze, sets sleep timer, or adjusts display brightness.
- PRESET / TUNING: Used for saving and recalling radio presets, and manually tuning radio frequencies.
5. Setup
5.1. Power Connection
- Plug the AC power cord into a standard wall outlet.
- The display will flash, indicating the unit is powered on but the time is not yet set.
5.2. Battery Backup Installation
The unit requires 2 AAA batteries (not included) for backup power. These batteries maintain time and alarm settings during a power outage.
- Open the battery compartment cover located on the bottom of the unit.
- Insert 2 new AAA batteries, observing the correct polarity (+ and -) as indicated inside the compartment.
- Close the battery compartment cover securely.
- If the 'LOW BATT' indicator lights up, replace the batteries.
5.3. Setting the Current Time
- Press and hold the MODE button until the time display begins to flash.
- Press the HOUR button repeatedly to set the hour. Observe the PM indicator for correct AM/PM setting.
- Press the MIN button repeatedly to set the minutes.
- Press the MODE button again to confirm and exit time setting mode.
6. Operating Instructions
6.1. Radio Operation (AM/FM)
- Press the MODE button repeatedly until 'FM' or 'AM' appears on the display.
- Press the TUNING buttons (up/down arrows) to manually tune to a desired station. Press and hold to auto-scan for the next available station.
- Adjust the volume using the VOLUME +/- buttons.
6.1.1. Setting and Recalling Radio Presets
The unit can store up to 20 radio stations (10 AM, 10 FM).
- Tune to the desired radio station.
- Press and hold the PRESET button until the preset number flashes on the display.
- Use the TUNING buttons to select the desired preset number (P01-P10 for AM/FM).
- Press the PRESET button again to save the station.
- To recall a preset, press the PRESET button repeatedly to cycle through saved stations.
6.2. Setting and Using Alarms (Alarm 1 & Alarm 2)
The clock radio features two independent alarms.
- Press and hold the ALM 1 or ALM 2 button until the alarm time flashes.
- Press the HOUR and MIN buttons to set the desired alarm time.
- Press the ALM 1 or ALM 2 button again to select the wake source: BUZZER or RADIO. The corresponding indicator will light up.
- Press the ALM 1 or ALM 2 button a third time to confirm and activate the alarm. The alarm indicator (ALM 1 or ALM 2) will remain lit.
- To turn off a sounding alarm, press the ALM RESET button. The alarm will reset for the next day.
- To deactivate an alarm completely, press the corresponding ALM 1 or ALM 2 button until its indicator light turns off.
6.3. Snooze Function
When an alarm sounds, press the SNOOZE/SLEEP/DISPLAY DIMMER button to temporarily silence the alarm for approximately 9 minutes. The alarm will sound again after the snooze period.
6.4. Sleep Timer
The sleep timer allows you to fall asleep to the radio, which will automatically turn off after a set period (up to 90 minutes).
- While the radio is playing, press the SNOOZE/SLEEP/DISPLAY DIMMER button repeatedly to cycle through sleep timer options (e.g., 90, 60, 30, 15 minutes, OFF).
- The radio will play for the selected duration and then automatically turn off.
6.5. Display Dimmer
To adjust the brightness of the display, press and hold the SNOOZE/SLEEP/DISPLAY DIMMER button. The display brightness will cycle through different levels. Release the button when the desired brightness is reached.
6.6. Using the Line-in Jack (AUX)
Connect an external audio device (e.g., smartphone, MP3 player) to the unit using a 3.5mm audio cable (not included).
- Plug one end of the 3.5mm audio cable into the Line-in jack on the back of the clock radio.
- Plug the other end into the headphone jack or audio output of your external device.
- Press the MODE button repeatedly until 'AUX' appears on the display.
- Start playback on your external device.
- Adjust the volume using the VOLUME +/- buttons on the clock radio and/or your external device.
7. Maintenance
7.1. Cleaning
- Unplug the unit from the power outlet before cleaning.
- Use a soft, dry cloth to wipe the exterior surfaces.
- Do not use liquid cleaners, abrasive cleaners, or sprays, as these may damage the finish.
7.2. General Care
- Avoid placing the unit in direct sunlight, near heat sources, or in areas with high humidity or dust.
- Do not block ventilation openings.
- If the unit will not be used for an extended period, remove the backup batteries to prevent leakage.
8. Troubleshooting
| Problem | Possible Cause | Solution |
|---|---|---|
| Unit does not power on. | Power cord not securely plugged in. | Ensure the AC power cord is firmly connected to both the unit and a working wall outlet. |
| Display is dim or off. | Display dimmer setting is too low. | Press and hold the SNOOZE/SLEEP/DISPLAY DIMMER button to adjust brightness. |
| Alarm does not sound. | Alarm not activated or set incorrectly. | Ensure the ALM 1/ALM 2 indicator is lit and the alarm time/source is correctly set. |
| Poor radio reception. | Antenna not extended or unit's position. | Extend the FM wire antenna fully. For AM, rotate the unit for best reception. Avoid placing near electronic devices that may cause interference. |
| No sound from AUX input. | Incorrect mode or volume settings. | Ensure the unit is in AUX mode. Check volume levels on both the clock radio and the external device. Verify cable connection. |
| 'LOW BATT' indicator is on. | Backup batteries are low. | Replace the 2 AAA backup batteries. |
9. Specifications
| Feature | Specification |
|---|---|
| Brand | Timex |
| Model Number | T231WY2 |
| Color | White |
| Display Type | LED (Green) |
| Special Features | Alarm, Auto Dimmable, Programmable Sleep Timer, Radio |
| Product Dimensions | 6.9"W x 2.96"H |
| Power Source | AC Power, Battery Powered (Backup) |
| Backup Batteries | 2 AAA batteries required (not included) |
| Item Weight | 1.4 Pounds |
| Connectivity | Line-in Jack (AUX) |
| Radio Bands | AM/FM |
| Presets | 20 (10 AM, 10 FM) |
10. Warranty and Support
For warranty information or technical support, please refer to the documentation included with your purchase or contact the manufacturer directly. Keep your proof of purchase for warranty claims.
11. Safety Information
WARNING: This product can expose you to chemicals including lead, which is known to the State of California to cause cancer and birth defects or other reproductive harm. For more information go to www.P65Warnings.ca.gov.
Always follow basic safety precautions when using electrical appliances to reduce the risk of fire, electric shock, and personal injury.


