Introduction
This manual provides essential instructions for the safe operation, maintenance, and troubleshooting of your JBM 51838 Industrial Wet and Dry Vacuum Cleaner. Please read this manual thoroughly before using the appliance to ensure proper function and to prevent injury or damage.
The JBM 51838 is designed for both wet and dry vacuuming tasks in industrial and commercial environments. Its robust construction and 80-liter capacity make it suitable for demanding cleaning applications.
Safety Instructions
Always follow basic safety precautions when using electrical appliances to reduce the risk of fire, electric shock, and personal injury.
- Read all instructions before use.
- Do not leave the appliance unattended when plugged in. Unplug from outlet when not in use and before servicing.
- Do not use outdoors or on wet surfaces.
- Do not allow to be used as a toy. Close attention is necessary when used by or near children.
- Use only as described in this manual. Use only manufacturer's recommended attachments.
- Do not use with damaged cord or plug. If appliance is not working as it should, has been dropped, damaged, left outdoors, or dropped into water, return it to a service center.
- Do not pull or carry by cord, use cord as a handle, close a door on cord, or pull cord around sharp edges or corners. Do not run appliance over cord. Keep cord away from heated surfaces.
- Do not unplug by pulling on cord. To unplug, grasp the plug, not the cord.
- Do not handle plug or appliance with wet hands.
- Do not put any object into openings. Do not use with any opening blocked; keep free of dust, lint, hair, and anything that may reduce air flow.
- Keep hair, loose clothing, fingers, and all parts of body away from openings and moving parts.
- Do not pick up anything that is burning or smoking, such as cigarettes, matches, or hot ashes.
- Do not use to pick up flammable or combustible liquids, such as gasoline, or use in areas where they may be present.
- Do not use without dust bag and/or filters in place.
- Turn off all controls before unplugging.
- Use extra care when cleaning on stairs.
- Store your appliance indoors in a cool, dry area.
Product Components
The JBM 51838 Industrial Wet and Dry Vacuum Cleaner includes the following main components:
- Motor head assembly
- Stainless steel tank (80 L capacity)
- Hose
- Extension wands (chrome-plated)
- Floor nozzle
- Cartridge filter (for dry use)
- Foam filter (for wet use)
- Wheeled base with handle
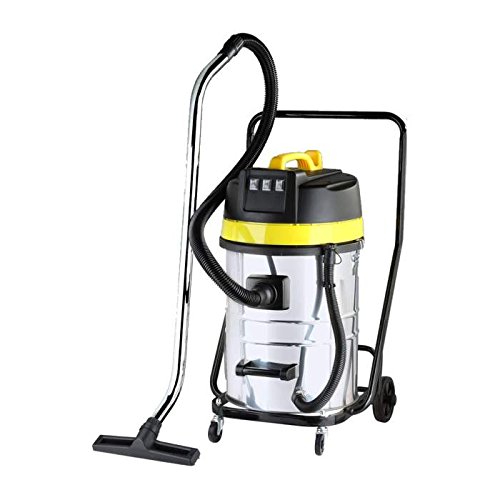
Figure 1: JBM 51838 Industrial Wet and Dry Vacuum Cleaner. This image shows the complete vacuum cleaner assembly, including the stainless steel tank, motor head (yellow and black), flexible hose, chrome extension wand, and floor nozzle, all mounted on a wheeled base with a handle.
Setup and Assembly
Follow these steps to assemble your JBM 51838 vacuum cleaner:
- Unpack Components: Carefully remove all components from the packaging. Verify that all parts listed in the "Product Components" section are present.
- Attach Wheels: Secure the wheels to the wheeled base if they are not pre-assembled. Ensure they are firmly attached for stability.
- Mount Tank to Base: Place the stainless steel tank onto the wheeled base.
- Install Filter:
- For Dry Vacuuming: Install the cartridge filter onto the motor head's filter cage. Ensure it is securely seated.
- For Wet Vacuuming: Remove the cartridge filter and install the foam filter over the filter cage.
- Attach Motor Head: Place the motor head assembly onto the tank. Secure it with the locking clips on either side of the tank.
- Connect Hose: Insert the flexible hose into the suction inlet on the tank. Ensure a tight connection.
- Attach Accessories: Connect the extension wands to the hose, and then attach the desired floor nozzle or other accessory to the end of the wands.
- Power Connection: Ensure the vacuum cleaner is switched off before plugging the power cord into a suitable 220V electrical outlet.
Operating Instructions
Dry Vacuuming
- Ensure the cartridge filter is correctly installed.
- Connect the hose and desired dry vacuuming accessory.
- Plug the power cord into a 220V outlet.
- Turn the power switch to the "ON" position.
- Begin vacuuming the desired surface.
- When finished, turn the power switch to "OFF" and unplug the appliance.
- Empty the tank and clean the filter as described in the Maintenance section.
Wet Vacuuming
Important: Before wet vacuuming, ensure the cartridge filter is removed and the foam filter is installed. Failure to do so will damage the cartridge filter and potentially the motor.
- Remove the cartridge filter and install the foam filter.
- Connect the hose and a suitable wet vacuuming accessory (e.g., squeegee nozzle).
- Plug the power cord into a 220V outlet.
- Turn the power switch to the "ON" position.
- Begin vacuuming liquids. The vacuum has an automatic shut-off when the tank is full.
- When the tank is full or you are finished, turn the power switch to "OFF" and unplug the appliance.
- Empty the tank and clean the foam filter as described in the Maintenance section.
Maintenance
Regular maintenance ensures optimal performance and extends the life of your vacuum cleaner. Always unplug the appliance before performing any maintenance.
Emptying the Tank
- Unplug the vacuum cleaner.
- Release the locking clips and remove the motor head assembly.
- Carefully lift the tank from the wheeled base and empty its contents into a suitable disposal area.
- Clean the inside of the tank with water and mild detergent if necessary, then dry thoroughly.
Filter Cleaning and Replacement
- Cartridge Filter (Dry Use):
- Remove the cartridge filter from the motor head.
- Gently tap the filter to dislodge dust and debris. For heavy dirt, rinse under running water. Allow to air dry completely before reinstallation. Do not use the filter if it is still wet.
- Replace the filter if it is damaged or excessively worn.
- Foam Filter (Wet Use):
- Remove the foam filter from the motor head.
- Rinse the foam filter thoroughly under running water until clean.
- Squeeze out excess water and allow to air dry completely before storage or next use.
General Cleaning
- Wipe the exterior of the vacuum cleaner with a damp cloth. Do not use harsh cleaners or solvents.
- Check the hose and accessories for blockages and clear them as needed.
- Inspect the power cord for any signs of damage. If damaged, have it replaced by a qualified technician.
Troubleshooting
| Problem | Possible Cause | Solution |
|---|---|---|
| Vacuum does not turn on. | No power supply. Power switch is off. Damaged power cord/plug. | Check if the plug is securely in the outlet. Ensure the power switch is in the "ON" position. Do not use if damaged; contact service. |
| Loss of suction. | Tank is full. Filter is clogged. Hose or accessory is blocked. Motor head not properly sealed. | Empty the tank. Clean or replace the filter. Clear any blockages from the hose or accessories. Ensure motor head clips are securely fastened. |
| Water leaks during wet vacuuming. | Foam filter not installed or damaged. Tank overfilled (automatic shut-off may be faulty). Seals are damaged. | Ensure foam filter is correctly installed and undamaged. Do not overfill the tank; empty before it reaches maximum capacity. Inspect seals and replace if necessary. |
| Unusual noise or vibration. | Foreign object in motor. Damaged motor. | Turn off and unplug immediately. Inspect for foreign objects. If noise persists, contact service. |
Specifications
| Feature | Detail |
|---|---|
| Model Number | 51838 |
| Brand | JBM |
| Type | Industrial Wet and Dry Vacuum Cleaner |
| Capacity | 80 Liters |
| Wattage | 1000 Watts |
| Voltage | 220 Volts |
| Power Source | Electric with cable |
| Filter Type | Cartridge (Dry), Foam (Wet) |
| Product Weight | 28 kg |
| Dimensions (Package) | 111 x 59 x 57.5 cm |
| Surface Recommendation | Hard floor |
Warranty and Support
For warranty information, please refer to the documentation provided at the time of purchase or contact your retailer. JBM products are designed for durability and performance. Should you require technical assistance or spare parts, please contact JBM customer support or an authorized service center.
Manufacturer: JBM
Contact Information: Please refer to the official JBM website or your purchase documentation for the most current contact details for customer support and service.


