1. Introduction
Thank you for choosing the Xpelair C4HTR 4-inch Simply Silent Contour Extractor Fan. This fan is designed for efficient and quiet ventilation in bathrooms, kitchens, and other areas requiring moisture and odor extraction. It features a built-in humidistat and timer for automatic operation based on humidity levels and adjustable run-on time.
The C4HTR model is recognized for its extremely quiet operation, making it one of the quietest intermittent bathroom fans available. Its sleek design allows for versatile installation on walls, ceilings, or panels.

Image 1.1: The Xpelair C4HTR fan, highlighting its silent running at 16dBA at 3m (15 l/s).
2. Safety Information
Please read all instructions carefully before installation and use. Failure to follow these instructions may result in electric shock, fire, or personal injury.
- Installation must be carried out by a qualified electrician in accordance with current wiring regulations.
- Ensure the power supply is disconnected at the mains before commencing any installation, maintenance, or cleaning.
- This appliance is not intended for use by persons (including children) with reduced physical, sensory or mental capabilities, or lack of experience and knowledge, unless they have been given supervision or instruction concerning use of the appliance by a person responsible for their safety.
- Children should be supervised to ensure that they do not play with the appliance.
- Do not install the fan where it may be exposed to direct water spray.
- Ensure adequate ventilation is provided to prevent the back-flow of gases from open-flued appliances into the room.
- The fan must not be connected to a flexible ducting system that is less than 4 inches (100mm) in diameter.
3. Package Contents
Verify that all components are present before beginning installation:
- Xpelair C4HTR Extractor Fan Unit
- Mounting Screws and Wall Plugs
- Instruction Manual (this document)
4. Installation
The Xpelair C4HTR fan is suitable for wall, ceiling, or panel mounting. The 'Twist and Click' front cover simplifies installation and maintenance.
4.1 Mounting Options
The fan can be installed in various orientations:

Image 4.1: Visual representation of ceiling and wall mounting applications for the fan.
4.2 Preparing for Installation
- Disconnect Power: Ensure the electrical supply to the installation area is completely switched off at the consumer unit/fuse box.
- Prepare Opening: Create a circular opening of appropriate diameter (refer to specifications for exact dimensions) in the wall, ceiling, or panel.
- Separate Components: The fan consists of a main body and a front cover. Gently twist and click to separate the front cover from the main unit for easier mounting.
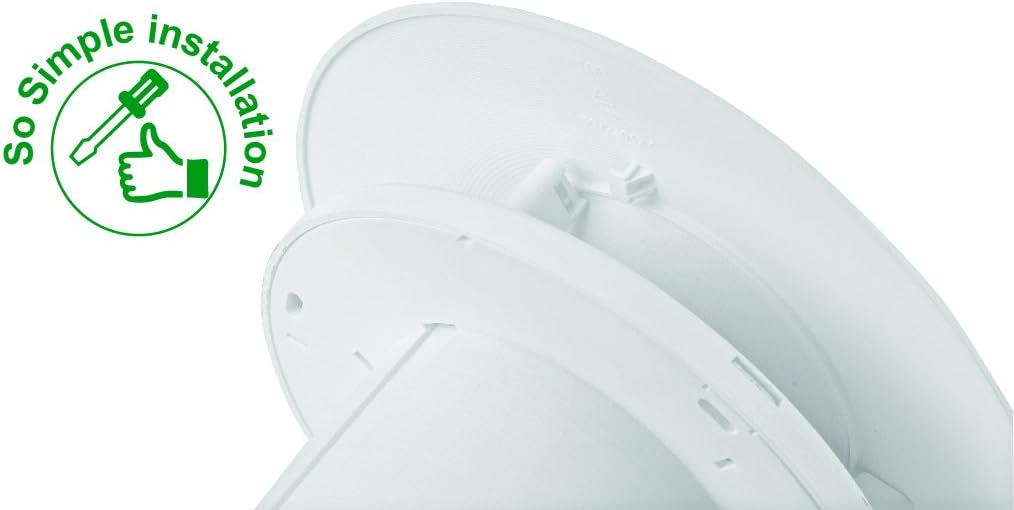
Image 4.2: The 'So Simple installation' feature, indicating ease of assembly with a screwdriver.
4.3 Electrical Connection
The C4HTR requires a 240V electrical supply. Wiring should be performed by a qualified electrician.
- Identify the Live (L), Neutral (N), and Switched Live (T) terminals on the fan unit.
- Connect the mains Live (L) to the fan's Live terminal.
- Connect the mains Neutral (N) to the fan's Neutral terminal.
- For timer and humidistat functionality, connect a switched live supply (e.g., from a light switch) to the fan's Switched Live (T) terminal. This allows the fan to activate when the light is switched on, or to override the humidistat.
- Ensure all connections are secure and correctly insulated.
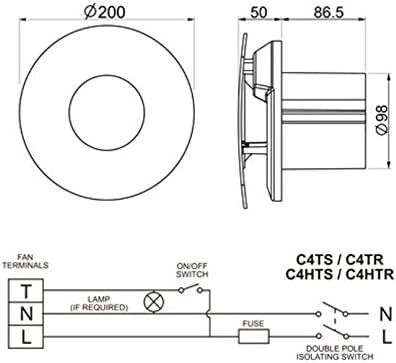
Image 4.3: Wiring diagram for C4HTR models, showing connections for Live, Neutral, and Switched Live, along with fan dimensions.
4.4 Securing the Fan
- Position the main fan body into the prepared opening.
- Secure the fan body to the wall/ceiling/panel using the provided screws and wall plugs.
- Once the main body is secure and wired, reattach the front cover by aligning and twisting until it clicks into place.
5. Setup and Adjustment
The C4HTR fan features an adjustable humidistat and timer. These settings are typically accessed by removing the front cover.
5.1 Humidistat Adjustment
The humidistat controls when the fan activates based on the room's humidity level. It can be adjusted to suit your environment.
- Locate the humidistat adjustment dial or screw on the fan unit (usually behind the front cover).
- Turning the dial towards a higher setting (e.g., 'Max' or a higher percentage) means the fan will only activate at higher humidity levels.
- Turning the dial towards a lower setting (e.g., 'Min' or a lower percentage) means the fan will activate at lower humidity levels, running more frequently.
- Adjust incrementally and observe fan behavior over a few days to find the optimal setting for your needs.
5.2 Timer Adjustment
The timer controls how long the fan continues to run after the switched live supply is turned off (e.g., after the light is switched off) or after the humidity drops below the set point.
- Locate the timer adjustment dial or screw (often labeled 'Timer' or with time increments).
- The timer can typically be set from a few minutes up to 30 minutes.
- Turn the dial to increase or decrease the run-on time as desired.
6. Operating Instructions
The Xpelair C4HTR fan operates automatically based on its humidistat and timer settings, or manually via a switched live connection.
6.1 Automatic Operation (Humidistat)
- When the ambient humidity level in the room rises above the set point on the humidistat, the fan will automatically switch on.
- The fan will continue to run until the humidity level drops below the set point, after which it will run for the duration of the set timer.
6.2 Manual Operation (Switched Live)
- If connected to a switched live supply (e.g., room light switch), the fan will activate when the switch is turned on.
- When the switch is turned off, the fan will continue to run for the duration set on the timer.
6.3 Speed Settings
The fan offers two speed settings for airflow:
- Speed 1: 15 litres per second (L/s)
- Speed 2: 21 litres per second (L/s)
Refer to the installation guide or consult a qualified electrician for instructions on how to select the desired speed setting, as this may involve internal wiring adjustments.

Image 6.1: The Xpelair C4HTR fan discreetly installed on a bathroom ceiling.
7. Maintenance
Regular cleaning ensures optimal performance and longevity of your Xpelair C4HTR fan.
7.1 Cleaning the Fan
- Disconnect Power: Always switch off the electrical supply to the fan at the mains before cleaning.
- Remove Front Cover: Gently twist and click to remove the front cover.
- Clean Cover and Impeller: Wipe the front cover and the fan impeller blades with a soft, damp cloth. A mild detergent can be used if necessary. Do not use abrasive cleaners or solvents.
- Dry Thoroughly: Ensure all parts are completely dry before reassembling.
- Reattach Cover: Align the front cover and twist until it clicks securely into place.
- Restore Power: Switch the electrical supply back on at the mains.

Image 7.1: The Xpelair C4HTR fan, illustrating its easy-clean design with a sponge icon.
8. Troubleshooting
If your Xpelair C4HTR fan is not operating as expected, refer to the following common issues and solutions:
| Problem | Possible Cause | Solution |
|---|---|---|
| Fan does not turn on. | No power supply. Humidistat set too high. Timer not activated. | Check mains power and circuit breaker. Adjust humidistat to a lower setting. Ensure switched live is active or humidity is high enough. |
| Fan runs continuously. | Humidistat set too low. Timer set too long. Faulty humidistat/timer. | Adjust humidistat to a higher setting. Adjust timer to a shorter duration. Contact qualified electrician or support. |
| Fan is noisy. | Obstruction in impeller. Loose mounting. Motor issue. | Disconnect power and check for obstructions. Ensure fan is securely mounted. Contact qualified electrician or support. |
| Poor extraction. | Blocked grille/ducting. Fan speed set too low. | Clean grille and check ducting for blockages. Adjust fan to higher speed setting (if applicable). |
If the problem persists after attempting these solutions, please contact Xpelair customer support or a qualified electrician.
9. Specifications
| Feature | Detail |
|---|---|
| Model Name | C4HTR |
| Brand | Xpelair |
| Style | with hygrostat and timer |
| Color | White |
| Voltage | 240 Volts |
| Noise Level | 16 Decibels |
| Number of Speeds | 2 (15 l/s and 21 l/s) |
| Mounting Type | Wall Mount, Ceiling Mount, Panel Mount |
| Control Method | Touch (for adjustments) |
| Product Dimensions | 0.31 x 0.31 x 0.31 inches (Note: This seems to be a placeholder or incorrect data, actual dimensions are likely larger for a 4-inch fan. Refer to Image 4.3 for diagrammatic dimensions.) |
| Item Weight | 0.32 ounces (Note: This seems to be a placeholder or incorrect data for a fan.) |
| UPC | 798256208287 |
Note: The provided product dimensions and item weight appear to be generic placeholder values. For accurate physical dimensions, please refer to the technical drawings or contact Xpelair directly.
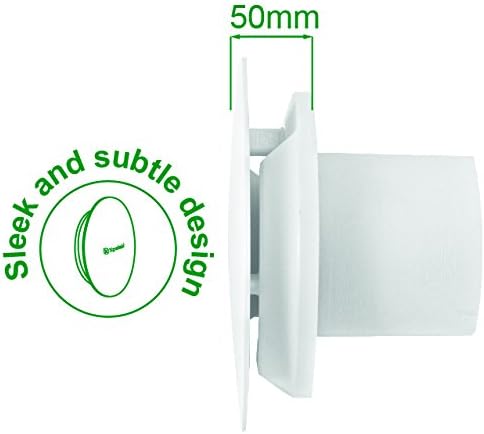
Image 9.1: Side profile of the fan, highlighting its sleek design and a depth of 50mm.
10. Warranty and Support
10.1 Manufacturer's Warranty
The Xpelair C4HTR fan comes with a 2-year manufacturer warranty from the date of purchase. This warranty covers defects in materials and workmanship under normal use. Please retain your proof of purchase for warranty claims.
The warranty does not cover damage caused by improper installation, misuse, neglect, unauthorized repairs, or normal wear and tear.
10.2 Customer Support
For technical assistance, troubleshooting beyond this manual, or warranty claims, please contact Xpelair customer support through their official website or the retailer where the product was purchased.
When contacting support, please have your product model number (C4HTR) and proof of purchase readily available.


