
1. Overview
The Midline Valve 12-inch frost-free sillcock with integral vacuum breaker is designed to provide convenient outdoor water access while preventing freezing and backflow. Constructed from lead-free, chrome-plated brass, this sillcock offers durability and reliable performance. It is compatible with 1/2-inch MIP threaded or 1/2-inch solder cup (sweat) water supply connections and features a standard 3/4-inch MHT outlet for garden hoses and irrigation systems.
This product is UPC and NSF approved and rated for 150 WOG working pressure, ensuring it meets safety and performance standards.

Image 1.1: Midline Valve Frost-Free Anti-Siphon Sillcock installed on a brick wall, demonstrating its application for outdoor water access.
2. Product Features
- Dual Connection Options: Designed to fit 1/2-inch MIP threaded or 1/2-inch solder cup (sweat) water supply connections, offering installation flexibility.
- Standard 3/4-Inch MHT Outlet: Compatible with standard garden hoses, sprinklers, and irrigation systems for convenient outdoor water access.
- Durable Chrome-Plated Brass: Features a brass body and tube with a chrome-plated finish for long-lasting strength and corrosion resistance.
- 12-Inch Frost-Free Anti-Siphon Design: The extended 12-inch length ensures the valve mechanism is positioned inside the heated wall space, preventing water in the pipe from freezing. An integral vacuum breaker prevents backflow into the main water supply.
- Lead-Free & Certified: UPC and NSF approved, meeting lead-free safety standards. Rated for 150 WOG working pressure for dependable performance.

Image 2.1: Key features of the sillcock, including its multi-purpose functionality, anti-siphon vacuum breaker, and durable construction.
3. Components
The Midline Valve Frost-Free Anti-Siphon Sillcock consists of several key components:
- Multi-Turn Handle: Controls water flow.
- Vacuum Breaker Cap: Prevents back-siphonage.
- Male Hose Connector: For attaching standard garden hoses.
- Stem Body: The main shaft extending into the wall.
- MIP Connector / Inner SWT Fitting: The inlet connection point for the water supply inside the building.

Image 3.1: Labeled diagram of the sillcock's main components.

Image 3.2: Product dimensions and connection sizes for the 12-inch model.
4. Installation
Proper installation is crucial for the frost-free function and overall performance of the sillcock. This guide focuses on the sweat connection method.
For Sweat Connection Installation:
- Step 1: Remove Inner Stem Cartridge. Before soldering, carefully remove the inner stem cartridge to prevent damage to the rubber gasket/washer from heat.
- Step 2: Solder Pipe. On the interior side of the wall, proceed with soldering the water supply pipe to the sillcock's SWT connection. Ensure a secure and leak-free joint.
- Step 3: Reinstall Inner Stem Cartridge. After the soldering is complete and cooled, correctly reinstall the inner stem cartridge into the sillcock body.
- Step 4: Test for Leaks. Open the main water supply and thoroughly check for any leaks before regular use.
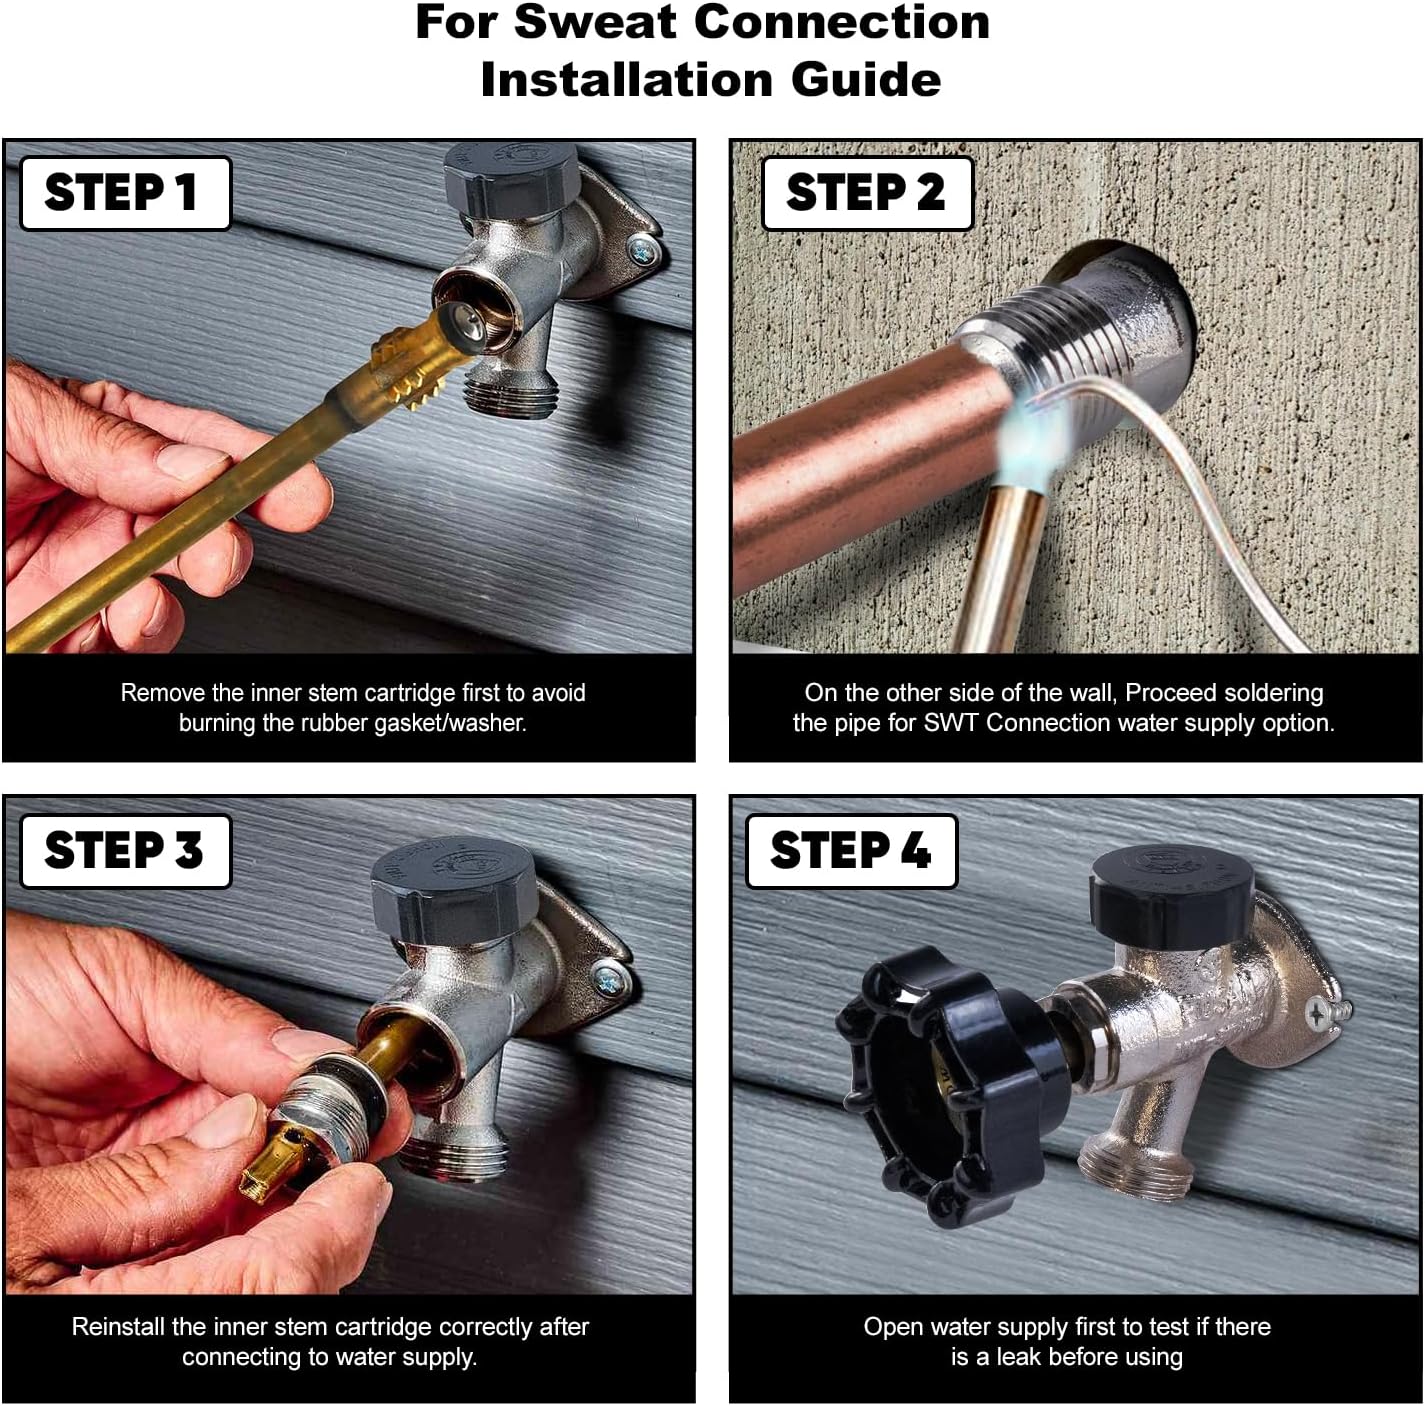
Image 4.1: Visual guide for sweat connection installation.
5. Operation
Operating the Midline Valve sillcock is straightforward:
- Turning On Water: Rotate the multi-turn handle counter-clockwise to open the valve and allow water to flow.
- Adjusting Flow: The multi-turn handle allows for precise control over water pressure and flow rate.
- Turning Off Water: Rotate the multi-turn handle clockwise until it stops to close the valve and stop water flow.
- Hose Connection: Attach your standard 3/4-inch garden hose to the male hose connector by screwing it on clockwise until snug. Ensure a washer is in place to prevent leaks.
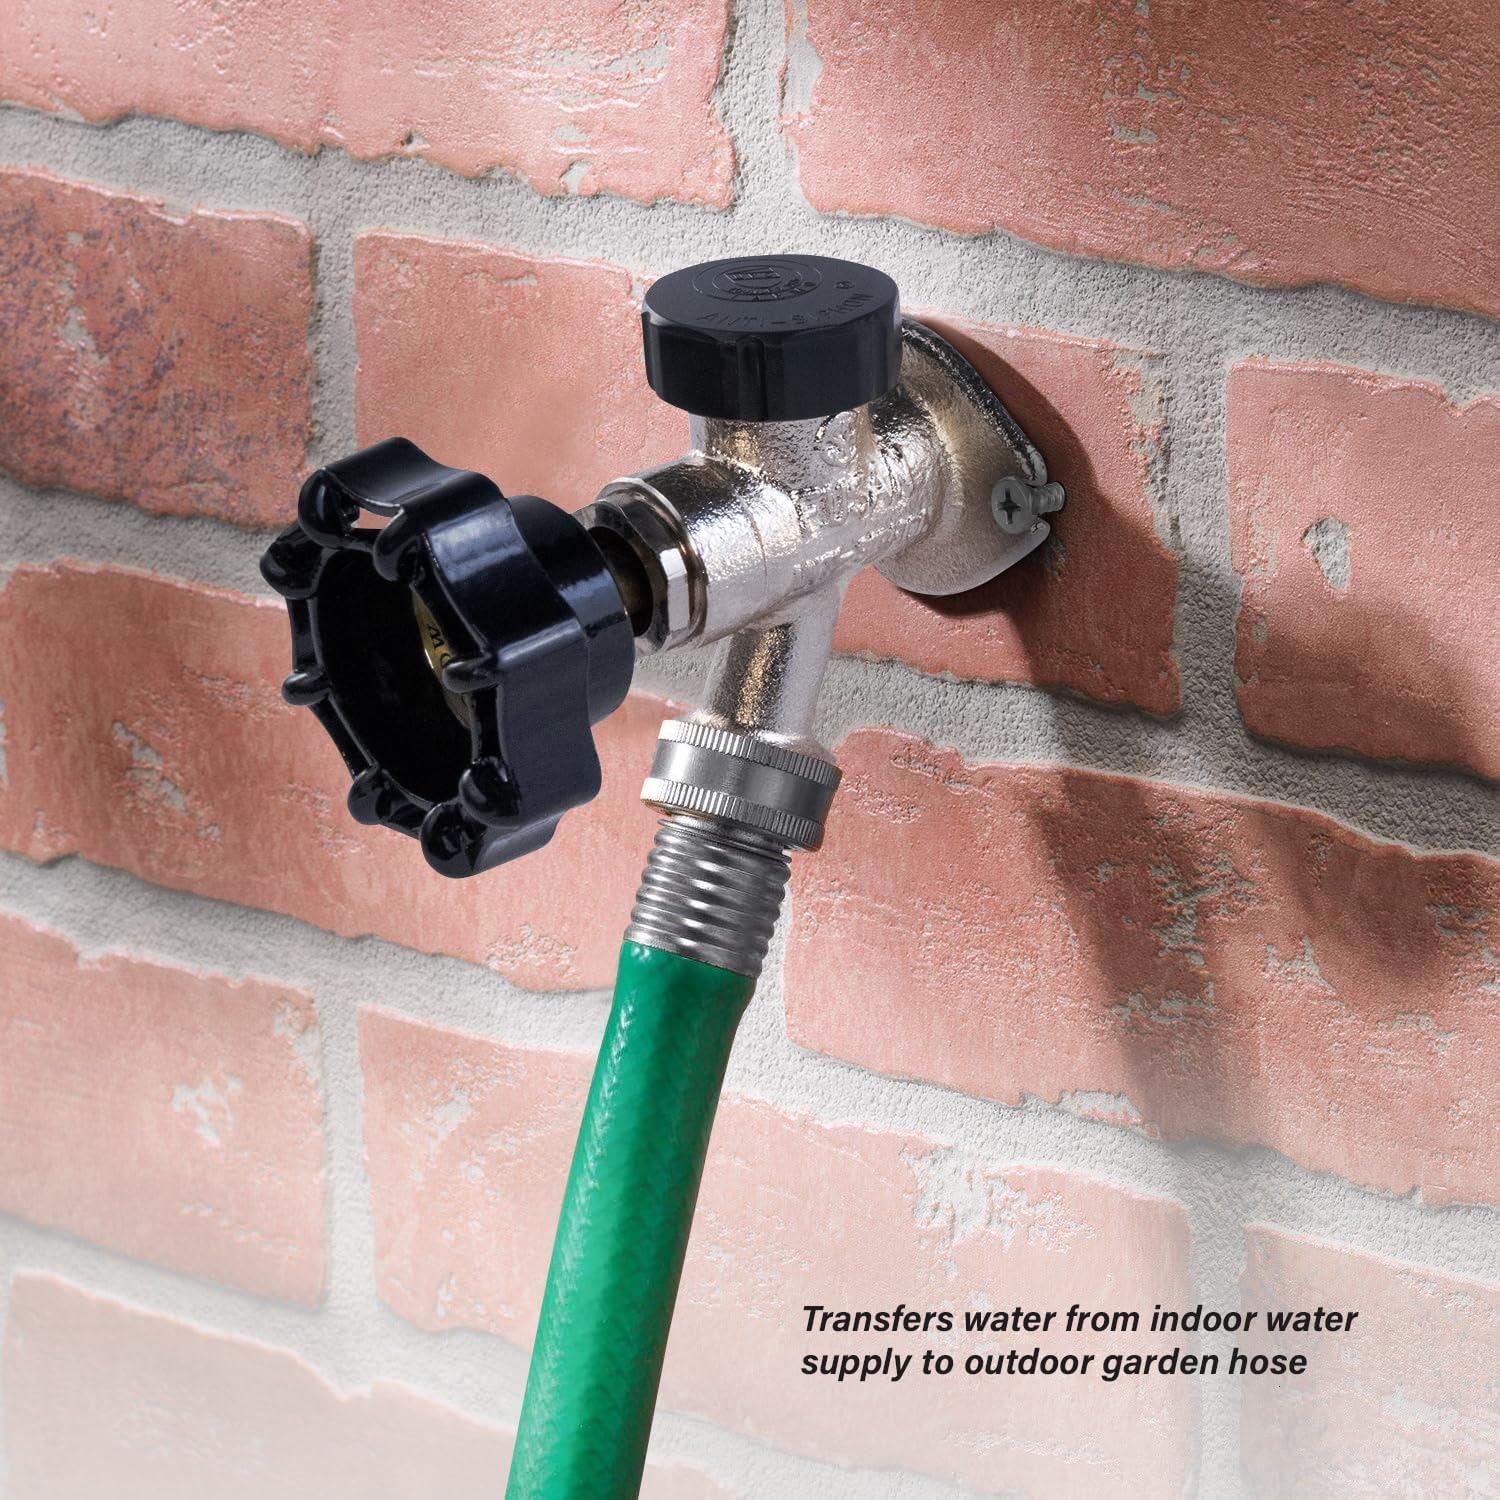
Image 5.1: Sillcock with a garden hose connected, ready for use.

Image 5.2: Hand operating the multi-turn handwheel to control water flow.
6. Maintenance
Regular maintenance ensures the longevity and proper function of your frost-free sillcock:
- Winterization: For optimal frost protection, always disconnect hoses from the sillcock before freezing temperatures arrive. This allows any residual water in the spout to drain completely.
- Inspection: Periodically inspect the sillcock for any signs of wear, corrosion, or leaks. Check the vacuum breaker cap for damage.
- Cleaning: Clean the exterior of the sillcock with a mild soap and water solution as needed to maintain its chrome-plated finish.
- Gasket/Washer Replacement: If you notice drips or leaks from the hose connection, the rubber washer inside the hose bib may need replacement.
7. Troubleshooting
Here are some common issues and their potential solutions:
- No Water Flow:
- Ensure the main water supply to the sillcock is open.
- Check if the sillcock handle is fully turned to the 'ON' position.
- Verify that the water supply line inside the house is not shut off or frozen.
- Water Leaking from Hose Connection:
- Tighten the hose connection.
- Replace the rubber washer inside the hose connection.
- Inspect the hose for damage.
- Water Leaking from Vacuum Breaker Cap:
- A small amount of water may discharge from the vacuum breaker during operation, which is normal.
- If continuous or excessive leaking occurs, the vacuum breaker may be faulty and require replacement. Consult a professional plumber.
- Sillcock Freezes:
- Ensure all hoses are disconnected from the sillcock during freezing weather.
- Verify that the sillcock is installed correctly with the valve mechanism inside the heated portion of the wall.
- If the pipe has burst, immediately shut off the main water supply and contact a qualified plumber.
8. Specifications
| Specification | Detail |
|---|---|
| Brand | Midline Valve |
| Model Number | 84343 |
| Size | 12 inches |
| Material | Brass |
| Exterior Finish | Chrome |
| Inlet Connection Size | 1/2 inch |
| Inlet Connection Type | MIP (Male Iron Pipe) / Sweat (Solder) |
| Outlet Connection Size | 3/4 inch |
| Outlet Connection Type | MHT (Male Hose Thread) |
| Maximum Operating Pressure | 150 PSI (Pound per Square Inch) WOG |
| Number of Ports | 2 |
| Certifications | NSF, UPC |
| Item Weight | 2.56 ounces |
| Product Dimensions (L x W x H) | 3 x 1 x 2 inches (Note: This refers to the valve body, not the full 12-inch length) |
9. Warranty and Support
Specific warranty details for the Midline Valve 12 Inch Frost-Free Anti-Siphon Sillcock are not provided in this manual. For warranty information, technical support, or to inquire about replacement parts, please contact Midline Valve directly through their official website or customer service channels.
Always ensure to follow local plumbing codes and regulations during installation and maintenance. If you are unsure about any installation or repair procedures, it is recommended to consult a qualified professional plumber.