
AKG P220
Contents
AKG P220 Vocal Condenser Microphone User Manual
Model: P220 | Brand: AKG
1. Introduction
The AKG P220 is a large-diaphragm true condenser microphone designed to deliver warm and clear sound. It is an ideal choice for recording lead vocals, acoustic guitars, and brass instruments in both studio and live performance environments. This manual provides essential information for the proper setup, operation, and maintenance of your AKG P220 microphone.

Figure 1.1: Front view of the AKG P220 Vocal Condenser Microphone, showcasing its robust black body and metallic grille.
2. Safety Information
- Phantom Power: The AKG P220 requires 48V phantom power for operation. Ensure your audio interface or mixer provides this power.
- Handle with Care: This is a precision instrument. Avoid dropping or subjecting the microphone to strong impacts.
- Environmental Conditions: Do not expose the microphone to extreme temperatures, humidity, or direct sunlight.
- Cleaning: Use a soft, dry cloth for cleaning. Do not use liquid cleaners or solvents.
- Disassembly: Do not attempt to disassemble or modify the microphone. This will void the warranty and may cause damage.
3. Package Contents
Verify that all items listed below are included in your AKG P220 package:
- AKG P220 Vocal Condenser Microphone
- Spider-type Shock Mount
- Aluminum Carrying Case

Figure 3.1: The AKG P220 microphone, its shock mount, and the durable aluminum carrying case included in the package.
4. Setup
4.1. Attaching the Shock Mount
- Carefully remove the AKG P220 microphone from its carrying case.
- Gently insert the microphone into the spider-type shock mount. Ensure it is securely seated within the elastic bands to minimize handling noise and vibrations.
- Screw the shock mount onto a standard microphone stand.

Figure 4.1: The AKG P220 microphone securely placed within its shock mount, ready for attachment to a stand.
4.2. Connecting the Microphone
- Connect a balanced XLR cable to the XLR output connector located at the bottom of the AKG P220 microphone.
- Connect the other end of the XLR cable to an input on your audio interface, mixer, or preamplifier that provides 48V phantom power.
- Ensure phantom power is activated on your connected device. The microphone will not function without it.
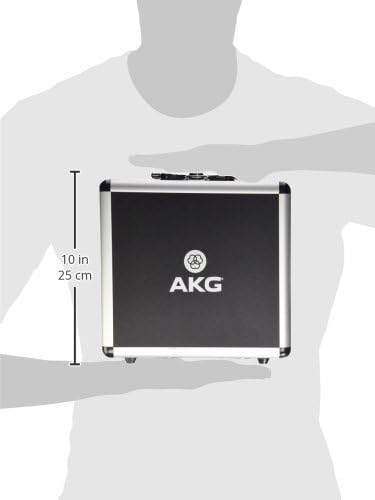
Figure 4.2: The bottom of the AKG P220 microphone, highlighting the XLR connector for audio output.

Figure 4.3: Rear view of the AKG P220 microphone, showing the switches for bass-cut and attenuation pad.
5. Operating the Microphone
5.1. Controls and Features
The AKG P220 features two important switches:
- Bass-Cut Filter: This switch activates a low-frequency roll-off filter. It is useful for reducing unwanted low-end rumble, proximity effect, or stage noise. Engage this filter when recording vocals or acoustic instruments to achieve a cleaner sound.
- Attenuation Pad (-20dB): This switch engages a -20dB pre-attenuation pad. Use this feature when recording very loud sound sources, such as drums, loud guitar amplifiers, or powerful vocalists, to prevent input clipping and distortion in your audio interface or mixer.
5.2. Microphone Placement
Optimal microphone placement is crucial for achieving the best sound quality. Experiment with distance and angle relative to the sound source. For vocals, a distance of 6-12 inches (15-30 cm) from the mouth is a common starting point. For instruments, consider the instrument's sound projection and the desired sonic character.
6. Maintenance
- Storage: Always store the microphone in its aluminum carrying case when not in use to protect it from dust, moisture, and physical damage.
- Cleaning: Wipe the microphone body with a soft, dry, lint-free cloth. Do not use abrasive cleaners, solvents, or excessive moisture.
- Shock Mount Care: Periodically inspect the elastic bands of the shock mount for wear and tear. Replace them if they show signs of stretching or breakage to maintain effective vibration isolation.
7. Troubleshooting
| Problem | Possible Cause | Solution |
|---|---|---|
| No sound output | No phantom power; faulty cable; incorrect input selection | Ensure 48V phantom power is enabled; try a different XLR cable; verify correct input is selected on your audio device. |
| Distorted sound | Input clipping; microphone too close to source; attenuation pad not engaged for loud sources | Reduce input gain on your audio device; increase distance from sound source; engage the -20dB attenuation pad for loud sources. |
| Excessive low-end rumble/boominess | Proximity effect; environmental low-frequency noise | Engage the bass-cut filter; increase distance from sound source; use acoustic treatment in your recording space. |
| Microphone picking up vibrations | Shock mount not properly installed; worn shock mount bands; vibrations from stand/floor | Ensure microphone is correctly seated in shock mount; replace worn shock mount bands; use a heavier mic stand or isolation pad. |
8. Specifications
| Feature | Detail |
|---|---|
| Microphone Type | Large-diaphragm Condenser |
| Polar Pattern | Cardioid (Unidirectional) |
| Frequency Response | 20 Hz - 20 kHz |
| Audio Sensitivity | 33.9 dB |
| Impedance | 200 Ohm |
| Signal-to-Noise Ratio | 78 dB |
| Noise Level | 16 dB |
| Attenuation Pad | -20dB Switchable |
| Bass-Cut Filter | Switchable |
| Power Requirement | 48V Phantom Power |
| Connector Type | XLR |
| Material | Aluminium Brass |
| Color | Black |
| Item Weight | 1.17 pounds (0.53 kg) |
| Product Dimensions (L x W x H) | 12 x 8 x 6 inches |
| Model Number | 3101H00420 |
9. Warranty and Support
AKG products are designed for durability and performance. For specific warranty information, please refer to the warranty card included with your product or visit the official AKG website. For technical support, product registration, or service inquiries, please contact AKG customer support through their official channels.
You can also find additional resources and support on the AKG Store on Amazon.
Ask a question about this manual
Ask about setup, troubleshooting, compatibility, parts, safety, or missing instructions. Manuals+ will review the question and use this page’s manual context to help answer it.