
1. Introduction
This manual provides essential information for the installation, maintenance, and troubleshooting of the BRANDT 1222J5 POLY-V drive belt. This component is designed for use in various washing machine models from Brandt, Fagor, Vedette, and Thomson. Proper installation and care are crucial for the optimal performance and longevity of your appliance.
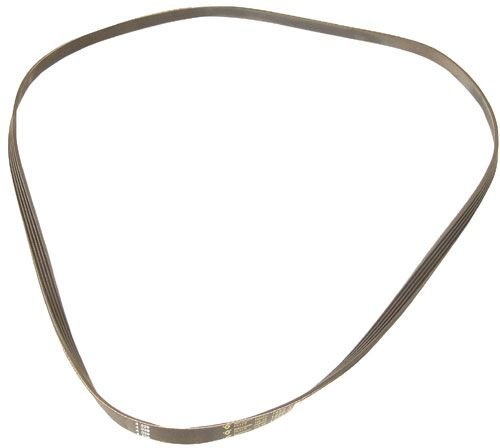
Image 1: The BRANDT 1222J5 POLY-V drive belt. This image shows the multi-ribbed design of the belt, indicating its POLY-V type, and its typical appearance as a replacement part.
2. Safety Information
Always observe the following safety precautions when working with electrical appliances:
- Disconnect Power: Before attempting any installation or maintenance, ensure the washing machine is unplugged from the electrical outlet and the water supply is turned off.
- Wear Protective Gear: Use appropriate personal protective equipment, such as gloves, to prevent injury.
- Consult a Professional: If you are unsure about any step, consult a qualified technician.
- Handle with Care: Drive belts can be under tension. Exercise caution during removal and installation.
3. Compatibility
The 1222J5 POLY-V drive belt is compatible with a range of washing machine models. It is marked as 1219J5 with a length of 1219mm and a J-type profile with 5 ribs, and can replace a 1222J5 belt. Verify your appliance's model number against the list below:
Compatible BRANDT Models:
- 540XE
- 542NEW
- 553TX
- 555TX
- 779VX
- 785VXA
- 977VX
- 987VX
- 999TDS
- B853
- BIO100B
- BIO70
- BIO85B
- BM833
- BM988
- BT800
- BX510
- G5100
- G5400
- LMA42
- MC41
- MC43
- MI402
- MLB446
- MLB850
- MLS785
- S7300
- S9500
- TR8700
- TS45B
- TS8507
- TS8533
- TS8537
- V806T
- VB8200T
- VB830T
- VG750
- VG801
- VG811
- VN1046
- VN82T
- VV1045
- VV945
- Z8500
- Z8502
- Z8504
- Z8511
- Z8513
- Z8570
Compatible VEDETTE Models:
- 4468
- 4469
- 4470
- 4483
- 44B
- 454Z
- 5400T
- 5571
- 5571BB
- 5573
- 5587
- 5585
- 5589
- 5596
- 589TX
- 750T
- 752T
- 756T
- 7575
- 7576
- 7586
- 7599
- 8575
- V8575
- 8582S
- 8584
- 8585
- 8586
- 8597
- 8599
- C4000
- HP701
- HP850
- HPB101
- HPB700
- HPB851
- STAR2000
- STAR2050
- STAR2080
- V5587
Compatible FAGOR Models:
- F3
Compatible THOMSON Models:
- LL1000CH
- TP860N
- TS880
- TX209
- TX209V
- TX238
- TX338
- TX368
4. Installation Instructions
Replacing a washing machine drive belt typically involves accessing the motor and drum pulley. The following steps are general guidelines. Always refer to your specific washing machine's service manual for detailed instructions.
- Prepare the Appliance: Ensure the washing machine is completely disconnected from power and water. Move the appliance to an area with sufficient space to work.
- Access the Belt Area: Depending on your washing machine model, you may need to remove the back panel, top panel, or front panel to access the motor and drum pulley. Use appropriate tools to carefully remove fasteners.
- Remove the Old Belt: Locate the old drive belt. It will typically be stretched between the motor pulley and the larger drum pulley. Carefully pry the old belt off the pulleys. Note its orientation if it has a specific direction.
- Inspect Pulleys: Before installing the new belt, inspect both the motor and drum pulleys for any damage, wear, or debris that could affect the new belt's performance. Clean as necessary.
- Install the New Belt:
- First, place the new belt around the smaller motor pulley.
- Next, partially place the belt onto the larger drum pulley.
- While holding the belt firmly on the motor pulley and partially on the drum pulley, slowly rotate the drum pulley by hand. The belt should gradually roll onto the drum pulley until it is fully seated. Ensure the ribs of the belt align correctly with the grooves on both pulleys.
- Verify Tension and Alignment: Once installed, rotate the drum by hand a few full turns to ensure the belt is properly seated, aligned, and has appropriate tension. It should feel snug but not excessively tight.
- Reassemble the Appliance: Carefully reattach any panels or components that were removed. Ensure all fasteners are securely tightened.
- Test the Appliance: Reconnect power and water. Run a short, empty wash cycle to confirm proper operation and that the belt is functioning correctly without unusual noises or slippage.
5. Operating Considerations (Post-Installation)
After successful installation of the drive belt, the washing machine should operate as intended. Pay attention to the following during initial use:
- Listen for Unusual Noises: During the first few cycles, listen for any new grinding, squealing, or thumping sounds, which could indicate improper belt installation or other issues.
- Check Drum Rotation: Ensure the drum rotates smoothly and consistently during wash and spin cycles.
- Observe Performance: Confirm that the washing machine completes cycles normally and that clothes are washed and spun effectively.
6. Maintenance
Regular inspection of the drive belt can help prevent future issues and extend the life of your washing machine:
- Periodic Inspection: If accessible, periodically inspect the drive belt for signs of wear, cracking, fraying, or excessive looseness. The frequency of inspection depends on appliance usage.
- Cleanliness: Ensure the area around the belt and pulleys remains free of lint, debris, or foreign objects that could interfere with belt operation.
- Replace When Worn: A worn or damaged belt should be replaced promptly to avoid further damage to the washing machine.
7. Troubleshooting Common Issues
If your washing machine exhibits problems after belt replacement, consider the following:
| Symptom | Possible Cause | Solution |
|---|---|---|
| Drum not spinning or spinning slowly | Belt is loose, broken, or improperly installed. | Re-check belt tension and alignment. Replace if broken. |
| Squealing noise during operation | Belt slippage due to incorrect tension or worn pulleys. | Ensure belt is properly seated. Inspect pulleys for wear. |
| Burning smell | Belt friction due to misalignment or excessive load. | Check belt alignment. Reduce laundry load. |
| Loud thumping or banging | Belt hitting internal components, or drum imbalance. | Verify belt is clear of obstructions. Check drum balance. |
If troubleshooting steps do not resolve the issue, it is recommended to contact a qualified appliance repair technician.
8. Specifications
- Part Number: AP113085
- Type: POLY-V Drive Belt
- Marking on Belt: 1219J5
- Length: 1219mm (can replace 1222J5)
- Profile: J-type with 5 ribs
- Manufacturer: BRANDT
- ASIN: B00M9A8TRK
9. Warranty and Support
Information regarding specific warranty terms for this replacement part is not available in the provided product details. For warranty inquiries or technical support, please refer to the original point of purchase or contact BRANDT customer service directly. Keep your purchase receipt as proof of purchase.
For general information about BRANDT products, you may visit their official website (if available, a link would be provided here if known).
10. Product Videos
No official product videos from the seller are available for this item in the provided data.

