
Introduction
This manual provides detailed instructions for the safe and effective use of your KODAK PIXPRO AZ365 Digital Camera. Please read this manual thoroughly before operating the camera and keep it for future reference. The KODAK PIXPRO AZ365 features a 16-megapixel sensor, 36x optical zoom, 24mm wide-angle lens, optical image stabilization, and 720p HD video recording capabilities.
What's in the Box
Verify that all items listed below are included in your camera package:
- KODAK PIXPRO AZ365 Digital Camera
- AA Alkaline Batteries (4)
- USB Cable
- Neck Strap
- Lens Cover
- Service Card
- Quick Start Guide
- Warranty Card
Camera Overview
Familiarize yourself with the main components of your KODAK PIXPRO AZ365 camera.

Figure 1: Front View (Flash Raised) - This image shows the front of the KODAK PIXPRO AZ365 camera in red, with the built-in flash unit in the raised position. The lens is retracted, and the KODAK logo is visible above the lens barrel.
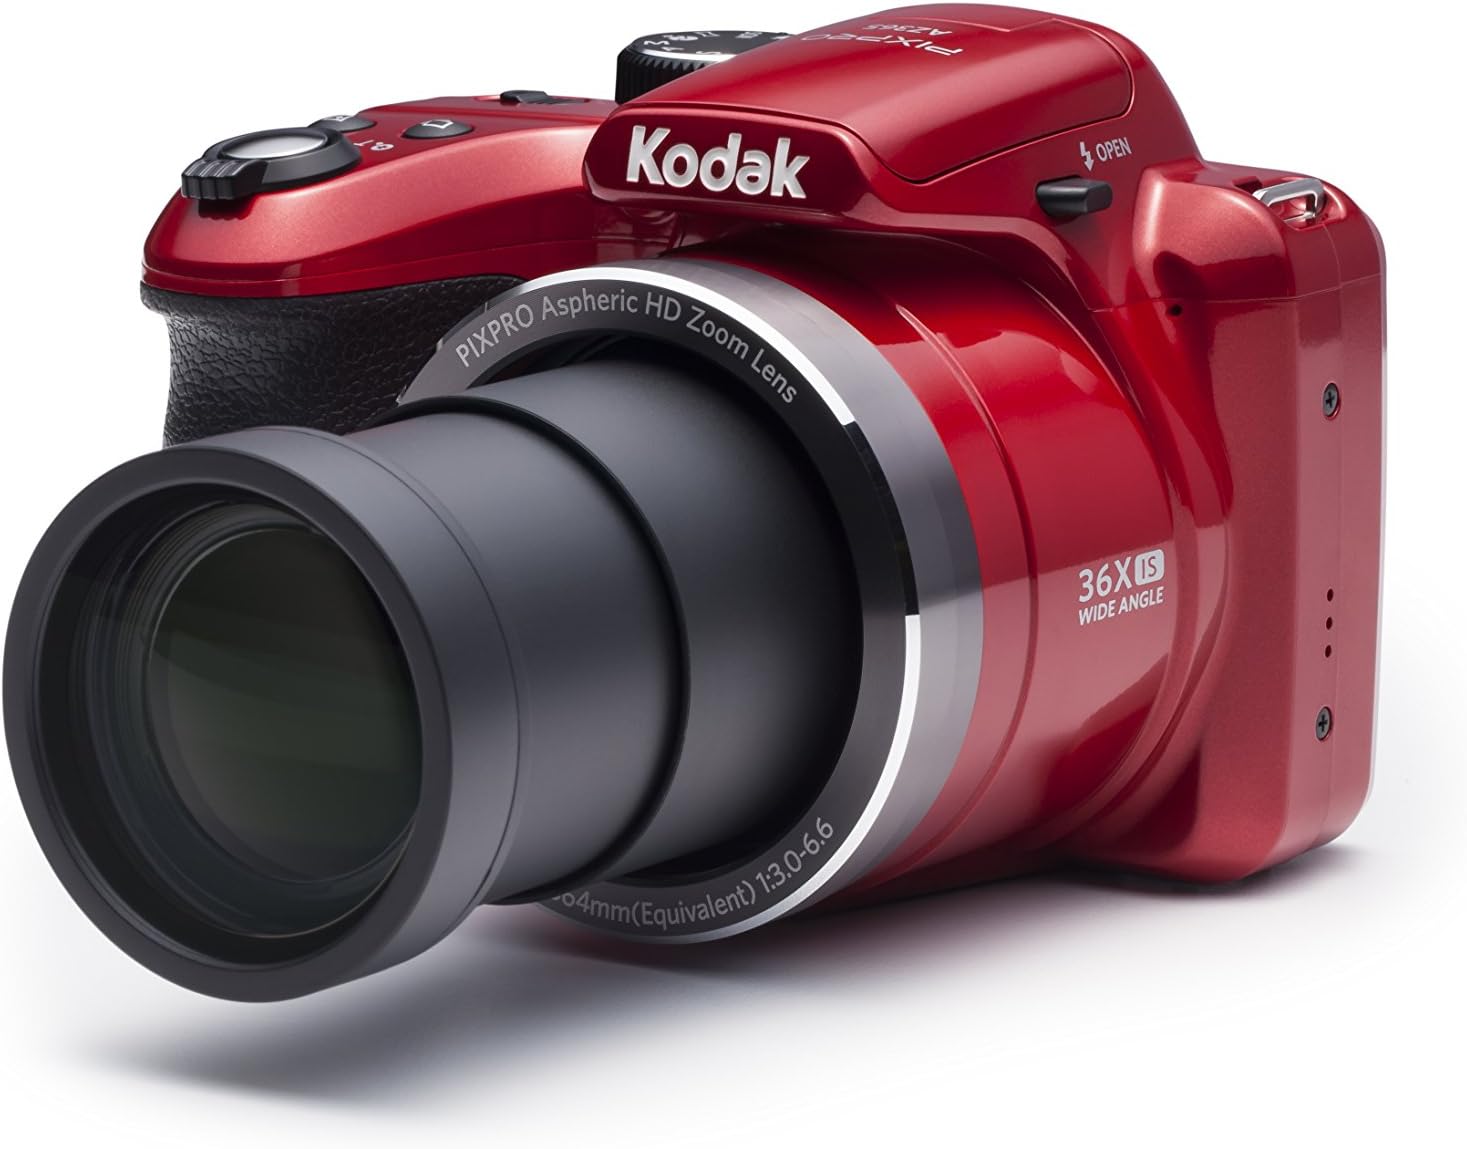
Figure 2: Front View (Lens Extended) - This image displays the KODAK PIXPRO AZ365 camera from the front, with its 36x optical zoom lens fully extended. The camera body is red, and the lens barrel indicates "PIXPRO Aspheric HD Zoom Lens" and "36X IS WIDE ANGLE".

Figure 3: Top View - This image provides a top-down view of the KODAK PIXPRO AZ365 camera. Key controls visible include the power on/off switch, the shutter button with zoom lever, and the mode dial with settings like P, S, A, M, Auto, SCN, Movie, and Panorama.

Figure 4: Rear View - This image shows the back of the KODAK PIXPRO AZ365 camera, highlighting the 3-inch LCD screen. To the right of the screen are various control buttons, including menu, info, playback, display, and a directional pad with AF, SET, and flash controls.
Setup
1. Installing Batteries
- Open the battery compartment cover located on the bottom of the camera.
- Insert four (4) AA Alkaline batteries, ensuring correct polarity (+/-) as indicated inside the compartment.
- Close the battery compartment cover securely.
Note: For optimal performance, use new, high-quality alkaline batteries. Battery life can vary significantly based on usage and battery type.
2. Inserting a Memory Card
- Locate the memory card slot, typically near the battery compartment.
- Insert an SDXC memory card with the metal contacts facing the correct direction until it clicks into place.
- To remove, press the card gently until it springs out.
Note: The camera supports SDXC memory cards. An 8MB internal memory is available, but an SDXC card is recommended for storing photos and videos.
3. Attaching the Neck Strap
Thread the neck strap through the strap eyelets on the camera body to prevent accidental drops.
Operating the Camera
Power On/Off
Slide the ON/OFF switch located on the top of the camera to power it on or off. The lens will extend upon power-on.
Taking Photos
- Turn the mode dial to your desired shooting mode (e.g., Auto for general use).
- Frame your shot using the 3-inch LCD screen.
- Use the zoom lever around the shutter button to adjust the optical zoom (36x) or digital zoom (4x).
- Press the shutter button halfway down to focus. The camera will automatically detect focus points.
- Press the shutter button fully down to capture the image.
Using the Flash
The camera features a built-in flash. Press the flash button on the directional pad to cycle through flash modes:
- Auto Flash: Camera automatically determines if flash is needed.
- Red-Eye Reduction: Fires a pre-flash to reduce red-eye effect.
- Fill Flash: Flash fires regardless of ambient light.
- Slow Synchro: Combines flash with a slow shutter speed for balanced exposure in low light.
- Red-Eye Reduction + Slow Synchro: Combines both effects.
Shooting Modes
The mode dial allows you to select various shooting modes for different scenarios:
- Auto: Camera automatically sets optimal settings for most situations.
- Program (P): Camera sets aperture and shutter speed, but you can adjust other settings.
- Shutter Priority (S): You set the shutter speed, camera sets aperture.
- Aperture Priority (A): You set the aperture, camera sets shutter speed.
- Manual (M): You control both aperture and shutter speed.
- Scene (SCN): Access various scene modes like Landscape, Portrait, Sports, Macro, etc.
- Movie: For recording video.
- Panorama: Capture wide panoramic shots.
Video Recording
The KODAK PIXPRO AZ365 can record high-definition video.
- Turn the mode dial to Movie mode.
- Press the dedicated video recording button (usually marked with a red dot) to start recording.
- Press the button again to stop recording.
Videos are recorded in 720p resolution in MOV (H.264) format.
Playback
To view your captured photos and videos:
- Press the Playback button (usually marked with a triangle icon).
- Use the directional pad to navigate through your images and videos.
- Press the SET button to play videos.
- To delete a file, select it and press the delete button (often marked with a trash can icon) and confirm.
Maintenance
Cleaning the Camera
- Use a soft, lint-free cloth to clean the camera body.
- For the lens and LCD screen, use a specialized lens cleaning cloth and solution. Avoid harsh chemicals.
- Use a blower brush to remove dust from the lens surface.
Battery Care
- Remove batteries when the camera will not be used for an extended period.
- Store batteries in a cool, dry place.
- Dispose of used batteries according to local regulations.
Storage
Store the camera in a dry, dust-free environment, away from extreme temperatures and direct sunlight. Use the provided lens cover to protect the lens.
Troubleshooting
| Problem | Possible Cause / Solution |
|---|---|
| Camera does not power on. |
|
| Poor battery life. |
|
| Images are blurry. |
|
| Memory card error. |
|
Specifications
| Feature | Detail |
|---|---|
| Model Name | AZ365 |
| Effective Still Resolution | 16.1 MP |
| Photo Sensor Technology | CCD |
| Optical Zoom | 36x |
| Digital Zoom | 4x |
| Minimum Focal Length | 24 Millimeters (Wide Angle) |
| Maximum Focal Length | 864 Millimeters |
| Image Stabilization | Optical (OIS) |
| Video Resolution | 720p HD |
| Video Capture Format | MOV (H.264) |
| Screen Size | 3 Inches |
| Display Type | LCD |
| Supported File Format | JPEG |
| Flash Memory Type | SDXC |
| Battery Type | AA Alkaline (4) |
| Item Weight | 15.36 ounces |
| Color | Red |
Warranty and Support
Your KODAK PIXPRO AZ365 Digital Camera comes with a limited warranty. Please refer to the included Warranty Card for detailed terms and conditions, including warranty period and coverage.
For technical support, service, or inquiries regarding your product, please contact KODAK customer service. Contact information can typically be found on the Warranty Card or the official KODAK PIXPRO website.