1. Introduction
This manual provides essential instructions for the proper use and care of your Minolta Maxxum STsi QD Panorama Date 35mm SLR Camera. Please read this manual thoroughly before operating the camera to ensure optimal performance and longevity. The Minolta Maxxum STsi is a sophisticated 35mm Single-Lens Reflex camera designed for both amateur and advanced photographers, featuring autofocus, various exposure modes, a built-in flash, Panorama mode, and a Quartz Date imprinting function.
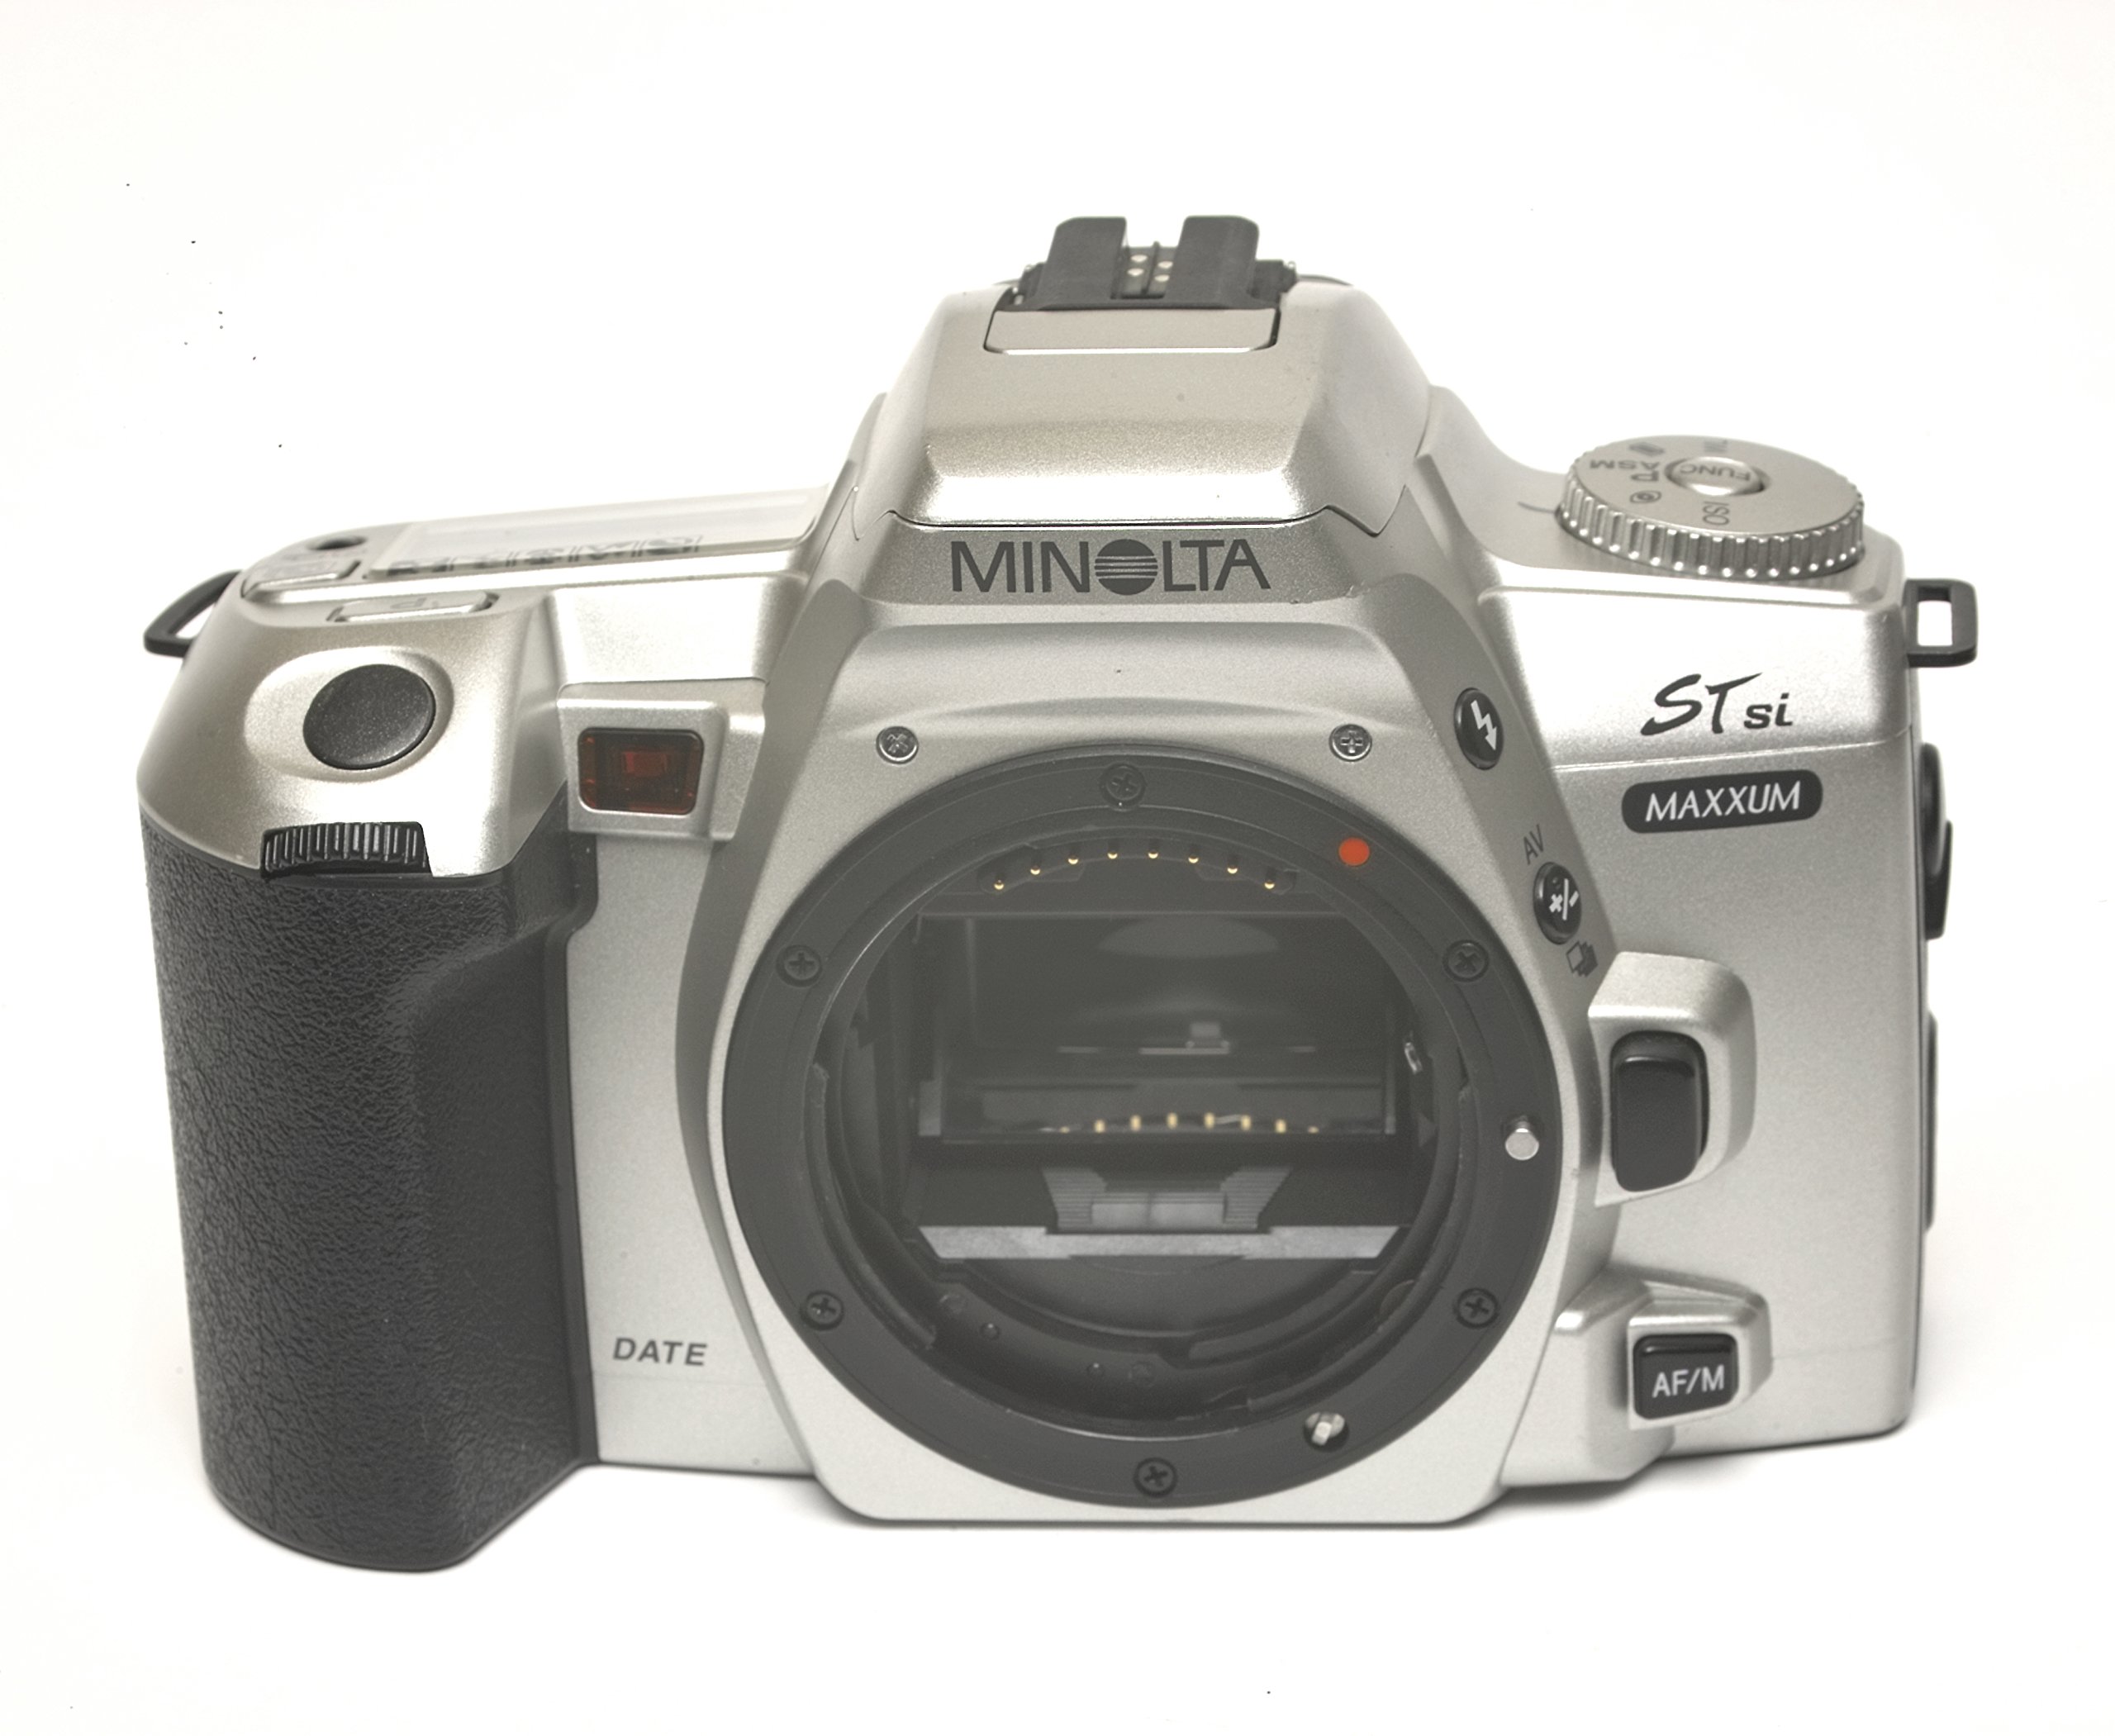
Figure 1: Rear view of the Minolta Maxxum STsi camera, displaying the LCD panel, viewfinder, and various control buttons including the 'SPOT' metering button and 'MODE SEL ADJ' buttons for date setting.
2. Setup
2.1 Battery Installation
The Minolta Maxxum STsi requires two CR2 lithium batteries for operation. Ensure the batteries are inserted with the correct polarity.
- Locate the battery compartment cover on the bottom of the camera.
- Turn the battery compartment cover counter-clockwise using a coin or similar flat object to open it.
- Insert two CR2 lithium batteries, observing the polarity indicators (+/-) inside the compartment.
- Replace the cover and turn it clockwise until securely closed.

Figure 2: Bottom view of the camera, highlighting the circular battery compartment cover on the left side and the tripod mount screw hole.
2.2 Lens Attachment
This camera body is compatible with Minolta A-mount lenses. Ensure the lens is clean and free of dust before attachment.
- Remove the body cap from the camera and the rear cap from the lens.
- Align the red dot on the lens barrel with the red dot on the camera's lens mount.
- Insert the lens into the camera mount and turn it clockwise until it clicks into place. Do not force the lens.
- To remove the lens, press the lens release button (located on the side of the camera body) and turn the lens counter-clockwise until it detaches.

Figure 3: Front-side view of the camera, illustrating the lens mount, lens release button (below the 'AV' button), and the AF/M switch.
2.3 Film Loading
The camera accepts standard 35mm film cartridges.
- Open the camera back by sliding the film door release latch downwards (usually on the side of the camera).
- Place a 35mm film cartridge into the film chamber on the left side, ensuring the film leader points towards the take-up spool on the right.
- Pull the film leader across to the red mark on the take-up spool. Ensure the film perforations engage with the teeth of the take-up spool.
- Close the camera back firmly until it clicks. The camera will automatically advance the film to the first frame. The frame counter will display '1'.

Figure 4: Rear view of the camera with the film door open, revealing the film chamber on the left and the film take-up spool on the right, ready for film loading.
2.4 Setting Date/Time (QD Function)
The Quartz Date (QD) function allows you to imprint the date or time onto your photographs. Refer to the camera's rear LCD panel and control buttons.
- Press the 'MODE' button (located below the rear LCD) to cycle through date/time display formats (Year/Month/Day, Month/Day/Year, Day/Month/Year, Day/Hour/Minute, Off).
- Once the desired format is selected, use the 'SEL' button to select the digit to be adjusted.
- Use the 'ADJ' button to change the value of the selected digit.
- Repeat steps 2 and 3 until the correct date and time are set.
3. Operating the Camera
3.1 Camera Controls Overview
Familiarize yourself with the main controls of your camera.

Figure 5: Top view of the camera, illustrating the main mode dial (left), the top LCD panel displaying shooting information, and the shutter release button.
- Mode Dial: Located on the left side, used to select various shooting modes (P, A, S, M, etc.).
- Shutter Release Button: Activates autofocus and takes the picture.
- LCD Panel: Displays current settings such as shooting mode, aperture, shutter speed, film counter, and battery status.
- Viewfinder: Used for composing and focusing your shots.
- AF/M Switch: Toggles between Autofocus and Manual Focus.
3.2 Shooting Modes
Rotate the Mode Dial to select your desired shooting program:
- P (Program Auto): The camera automatically sets both aperture and shutter speed for optimal exposure.
- A (Aperture Priority): You set the aperture, and the camera selects the appropriate shutter speed.
- S (Shutter Priority): You set the shutter speed, and the camera selects the appropriate aperture.
- M (Manual): You manually set both aperture and shutter speed.
- Scene Modes: (e.g., Portrait, Landscape, Sports) The camera optimizes settings for specific shooting situations.
3.3 Focusing
The Maxxum STsi offers both autofocus and manual focus capabilities.
- Autofocus (AF): Set the AF/M switch on the lens or camera body to 'AF'. Press the shutter release button halfway down to activate autofocus. The camera will focus on the subject in the center of the viewfinder.
- Manual Focus (MF): Set the AF/M switch to 'M'. Rotate the focusing ring on the lens until the subject appears sharp in the viewfinder.
3.4 Exposure Compensation
To adjust the exposure beyond what the camera automatically determines, use the exposure compensation function. This is typically accessed via a button labeled '+/-' and adjusted with a control dial.
3.5 Built-in Flash Operation
The camera features a built-in pop-up flash. In certain automatic modes, the flash may pop up automatically in low light conditions. You can also manually activate or deactivate the flash using dedicated buttons or menu options, depending on the selected shooting mode.
3.6 Panorama Mode
The Panorama mode allows you to capture images with a wider aspect ratio, suitable for landscapes. To activate, locate the Panorama switch or button on the camera body and slide/press it. This will mask the top and bottom of the film frame, creating a panoramic effect. Remember that this is an in-camera masking feature and does not physically widen the film frame.
4. Maintenance
4.1 Cleaning
- Camera Body: Wipe the camera body with a soft, dry cloth. For stubborn dirt, slightly dampen the cloth with water. Avoid using solvents or harsh chemicals.
- Lens Mount: Use a blower brush to remove dust from the lens mount area. Avoid touching the electrical contacts.
- Viewfinder/LCD: Use a soft, lint-free cloth specifically designed for optics.
4.2 Storage
When not in use, store the camera in a cool, dry place away from direct sunlight and extreme temperatures. Remove batteries if the camera will not be used for an extended period to prevent leakage. Keep the body cap on the camera and lens caps on the lens to protect the internal components and optics from dust and damage.
5. Troubleshooting
| Problem | Possible Cause | Solution |
|---|---|---|
| Camera does not power on. | Dead or incorrectly inserted batteries. | Replace batteries with fresh ones, ensuring correct polarity. |
| Film does not advance. | Film not loaded correctly or end of roll. | Re-load film, ensuring leader engages with take-up spool. Check film counter. |
| Autofocus not working. | AF/M switch set to 'M' (Manual Focus) or insufficient light. | Set AF/M switch to 'AF'. Ensure adequate lighting or use manual focus. |
| Flash does not fire. | Flash mode off, battery low, or subject too far. | Check flash settings. Replace batteries. Ensure subject is within flash range. |
| Date imprint not appearing. | QD function turned off or incorrect setting. | Verify QD function is enabled and date/time is set correctly. |
6. Specifications
- Model Name: STsi
- Film Format Type: 35mm
- Special Feature: Panorama Date, Quick Operation
- Included Components: Camera Body Only
- Item Weight: 14.4 ounces
- Package Dimensions: 6.7 x 4.2 x 3 inches
- Manufacturer: Minolta
- ASIN: B00M5RKX4E
7. Warranty and Support
For information regarding warranty coverage or technical support, please refer to the official Minolta website or contact their customer service department. Specific warranty terms may vary based on region and purchase date. This product is sold as a camera body only; any lenses or accessories would have their own separate warranty terms.


