
1. Introduction
This manual provides detailed instructions for the proper installation, operation, and maintenance of your SuperATV 3-inch Lift Kit. Please read this manual thoroughly before beginning installation to ensure safe and correct assembly and to maximize the performance and longevity of your product. Keep this manual for future reference.
The SuperATV 3-inch Lift Kit is designed to provide additional ground clearance and allow for larger tire fitment on your Can-Am Maverick 1000, XRS, XMR, DPS, XC, and XRS models from 2014-2016. This kit is engineered for durability and precise fitment.
2. Safety Information
WARNING:
- Always wear appropriate personal protective equipment (PPE) including safety glasses, gloves, and closed-toe shoes during installation.
- Ensure the vehicle is securely supported on a flat, level surface using jack stands before beginning any work. Never rely solely on a jack.
- Disconnect the battery before performing any electrical work.
- Do not modify any components of the lift kit or vehicle. Modifications can compromise safety and void warranty.
- After installation, thoroughly inspect all fasteners to ensure they are tightened to manufacturer specifications.
- Test drive the vehicle in a safe, controlled environment after installation to ensure proper function and handling. Be aware that lifting a vehicle can alter its center of gravity and handling characteristics.
- Professional installation is recommended if you are not familiar with vehicle suspension systems.
3. Package Contents
Verify all components are present before beginning installation. If any parts are missing or damaged, contact SuperATV customer support immediately.
| Quantity | Description |
|---|---|
| 2 | Front Brackets |
| 2 | Rear Brackets |
| 1 | Support Bar |
| 4 | M8-1.25 Nylock Nut |
| 6 | M10-1.50 Nylock Nut |
| 4 | M12-1.75 Nylock Nut |
| 2 | 1/2-13 Nylock Nut |
| 2 | Spacers |
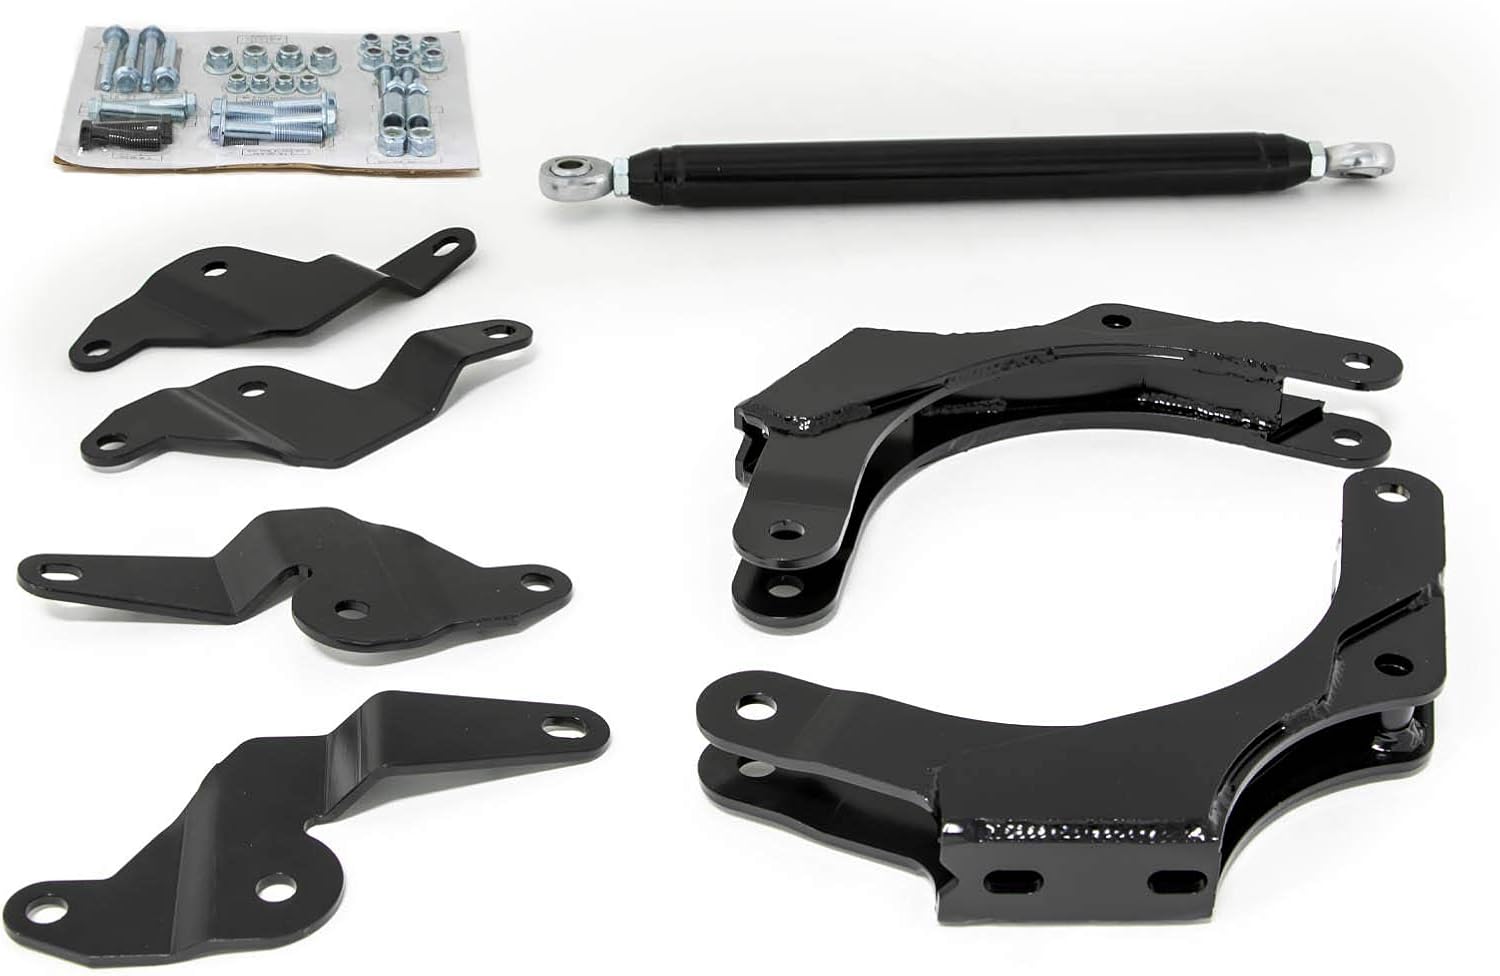
Image 1: All components included in the SuperATV 3-inch Lift Kit. This image displays the two front brackets, two rear brackets, one support bar, and various nuts and spacers required for installation.
4. Installation Instructions
The following steps outline the general procedure for installing the SuperATV 3-inch Lift Kit. Specific vehicle configurations may vary. Refer to your vehicle's service manual for detailed disassembly and reassembly procedures if needed.
4.1. Preparation
- Park the vehicle on a flat, level surface.
- Engage the parking brake.
- Loosen the lug nuts on all wheels.
- Using a floor jack, lift the front of the vehicle and place jack stands securely under the frame, ensuring the vehicle is stable.
- Remove the front wheels.
- Repeat the lifting and wheel removal process for the rear of the vehicle.
4.2. Front Lift Kit Installation
- Locate the upper shock mounting bolts on the front suspension.
- Remove the upper shock mounting bolts. Retain all original hardware.
- Install the SuperATV Front Brackets (2) to the upper shock mounts using the provided M12-1.75 Nylock Nuts (4) and original bolts. Ensure the brackets are oriented correctly as shown in the diagram.
- Reattach the upper shocks to the new mounting points on the SuperATV Front Brackets using the original hardware.
- Tighten all fasteners to vehicle manufacturer specifications.
4.3. Rear Lift Kit Installation
- Locate the upper shock mounting bolts on the rear suspension.
- Remove the upper shock mounting bolts. Retain all original hardware.
- Install the SuperATV Rear Brackets (2) to the upper shock mounts using the provided M10-1.50 Nylock Nuts (6) and original bolts. Pay attention to the orientation of the brackets.
- Attach the Support Bar (1) between the two rear brackets using the provided M8-1.25 Nylock Nuts (4) and original bolts.
- Reattach the upper shocks to the new mounting points on the SuperATV Rear Brackets using the original hardware.
- Tighten all fasteners to vehicle manufacturer specifications.

Image 2: A Can-Am Maverick with the SuperATV 3-inch Lift Kit installed, demonstrating the enhanced ride height and ability to accommodate larger tires.

Image 3: Side profile of a yellow Can-Am Maverick equipped with a lift kit, showcasing its elevated stance suitable for off-road conditions.

Image 4: A different side angle of the yellow Can-Am Maverick with the lift kit, highlighting the increased space between the tires and fender.

Image 5: The yellow Can-Am Maverick with the lift kit navigating an incline, illustrating the improved articulation and ground clearance provided by the kit.
4.4. Post-Installation
- Reinstall all wheels and tighten lug nuts to vehicle manufacturer specifications.
- Lower the vehicle safely from the jack stands.
- Perform a thorough inspection of all installed components, ensuring all bolts are tight and there is no interference with other vehicle parts.
- It is highly recommended to have a professional alignment performed after installing any lift kit to ensure proper steering and tire wear.
5. Operating Considerations
After installing the lift kit, the vehicle's handling characteristics will change. Be aware of the following:
- Increased Center of Gravity: The vehicle's center of gravity will be higher, which can affect stability, especially during sharp turns or on uneven terrain. Exercise caution.
- Braking Performance: Braking distances may be slightly altered. Adjust your driving habits accordingly.
- Tire Clearance: While the kit allows for larger tires, always check for full articulation clearance before aggressive off-road use.
- Suspension Travel: The lift kit maintains factory suspension travel but repositions the shock mounting points to achieve the lift.
6. Maintenance
Regular inspection and maintenance are crucial for the longevity and safe operation of your lift kit and vehicle.
- Periodic Inspection: Regularly inspect all bolts, nuts, and components of the lift kit for tightness and signs of wear or damage. This should be done before and after off-road excursions.
- Cleaning: Keep the components clean from mud, dirt, and debris, especially after off-road use, to prevent corrosion and wear.
- Alignment: Recheck wheel alignment periodically, especially if you notice uneven tire wear or changes in steering.
- Component Replacement: If any component shows signs of significant wear, bending, or cracking, replace it immediately with genuine SuperATV parts.
7. Troubleshooting
| Problem | Possible Cause | Solution |
|---|---|---|
| Uneven ride height | Improper installation of brackets; loose fasteners. | Re-check bracket orientation and ensure all fasteners are tightened evenly. |
| Unusual noises (clunking, squeaking) | Loose fasteners; interference with other components. | Inspect all mounting points for tightness. Check for contact between lift kit components and vehicle frame/suspension. |
| Steering feels loose or vehicle pulls | Alignment issues after lift installation. | Have a professional wheel alignment performed. |
| Reduced shock performance | Shocks are worn or damaged; incorrect shock re-installation. | Inspect shocks for leaks or damage. Ensure shocks are properly re-mounted to the new bracket locations. |
8. Specifications
- Brand: SuperATV
- Model Number: LK-CA-MAV-14
- Compatible Vehicles: Can-Am Maverick 1000 / XRS/XMR/DPS/XC/XRS (2014-2016)
- Lift Height: 3 Inches (Front and Rear)
- Material: Alloy Steel
- Item Weight: 8 pounds
- Product Dimensions: 6 x 6 x 9 inches (packaging/kit dimensions)
- Allows for Tires Up To: 34 inches
9. Warranty Information
SuperATV products are designed and manufactured to high standards. For specific warranty terms and conditions, please refer to the official SuperATV website or contact their customer support. Generally, SuperATV offers a limited lifetime warranty on many of its products against manufacturing defects.
Note: Improper installation, abuse, or modification of the product may void the warranty.
10. Customer Support
For technical assistance, missing parts, or warranty claims, please contact SuperATV directly:
- Website: Visit the SuperATV Store on Amazon
- Manufacturer: SuperATV.com
Please have your product model number (LK-CA-MAV-14) and purchase information ready when contacting support.


