Introduction
This manual provides comprehensive instructions for the installation, operation, and maintenance of your A-Tech 4GB (2x2GB) DDR2 PC2-6400 800MHz RAM Memory kit. This memory kit is designed to enhance the performance of compatible Gateway GT Series Desktop systems by providing additional memory capacity and speed.
Please read this guide thoroughly before proceeding with installation to ensure proper handling and optimal performance.
Product Overview

Image: Two A-Tech 2GB DDR2 RAM modules, model AT48GD4.Z, sealed in clear plastic packaging. Each module features a green PCB with black memory chips and a white label indicating "A-TECH PREMIUM MEMORY" and a barcode.
The A-Tech 4GB (2x2GB) DDR2 PC2-6400 800MHz RAM Memory kit consists of two 2GB DDR2 DIMM modules. These modules are Non-ECC (Error-Correcting Code) and operate at a speed of 800MHz, conforming to the PC2-6400 standard. They are specifically designed for compatibility with various Gateway GT Series Desktop models.
Compatibility
This A-Tech memory kit is compatible with the following Gateway GT Series Desktop models:
- GT4220m
- GT4222m
- GT4224m
- GT5214j
- GT5216j
- GT5218j
- GT5226j
- GT5236j
- GT5240j
- GT5676
- GT5692
- GT5694
Always refer to your computer's official documentation to confirm memory specifications and compatibility before installation.
Specifications
| Feature | Detail |
|---|---|
| Memory Type | DDR2 DIMM |
| Capacity | 4GB (2 x 2GB Modules) |
| Speed | 800MHz (PC2-6400) |
| Error Correction | Non-ECC |
| Buffering | Unbuffered |
| Voltage | Standard DDR2 Voltage (typically 1.8V) |
| Form Factor | 240-pin DIMM |
| Model Number | MS6235555 |
| Product Dimensions | 6.7 x 3.6 x 0.4 inches |
| Item Weight | 2.4 ounces |
Safety Information
Before beginning any installation, please observe the following safety precautions:
- Power Off: Always power down your computer completely and unplug it from the wall outlet before opening the case.
- Static Electricity: Static electricity can damage electronic components. Ground yourself by touching a metal part of the computer chassis before handling memory modules. Consider using an anti-static wrist strap.
- Handle with Care: Hold memory modules by their edges, avoiding contact with the gold connectors or the chips.
- Work Area: Ensure your work area is clean, well-lit, and free of obstructions.
Installation Guide
Follow these steps to install your new A-Tech RAM modules:
- Prepare Your System:
- Shut down your Gateway GT Series Desktop completely.
- Unplug the power cord and all other cables (monitor, keyboard, mouse, etc.) from the back of the computer.
- Move the computer to a clean, flat, and well-lit work surface.
- Open the Computer Case:
- Locate the screws or latches that secure the side panel of your desktop case.
- Remove the screws or open the latches and carefully slide off the side panel to expose the internal components.
- Locate RAM Slots:
- Identify the DIMM (RAM) slots on your motherboard. These are typically long, narrow slots, often colored differently or grouped together.
- If you are replacing existing RAM, note their current positions.
- Remove Existing RAM (if applicable):
- To remove an existing RAM module, gently push down on the small clips at both ends of the slot. The module should pop up slightly.
- Carefully pull the module straight out of the slot. Store removed modules in an anti-static bag.
- Install New RAM Modules:
- Align the notch on the A-Tech DDR2 DIMM module with the corresponding key in the RAM slot. DDR2 modules have a specific notch placement to prevent incorrect insertion.
- Place the module into the slot and apply firm, even pressure to both ends of the module until the clips on the sides snap into place, securing the module. You should hear a click.
- Repeat this process for the second RAM module in the next available or designated slot (often matching color slots for dual-channel configuration).

Image: An A-Tech RAM module positioned next to a desktop computer tower, with a monitor in the background displaying a high-performance race car. This illustrates the concept of boosting performance with a memory upgrade.
- Close the Computer Case:
- Once both modules are securely installed, reattach the side panel of your computer case and secure it with the screws or latches.
- Reconnect and Power On:
- Reconnect all cables to your computer.
- Plug the power cord back into the wall outlet.
- Power on your computer.
- Verify Installation:
- Once the computer boots up, check the system information to confirm that the new RAM is recognized. This can usually be found in the operating system's system properties or BIOS/UEFI settings.
Operating Your RAM
Once installed, your A-Tech RAM modules operate automatically with your computer's operating system. No special software or drivers are typically required for standard memory modules. The system will utilize the increased memory capacity to improve multitasking capabilities and overall system responsiveness.

Image: A person is shown working efficiently on a computer setup with multiple monitors, indicating enhanced multitasking capabilities. This illustrates the benefit of increased RAM for handling greater workloads.
Maintenance
RAM modules generally require minimal maintenance. To ensure their longevity and optimal performance:
- Keep System Clean: Regularly clean the interior of your computer case to prevent dust buildup, which can lead to overheating and affect component performance. Use compressed air to gently remove dust from RAM modules and slots.
- Proper Ventilation: Ensure your computer has adequate airflow and is not placed in an enclosed space that could restrict ventilation.
- Avoid Physical Damage: Handle RAM modules carefully during installation or removal. Avoid bending or applying excessive force.
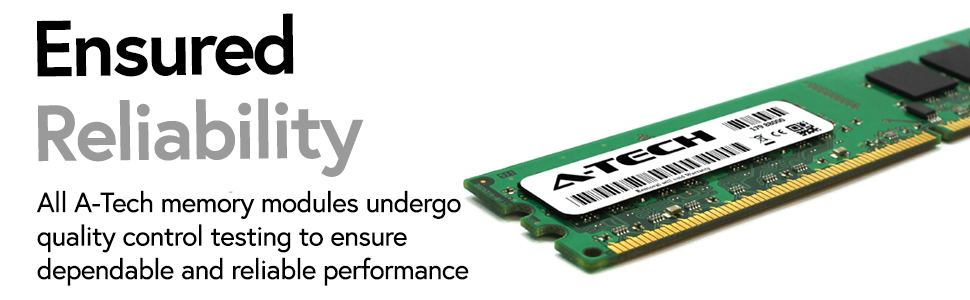
Image: A close-up view of an A-Tech RAM module, highlighting its construction and the product label. This image emphasizes the quality and reliability of the component.
Troubleshooting
If you encounter issues after installing your A-Tech RAM, consider the following troubleshooting steps:
- No Display/Beep Codes:
- Ensure the RAM modules are fully seated in their slots. Re-seat them by pressing down firmly until the clips snap.
- Verify that the modules are installed in the correct slots according to your motherboard's manual (e.g., for dual-channel operation).
- If you installed multiple modules, try booting with only one module at a time to identify a potentially faulty module.
- Incorrect RAM Amount Detected:
- Check your system's BIOS/UEFI settings to ensure the correct amount of RAM is detected.
- Ensure your operating system is a 64-bit version to fully utilize more than 4GB of RAM. (Note: This kit is 4GB, so this is less likely to be an issue unless other RAM is present).
- Verify that your motherboard supports the total amount of RAM installed.
- System Instability/Crashes:
- Run a memory diagnostic tool (e.g., Windows Memory Diagnostic) to check for errors.
- Ensure your motherboard's BIOS is up to date, as updates can improve memory compatibility.
If problems persist, contact A-Tech customer support for further assistance.
Warranty and Support
A-Tech memory products come with a Lifetime Warranty, ensuring peace of mind regarding your investment. This warranty covers defects in materials and workmanship for the life of the product.
For technical support, warranty claims, or any questions regarding your A-Tech memory, please visit the official A-Tech website or contact their customer service department.

Image: The A-Tech Premium Memory logo. Click the logo to visit the official A-Tech website for support and more information.
Official Website: atechmemory.com