1. Introduction
This manual provides comprehensive instructions for the installation, operation, and maintenance of the Harman P38 Control Board Retro-Kit. This kit is designed to upgrade older Harman P38 series pellet stoves, including models P38, PP38, P38+, and P38++, that were originally equipped with the 1-00-03769 circuit board. The retro-kit replaces the original board, which is no longer available, and introduces built-in thermostat control for enhanced functionality.
The new control board kit, part number 1-00-7738111, offers improved control over your pellet stove's performance. Please read all instructions carefully before proceeding with installation or operation.
2. Important Safety Information
- Disconnect Power: Always ensure the pellet stove is completely disconnected from its power source before attempting any installation, maintenance, or inspection. Failure to do so can result in electric shock, injury, or death.
- Qualified Personnel: Installation should ideally be performed by a qualified technician. If you are performing the installation yourself, ensure you have a thorough understanding of electrical wiring and safety procedures.
- Check Components: Before installing the new control board, inspect all existing wiring and components of your pellet stove for damage or wear. Address any issues before proceeding.
- Non-Returnable Policy: Circuit boards that have been installed or used are typically non-returnable. Verify that this is the correct replacement part for your stove before opening the packaging or beginning installation.
- High Voltage Warning: The control board operates with 120V AC. Exercise extreme caution.
3. Package Contents
The Harman P38 Control Board Retro-Kit (Part #1-00-7738111) includes the following components:
- Control Board with Mounting Plate: The main circuit board pre-mounted on a metal plate.
- Wire Harness: A pre-assembled wiring harness for connecting the new board.
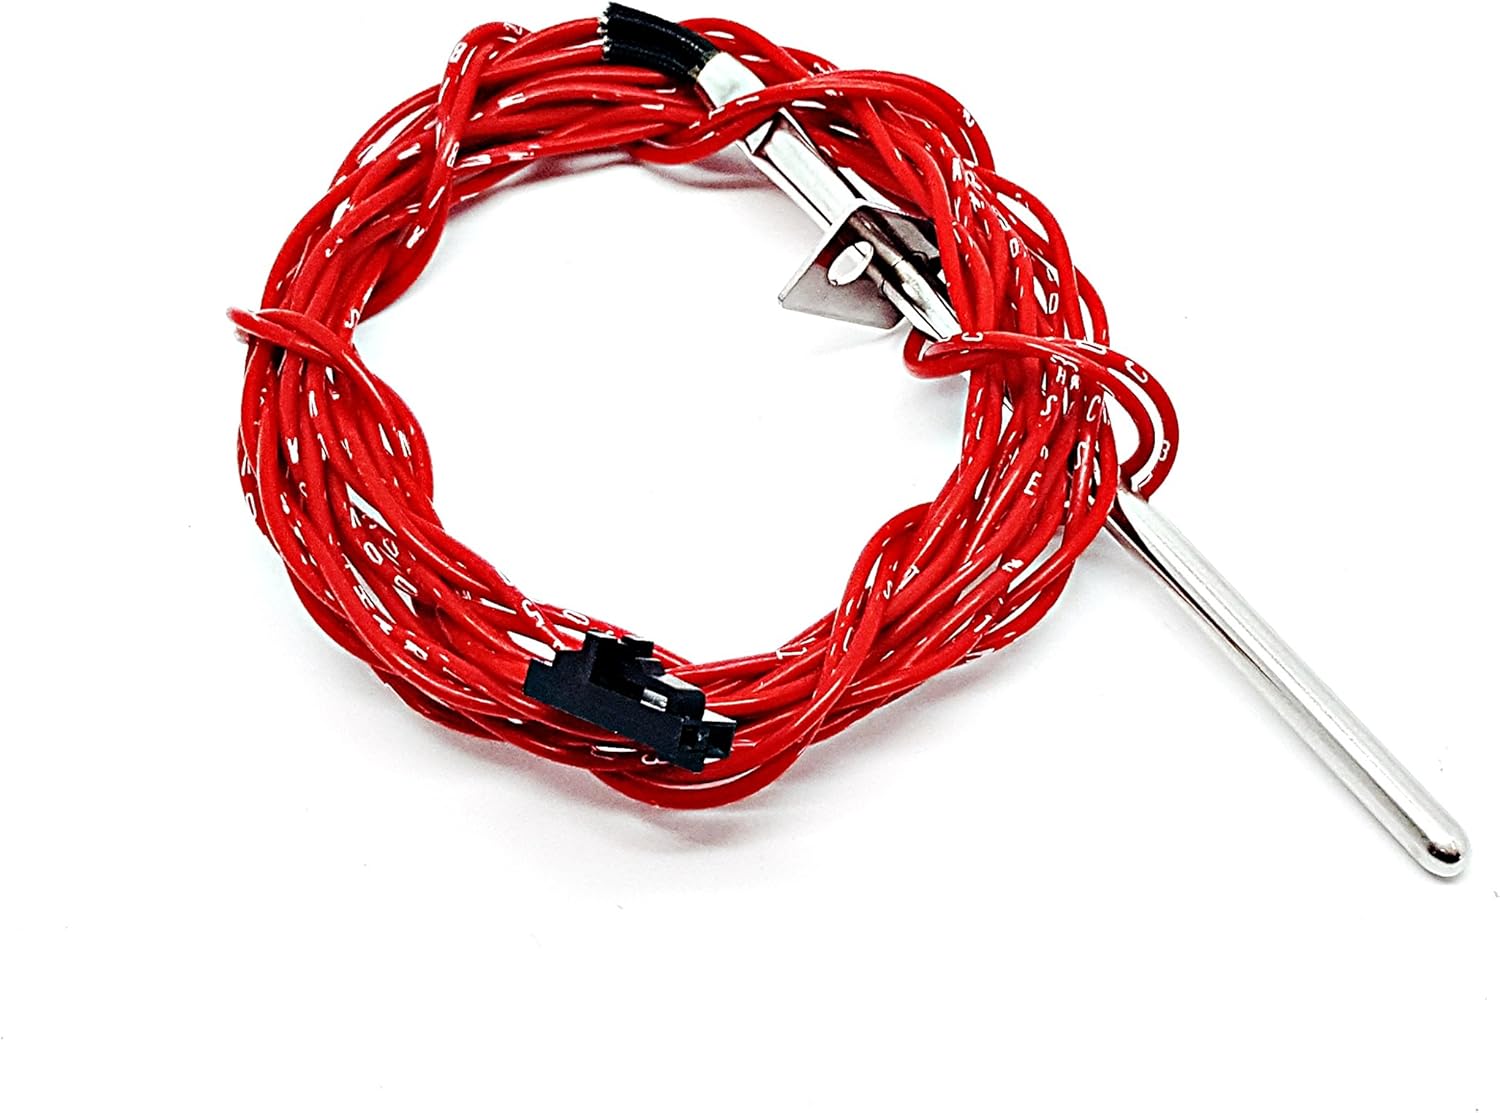
- Room Sensing Probe: A red-wired probe for ambient temperature detection.
- Control Panel Overlay: A new overlay for the stove's control panel.
- Installation Hardware: Various screws, nuts, and wire ties.


4. Installation Guide
This section outlines the steps for installing the Harman P38 Control Board Retro-Kit. It is crucial to follow these instructions carefully.
4.1. Preparation
- Power Disconnection: Turn off and unplug your Harman P38 pellet stove from the electrical outlet. Verify that no power is reaching the unit.
- Access: Open the control panel access door or remove the necessary panels to expose the existing circuit board.
- Documentation: Take clear photographs of the existing wiring connections before disconnecting anything. This will serve as a reference during reassembly.
- Tools: Gather necessary tools, which may include screwdrivers, wire cutters/strippers, a drill, and possibly a metal cutting tool (e.g., tin snips or a jigsaw with a metal blade) for modifying the stove's chassis.
4.2. Removing the Old Control Board
- Carefully disconnect all wires from the old circuit board. Refer to your photographs if needed.
- Unscrew and remove the old circuit board from its mounting location.
4.3. Preparing for the New Board
The new retro-kit board may require modifications to the stove's chassis for proper fitment and access to new controls.
- Position the included metal mounting plate (template) on the stove's control panel area. This plate has markings for new cutouts and drill holes.
- Secure the template in place and carefully mark the areas to be cut and drilled.
- Using appropriate metal cutting tools, create the necessary openings and drill holes as indicated by the template. Ensure clean edges and remove any metal burrs.

4.4. Mounting the New Control Board
- Align the new control board (pre-mounted on its plate) with the newly created openings and drill holes.
- Secure the control board using the provided screws and nuts. Ensure it is firmly in place and does not wobble.
4.5. Wiring Connections
- Connect the new wire harness to the appropriate terminals on the control board and to the corresponding components within the stove. Refer to the wiring diagram provided with the kit or your previously taken photographs.
- Install the red-wired room sensing probe. This probe should be placed in an area that accurately reflects the room's ambient temperature, away from direct heat sources or drafts. Connect it to the designated port on the control board.
- Ensure all connections are secure and properly insulated. Use the provided wire ties to neatly manage and secure the wiring, preventing it from touching hot surfaces or moving parts.
4.6. Final Steps
- Apply the new control panel overlay to the stove's exterior, aligning it with the new control knobs and LED indicators. Note: Knobs are typically not included and may need to be sourced separately if your original knobs are incompatible.
- Double-check all connections and ensure no tools or loose items are left inside the stove.
- Close all access panels and secure them.
5. Operating Instructions
The new control board introduces updated controls and features, most notably built-in thermostat control.
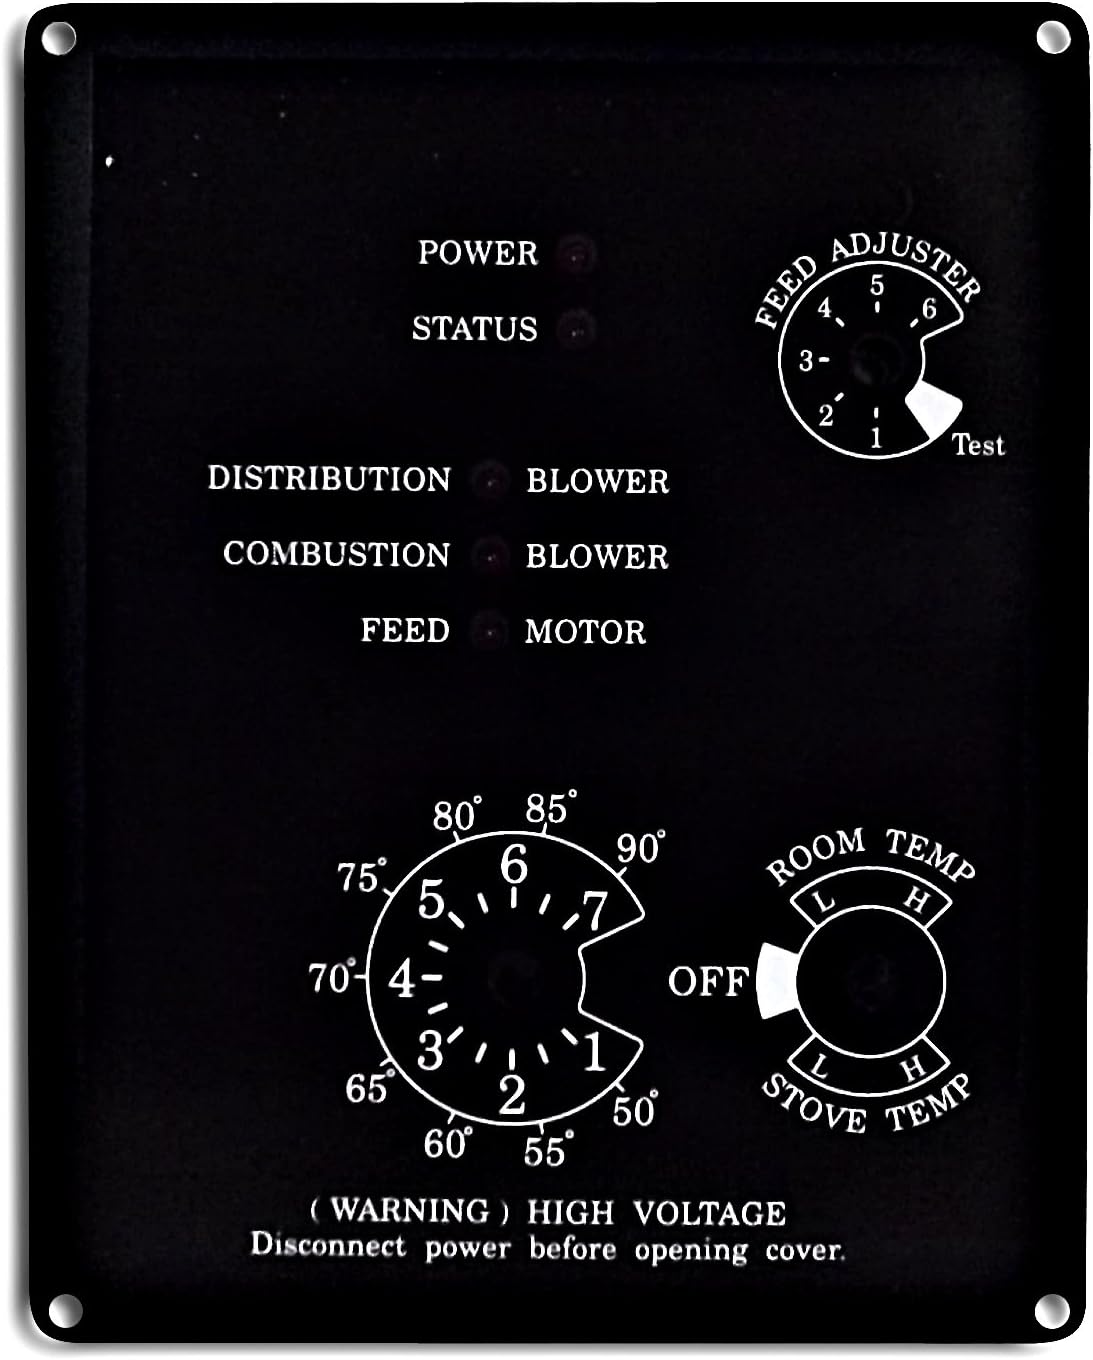
5.1. Control Panel Overview
- POWER LED: Indicates the stove is receiving power.
- STATUS LED: Provides operational status feedback (refer to stove's main manual for specific codes).
- DISTRIBUTION BLOWER LED: Indicates the distribution blower is active.
- COMBUSTION BLOWER LED: Indicates the combustion blower is active.
- FEED MOTOR LED: Indicates the pellet feed motor is active.
- FEED ADJUSTER Knob: Controls the pellet feed rate. Settings typically range from 1 (low) to 7 (high), with a 'Test' position for diagnostic purposes.
- ROOM TEMP Knob: Sets the desired room temperature when operating in thermostat mode. Settings typically range from 50°F to 90°F.
- STOVE TEMP Knob: Controls the stove's internal temperature or heat output. Settings typically range from Low (L) to High (H).
5.2. Using Thermostat Control
The primary advantage of this retro-kit is the integrated thermostat control, which uses the room sensing probe to maintain a consistent room temperature.
- Set Desired Room Temperature: Rotate the ROOM TEMP knob to your desired temperature setting. The stove will automatically adjust its operation to maintain this temperature.
- Adjust Feed Rate: Use the FEED ADJUSTER knob to fine-tune how aggressively the stove feeds pellets to reach and maintain the set temperature. Higher settings will feed more pellets, leading to faster heating and higher heat output.
- Stove Temperature/Output: The STOVE TEMP knob can be used to set the overall heat output range of the stove. For example, setting it to 'L' (Low) will result in a gentler heat output, while 'H' (High) will allow for maximum heat.
- Monitoring: Observe the POWER, STATUS, and other indicator LEDs to monitor the stove's operational state.
Note: The exact behavior and interaction of the knobs may vary slightly based on your specific Harman P38 model and environmental conditions. Refer to your original stove manual for general operating principles.
6. Maintenance
Proper maintenance ensures the longevity and efficient operation of your control board and pellet stove.
- Regular Cleaning: Periodically inspect the control board area for dust and debris. With power disconnected, gently clean the board and surrounding components using a soft brush or compressed air.
- Wiring Inspection: Annually, or if you suspect an issue, inspect all wiring connections for tightness and signs of wear or damage. Ensure no wires are frayed or exposed.
- Probe Placement: Ensure the room sensing probe remains in an optimal location, free from obstructions or external heat/cold sources that could skew temperature readings.
- Environmental Conditions: Keep the control board area dry and free from excessive humidity, which can damage electronic components.
7. Troubleshooting
If you encounter issues after installing the new control board, consider the following troubleshooting steps:
- No Power to Stove:
- Check the main power supply to the stove.
- Verify all wiring connections to the control board are secure.
- Inspect the stove's fuse (if applicable) for continuity.
- Stove Not Responding to Temperature Settings:
- Ensure the room sensing probe is properly connected to the control board.
- Verify the probe is located in an area that accurately reflects room temperature.
- Check the ROOM TEMP knob setting.
- Incorrect Pellet Feed Rate:
- Adjust the FEED ADJUSTER knob.
- Ensure the pellet hopper is not empty and the auger is free of obstructions.
- LED Indicators Not Functioning Correctly:
- Refer to your original Harman P38 stove manual for specific LED error codes or patterns.
- Ensure the control panel overlay is correctly aligned and not obstructing the LEDs.
- General Malfunction:
- Power cycle the stove (unplug for 5 minutes, then plug back in).
- Re-check all wiring connections for looseness or incorrect placement.
If troubleshooting steps do not resolve the issue, contact Harman customer support or a qualified service technician.
8. Specifications
- Model Number: 1-00-7738111
- Replaces Part Number: 1-00-03769
- Compatibility: Harman P38, PP38, P38+, P38++ Pellet Stoves (Pre Serial #008190059)
- Input Voltage: 120V AC
- Features: Built-in Thermostat Control, Room Sensing Probe input
- Manufacturer: HHT (Harman Heating & Technologies)
- Approximate Item Weight: 3 pounds
9. Warranty and Support
For warranty information regarding your Harman P38 Control Board Retro-Kit, please refer to the documentation provided by the manufacturer or retailer at the time of purchase. Warranty terms typically cover manufacturing defects and may not cover damage due to improper installation or misuse.
If you require technical assistance or have questions not covered in this manual, please contact Harman customer support or the authorized dealer from whom you purchased the kit. When contacting support, have your stove's model and serial number, as well as the retro-kit's part number (1-00-7738111), readily available.


