1. Introduction
This manual provides comprehensive instructions for the assembly, operation, and maintenance of your HOMCOM Shoe Cabinet, Model 02-0623. Designed for entryway organization, this cabinet offers multi-level storage for up to 12 pairs of shoes, featuring both open compartments and a double-door cupboard with adjustable shelves. Please read these instructions carefully before assembly and use to ensure safe and proper functionality.
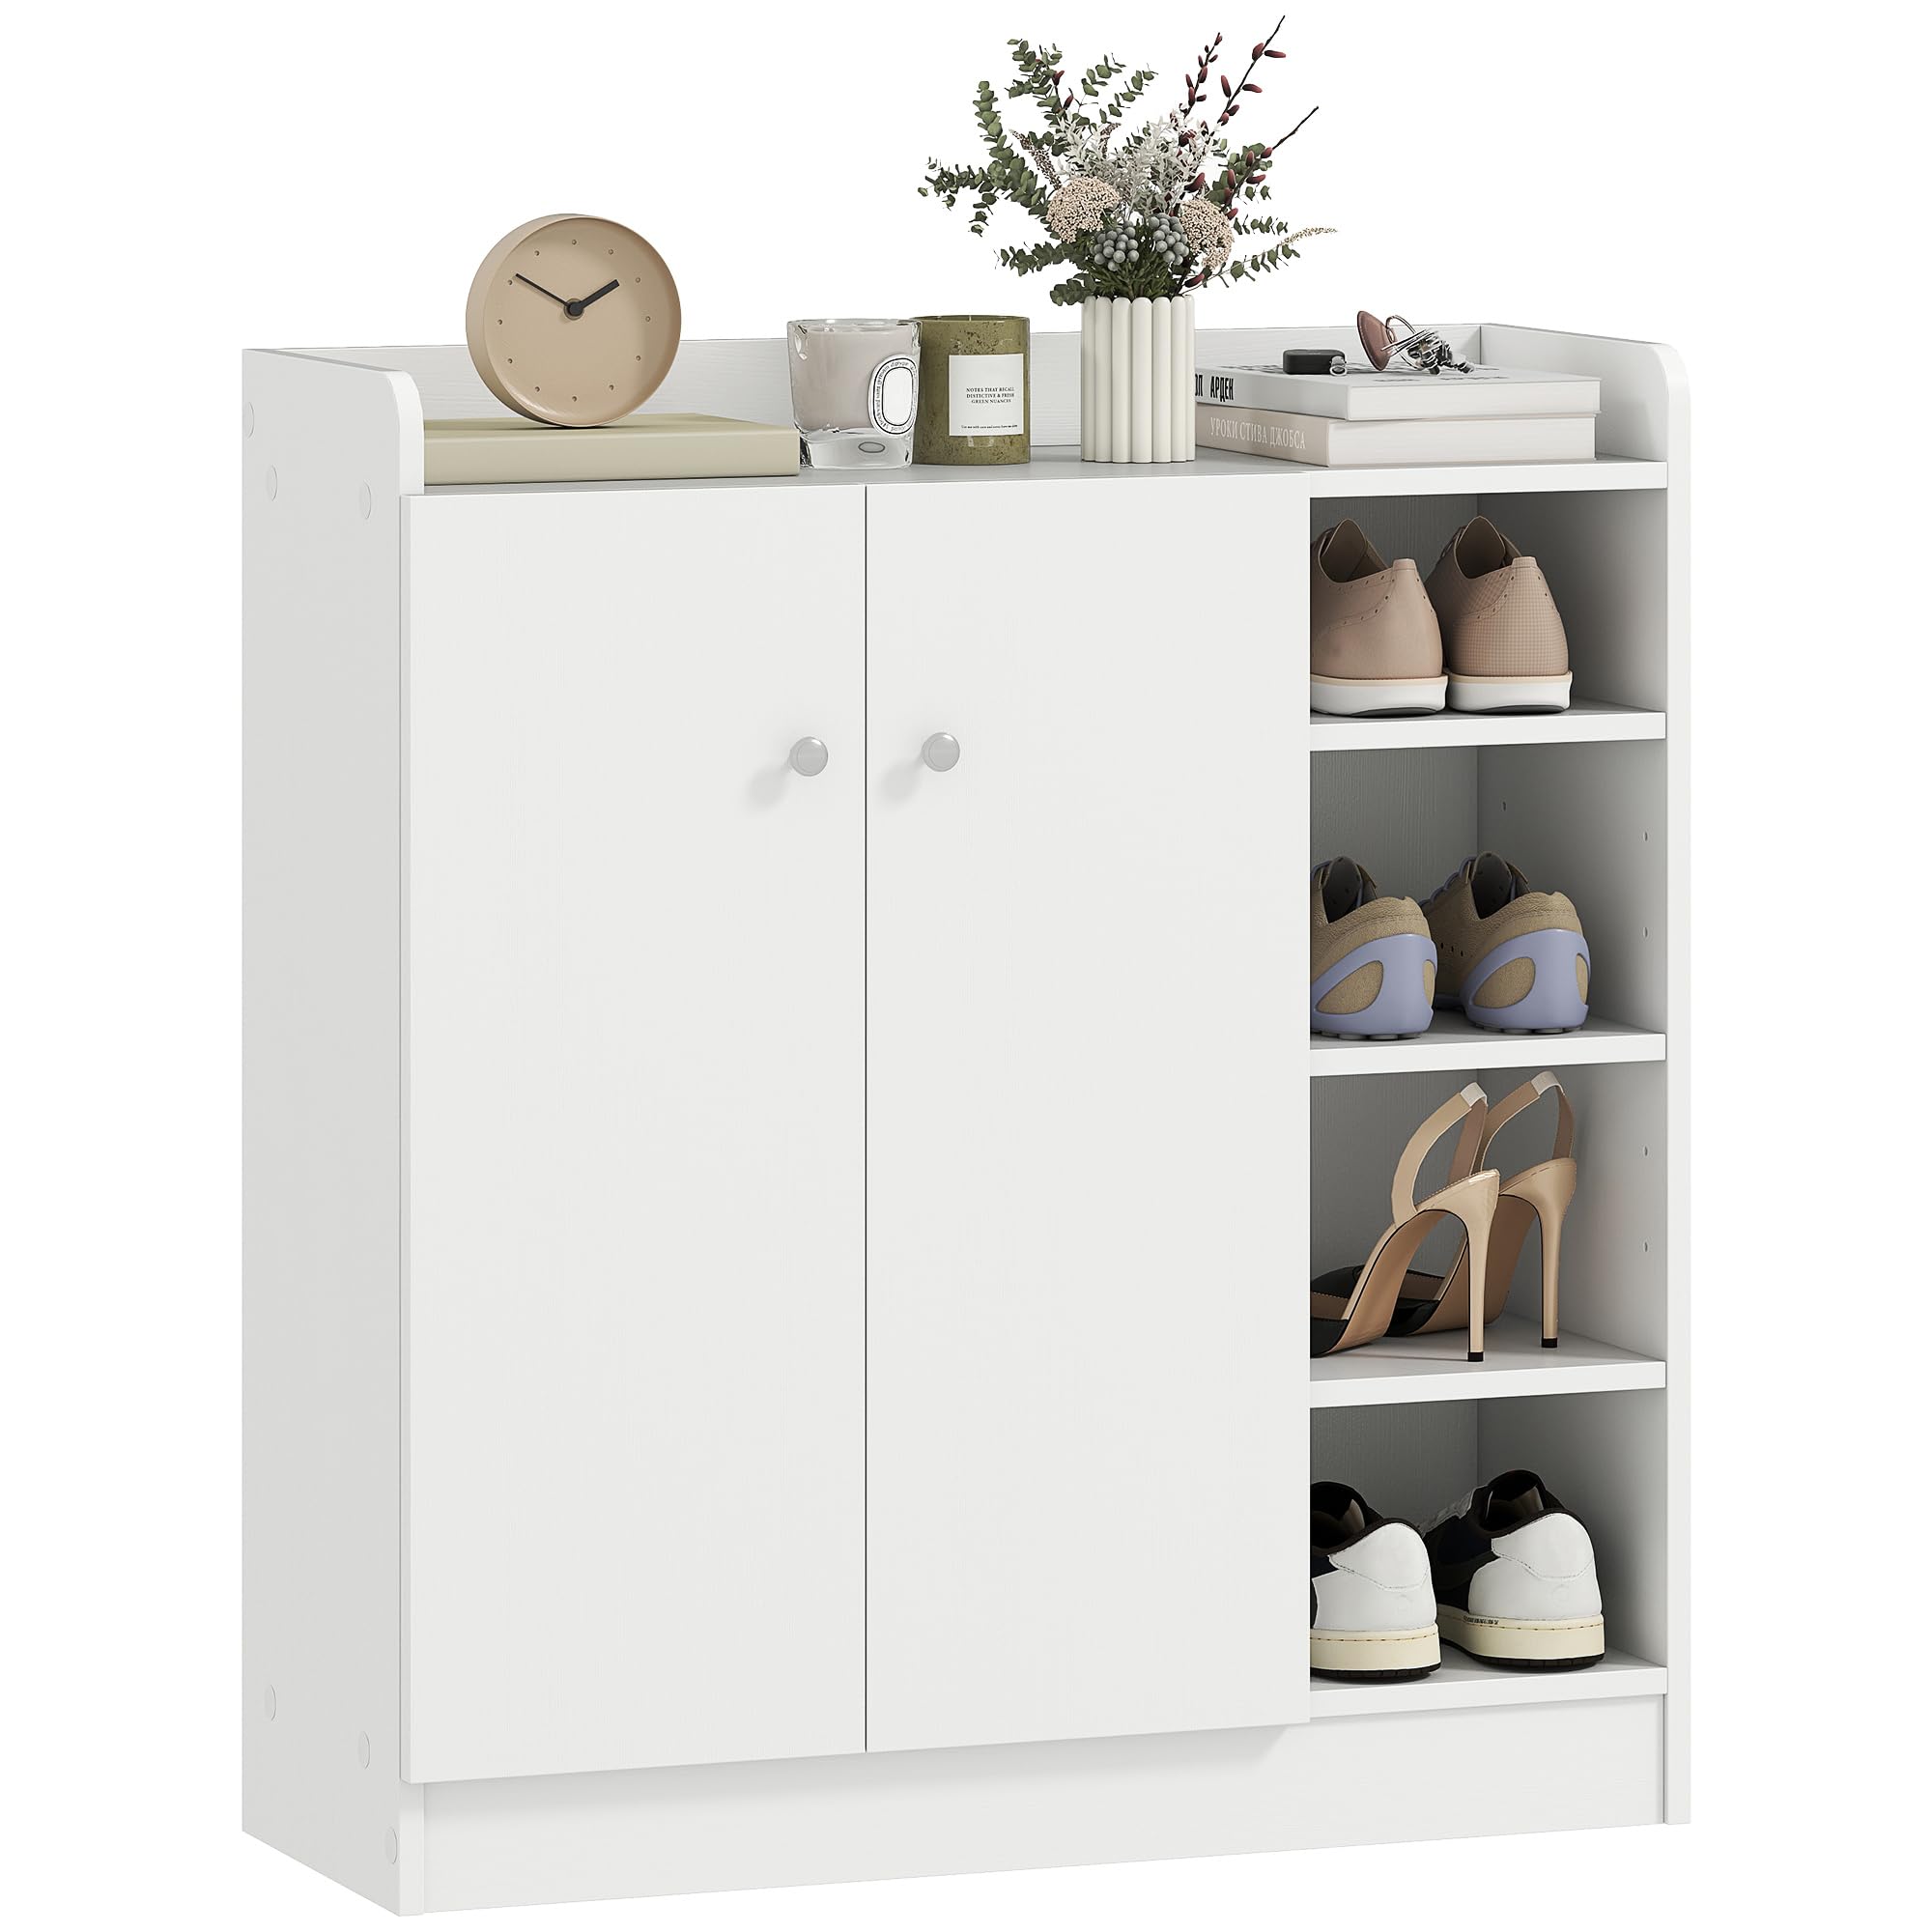
Image 1.1: The HOMCOM Shoe Cabinet (Model 02-0623) in a typical home environment.
2. Safety Instructions
To prevent injury or damage to the product, adhere to the following safety guidelines:
- Anti-Tipping System: Always use the provided anti-tipping system to secure the cabinet to a wall. This prevents accidental overturning, especially in households with children or pets.
- Weight Capacity: Do not exceed the maximum recommended load capacity. The total maximum load is 35 kg. The top shelf can support up to 10 kg, and each internal shelf can support up to 5 kg.
- Assembly: Ensure all screws, bolts, and fasteners are securely tightened during assembly. Periodically check for loose connections and tighten as needed.
- Small Parts: Keep all small parts and packaging materials away from children during assembly to prevent choking hazards.
- Placement: Place the cabinet on a flat, stable, and level surface to ensure stability.
3. Specifications
| Feature | Detail |
|---|---|
| Model Number | 02-0623 |
| Overall Dimensions (L x W x H) | 83 cm x 30 cm x 90 cm |
| Material | Engineered Wood (Particle Board with Melamine Finish) |
| Color | White |
| Shoe Capacity | Up to 12 pairs |
| Max. Total Load | 35 kg |
| Max. Top Shelf Load | 10 kg |
| Max. Internal Shelf Load | 5 kg |
| Assembly Required | Yes |
| Special Features | Adjustable shelves, Anti-tipping system, Sturdy construction |

Image 3.1: Detailed dimensions of the shoe cabinet.
4. Setup and Assembly
The HOMCOM Shoe Cabinet requires assembly. Please follow the step-by-step instructions and diagrams provided in the physical assembly manual included with your product. Ensure you have all components and tools before beginning.
Key Assembly Steps:
- Unpack and Identify Parts: Carefully unpack all components and verify against the parts list in your manual.
- Assemble Frame: Follow the diagrams to connect the main panels and base.
- Install Shelves: Insert the adjustable shelves into the desired positions within the double-door cupboard.
- Attach Doors: Secure the double doors using the provided hinges and attach the handles.
- Install Anti-Tipping Device: This is a critical safety step. Secure the anti-tipping device to the back of the cabinet and then to a sturdy wall stud using appropriate hardware.

Image 4.1: Details of the cabinet's construction, including handles and hinges, which are part of the assembly process.

Image 4.2: Illustration of the adjustable shelf feature, allowing customization for various shoe heights.
5. Operating Instructions
The HOMCOM Shoe Cabinet is designed for versatile shoe storage and entryway organization.
- Shoe Storage: Utilize the four open compartments for frequently used shoes or decorative items. The double-door cupboard provides concealed storage for additional pairs.
- Adjustable Shelves: The shelves within the double-door section are adjustable. To change their height, remove the shelves, reposition the shelf pins to the desired level, and reinsert the shelves. This allows accommodation for various shoe types, from flats to boots.
- Top Surface: The top surface of the cabinet can be used to display framed photos, keys, small plants, or other entryway essentials.
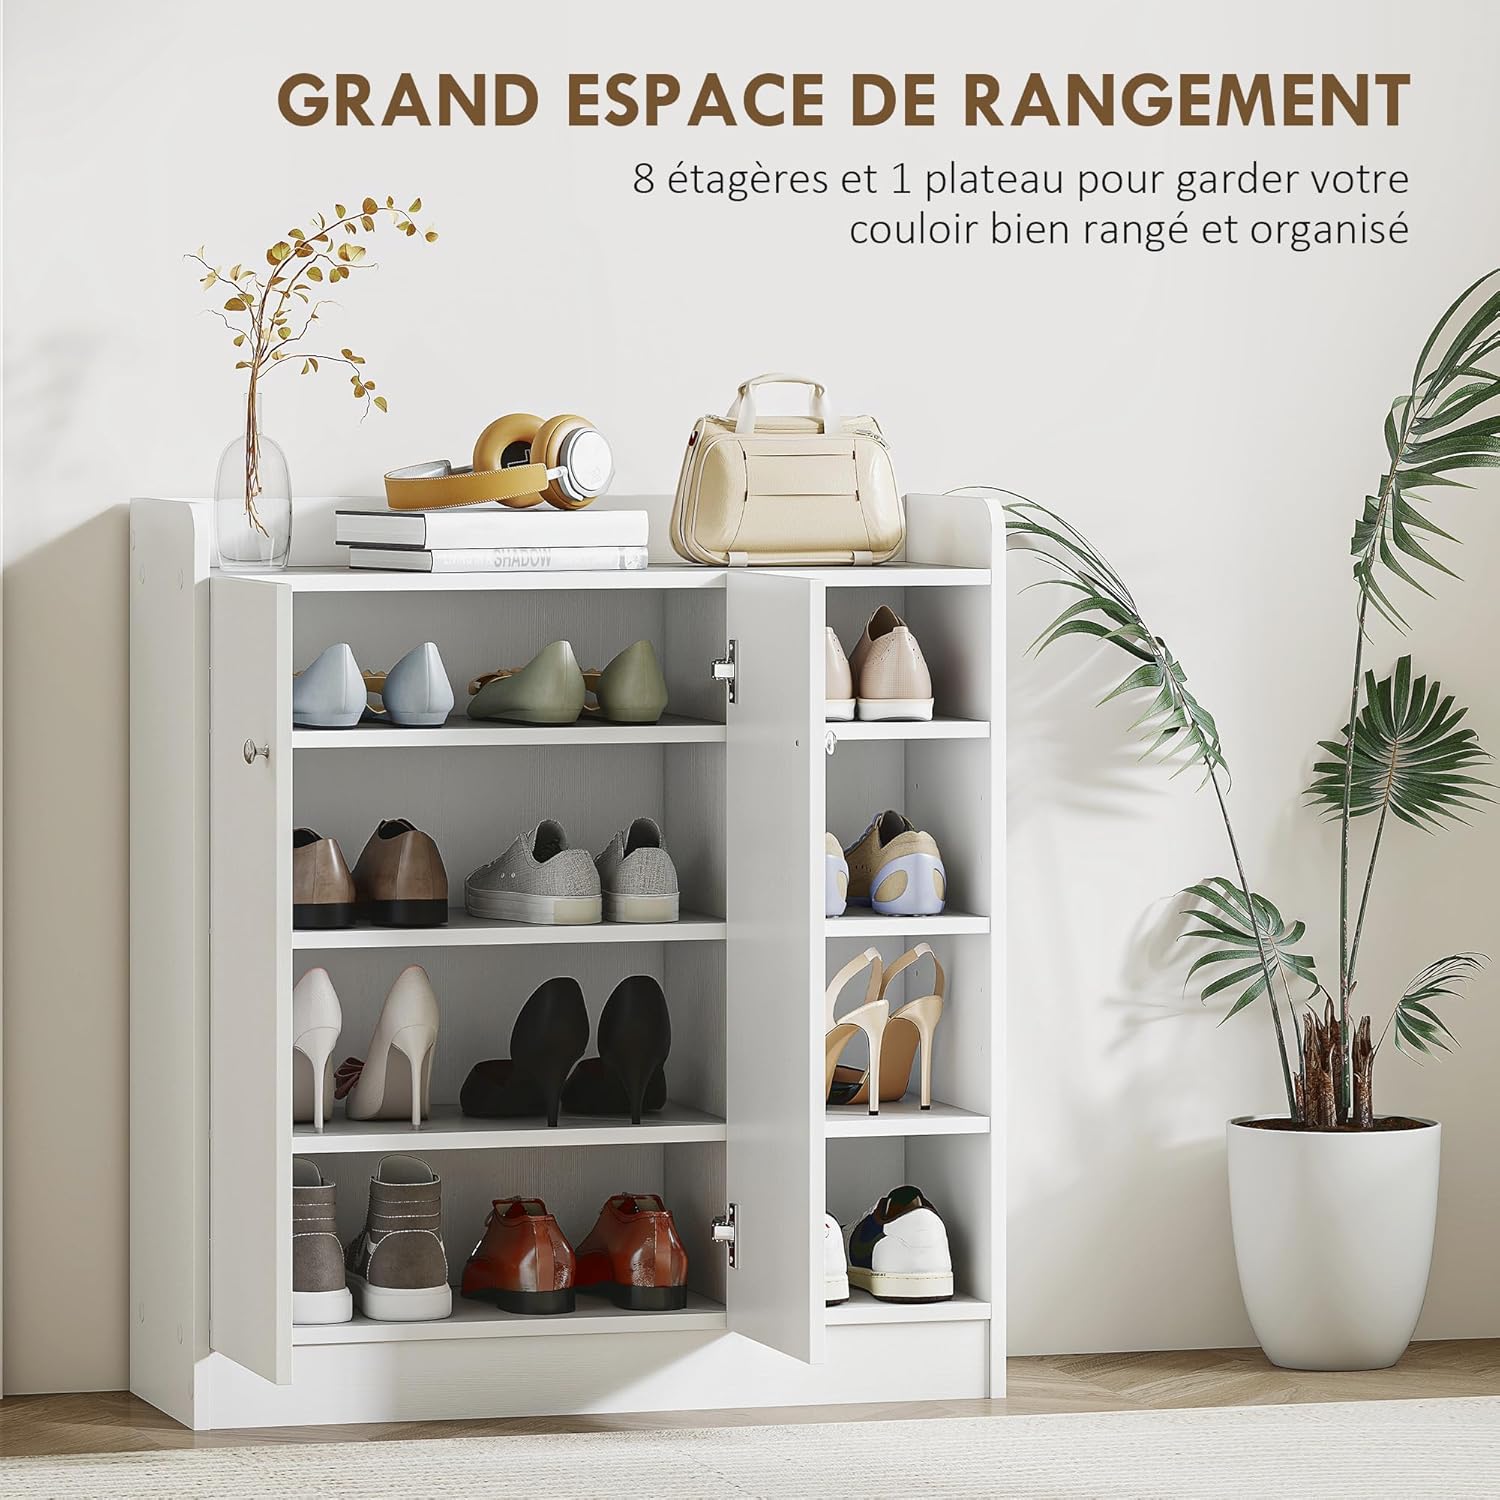
Image 5.1: Example of shoe storage capacity and organization within the cabinet.

Image 5.2: The top surface of the cabinet can be used for displaying small items.
6. Maintenance
Proper care will extend the life and appearance of your shoe cabinet.
- Cleaning: Wipe surfaces with a soft, slightly damp cloth. Avoid using harsh chemicals, abrasive cleaners, or polishes that may damage the melamine finish.
- Dusting: Regularly dust the cabinet with a dry, soft cloth.
- Fastener Check: Periodically inspect all screws and connections to ensure they remain tight. Re-tighten if any looseness is detected.
- Avoid Moisture: Protect the cabinet from excessive moisture and direct sunlight to prevent warping or discoloration.
7. Troubleshooting
If you encounter any issues with your shoe cabinet, refer to the following common solutions:
- Cabinet Feels Unstable:
Solution: Ensure the anti-tipping device is correctly installed and securely fastened to a wall stud. Verify that the cabinet is placed on a level surface. Check all assembly fasteners for tightness. - Doors Do Not Close Properly:
Solution: Inspect the hinges for proper alignment. Adjust the hinge screws if necessary to ensure the doors are level and close smoothly. Check for any obstructions inside the cabinet. - Scratches or Minor Damage:
Solution: For minor scratches, a furniture repair pen or touch-up paint matching the cabinet's white finish may be used.
8. Product Video
Video 8.1: An overview of the HOMCOM Shoe Cabinet's features and functionality. This video demonstrates the product's design, storage capabilities, and how it integrates into an entryway.
9. Warranty and Support
For information regarding product warranty, returns, or technical support, please refer to the documentation included with your purchase or visit the official HOMCOM website. You may also contact your retailer's customer service for assistance.
Manufacturer: HOMCOM
ASIN: B00LL261XQ