Introduction
This manual provides essential instructions for the safe and effective use of your Arrow ET200BN Heavy Duty Electric Brad Nailer. Please read all instructions carefully before operating the tool and retain this manual for future reference.
Important Safety Instructions
WARNING: Failure to follow these instructions may result in electric shock, fire, and/or serious injury.
- Always wear safety glasses to protect your eyes from flying debris.
- Disconnect the tool from the power source before loading nails, clearing jams, or performing maintenance.
- Keep hands and body parts away from the firing area.
- Ensure the contact safety mechanism is fully depressed against the workpiece before firing to prevent accidental discharge.
- Do not operate the tool in explosive atmospheres, such as in the presence of flammable liquids, gases, or dust.
- Use only genuine Arrow brad nails of the specified sizes (5/8", 3/4", 1", 1-1/4").
- If using an extension cord, ensure it is less than 15 feet long and of appropriate gauge for maximum power delivery.
Product Components
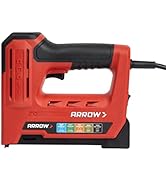
Familiarize yourself with the key parts of your Arrow ET200BN Electric Brad Nailer:

- Soft overmolded comfort grip and oversized trigger.
- Six-foot power cord.
- Convenient quick-release bottom load magazine.
- Contact safety for safe firing.
- Soft Overmolded Comfort Grip: Provides enhanced comfort and control during operation.
- Oversized Trigger: Designed for easy access and comfortable use.
- Six-Foot Power Cord: Offers ample reach for various tasks.
- Quick-Release Bottom Load Magazine: Facilitates fast and efficient nail reloading.
- Contact Safety: A safety mechanism that prevents accidental firing by requiring the tool to be pressed against the workpiece.
- Adjustable Depth Control Knob: Allows adjustment of nail driving depth for different materials and nail sizes.
Setup and Nail Loading
Power Connection
The ET200BN operates on AC/DC power. Ensure the tool is connected to a suitable power outlet. If an extension cord is necessary, use one less than 15 feet in length to maintain optimal performance.
Loading Brad Nails
The ET200BN is designed for 18-gauge brad nails in sizes 5/8", 3/4", 1", and 1-1/4". For best results, use genuine Arrow brad nails (BN1810 5/8", BN1812 3/4", BN1816 1", and BN1820 1-1/4").
- Disconnect Power: Always disconnect the tool from the power source before loading nails.
- Open Magazine: Tilt the tool or lay it flat. Press the lever (B) while pulling the slider (A) backwards to open the magazine.
- Insert Nails: Place the nail strip into the magazine (C) with the tapered end aligning with the bottom line of the magazine. Ensure the brad nail heads rest into the groove corresponding with the symbol of nail length on the nailer head (D). The magazine has a maximum capacity of 100 nails.
- Close Magazine: Push the slider (B) towards the nailer head (D) until it snap-locks into place.

Adjusting Depth Control
The adjustable depth-control knob allows you to set the correct amount of power for each job, matching the size of the brad nail to the materials being fastened. Turn the knob to increase or decrease the driving force.
Operating Instructions
- Position the Tool: First, position the contact tip (D) firmly against the workpiece. The contact safety must be depressed a few millimeters.
- Fire Nail: Once the contact safety is depressed, briefly push the trigger (F) to fire your brad nail and then release again.
- Safety Lock: The trigger (F) is locked as long as you do not press the tacker head (D) against the workpiece, preventing accidental operation. You must pick up the front of the tool and reactivate the contact safety for each shot.
For best performance and to prevent kickback, use two hands for better support and penetration. Place one hand on top of the nailer while the other hand presses the trigger.


Maintenance
- Cleaning: Keep the tool clean and free of dust and debris. Use a dry cloth to wipe down the exterior. Do not use solvents or harsh chemicals.
- Storage: Store the nailer in its carrying case in a dry, secure location away from children and unauthorized users.
- Inspection: Regularly inspect the power cord for damage. If damaged, have it repaired by a qualified service technician. Check the contact safety mechanism for proper function.
- Nail Jams: If a nail jam occurs, immediately disconnect the power cord. Refer to the "Troubleshooting" section for instructions on clearing jams.

Troubleshooting
| Problem | Possible Cause | Solution |
|---|---|---|
| Nailer does not fire. |
|
|
| Nails do not drive fully. |
|
|
| Nail jam. |
|
|
Technical Specifications
| Feature | Detail |
|---|---|
| Model Number | ET200BN |
| Power Source | AC/DC |
| Nail Gauge | 18 Gauge |
| Nail Lengths Supported | 5/8", 3/4", 1", 1-1/4" |
| Item Weight | 5.7 pounds |
| Material | Plastic |
| Color | White/Black |
| Special Features | Adjustable Depth Control, Contact Safety |

Warranty Information
The Arrow ET200BN Heavy Duty Electric Brad Nailer comes with a Limited Lifetime Warranty. For specific terms and conditions, please refer to the product information guide included with your purchase or contact Arrow Fastener customer support.
Customer Support
For further assistance, technical support, or to view the official user manual in PDF format, please visit the Arrow Fastener website or refer to the included product documentation.
You can access the official User Manual (PDF) here.


