Introduction
This manual provides essential information for the setup, operation, and maintenance of your Stagg ECL 4/4 Electric Cello. Please read these instructions carefully before using your instrument to ensure optimal performance and longevity. The Stagg ECL 4/4 Electric Cello combines traditional cello playing with modern electronic capabilities, offering silent practice and amplified performance options.
Package Contents
Upon unpacking, please verify that all the following items are included:
- Stagg ECL 4/4 Electric Cello
- Gig Bag
- Bow
- Endpin
- Frame/Support extensions

Image: The Stagg ECL 4/4 Electric Cello shown alongside its included gig bag, illustrating the complete package.
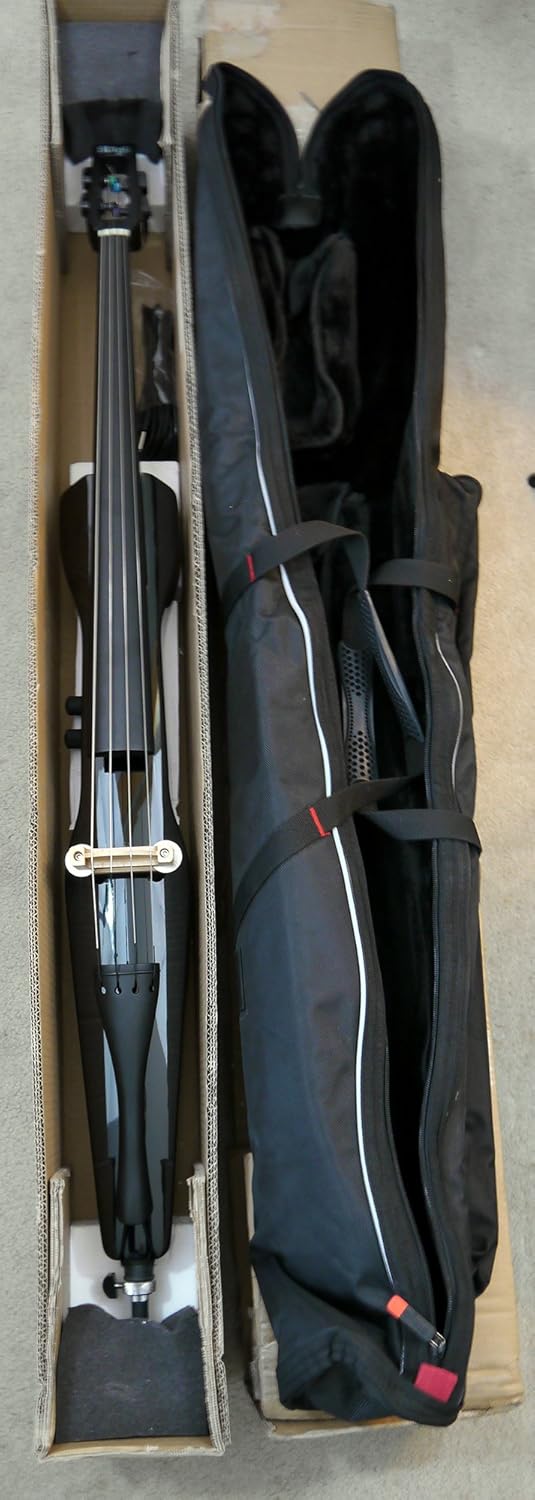
Image: The electric cello and its gig bag as they appear when packaged, ready for assembly.
Product Features
- Solid Maple Construction: Ensures durability and contributes to the instrument's acoustic properties.
- Active Preamp with Under Saddle Pickup: Provides clear amplification and allows for direct connection to audio equipment.
- Volume and Bass Controls: Integrated controls for sound shaping directly on the instrument.
- Gig Bag Included: For convenient transport and protection of the cello.
Setup Guide
1. Attaching the Frame and Endpin
The Stagg ECL 4/4 Electric Cello features a minimalist design with detachable frame extensions for comfortable playing posture. Carefully attach the frame extensions to the designated slots on the cello body. Ensure they are securely fastened to provide stability. Insert the adjustable endpin into its receptacle at the bottom of the cello and adjust its length to achieve a comfortable playing height while seated.

Image: The electric cello fully assembled with its frame and endpin, ready for playing, alongside a bow.
2. Stringing and Tuning
The cello comes with four alloy steel strings. The tuning pegs are designed for precise adjustments. Tune the strings to the standard cello tuning: C, G, D, A (from lowest to highest). Use a digital tuner for accuracy. The instrument features tuners rather than traditional pegs, which can offer more stable tuning.
3. Bridge Placement
The bridge is a crucial component for sound transfer. Ensure the bridge is correctly positioned upright between the f-holes (or their equivalent markings on the electric cello body) and that the strings pass over it without buzzing. The bridge height can be adjusted if necessary to achieve optimal string action, though it is typically set correctly from the factory.
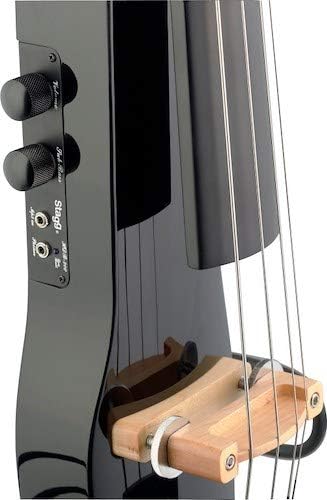
Image: A detailed view of the cello's bridge and the under-saddle pickup system.
4. Battery Installation
The active preamp requires a 9V battery (not included) for operation. Locate the battery compartment, typically on the back or side of the cello body. Insert a fresh 9V battery, observing correct polarity. The blue pilot light will indicate when the battery is active, which occurs when headphones or an external jack are plugged in.
Operating Instructions
1. Connecting to Audio Equipment
The Stagg ECL 4/4 features a 1/4" output jack for connecting to an amplifier, audio interface, or mixing console. It also includes a headphone jack for silent practice. When either jack is used, the internal preamp is activated, and the blue pilot light will illuminate.

Image: A close-up view of the volume and bass controls, along with the 1/4" output and headphone jacks on the cello body.
2. Volume and Tone Adjustment
Use the integrated volume and bass controls to adjust your sound. The volume knob controls the overall output level, while the bass knob allows you to boost or cut low frequencies, shaping your tone to suit your preference or the requirements of your amplifier/system.
3. Silent Practice
For silent practice, plug headphones directly into the dedicated headphone jack. This allows you to hear your playing clearly without disturbing others. Remember to unplug the headphones when finished to conserve battery life.
4. Playing Techniques
The electric cello can be played with a bow or pizzicato (plucking the strings). While bowing, ensure proper rosin application to the bow hair for optimal string vibration and sound production. Experiment with different bowing pressures and speeds to achieve desired dynamics and articulation. Pizzicato can produce a clear, percussive sound, often with a good response from the pickup.

Image: A close-up of a standard cello bow, highlighting its construction.
Official Product Video
Watch this video for a demonstration of the Stagg ECL 4/4 Electric Cello in use, showcasing its features and sound capabilities.
Video: A musician demonstrates the Stagg ECL 4/4 Electric Cello, highlighting its silent practice capabilities and versatility for various musical styles.
Maintenance
1. String Care and Replacement
Strings should be wiped clean after each use to remove rosin dust and oils, which can prolong their life. Replace strings when they become dull, corroded, or break. When replacing strings, do so one at a time to maintain tension on the bridge and soundpost.
2. Battery Management
To prevent battery drain, always unplug headphones and external cables from the cello's jacks when the instrument is not in use. The preamp remains active as long as a jack is connected. If the cello will not be used for an extended period, remove the battery to prevent leakage.
3. Cleaning
Wipe the cello body with a soft, dry cloth to remove dust and fingerprints. Avoid using harsh chemicals or abrasive cleaners, as these can damage the finish. For stubborn marks, a slightly damp cloth followed by a dry one may be used.
4. Storage
Store the cello in its included gig bag when not in use to protect it from dust, scratches, and minor impacts. Keep the instrument in a climate-controlled environment, away from extreme temperatures and humidity fluctuations, which can affect the wood components.

Image: The durable gig bag designed for the Stagg ECL 4/4 Electric Cello, featuring straps and pockets for accessories.
Troubleshooting
- No Sound Output:
- Ensure a fresh 9V battery is correctly installed.
- Verify that headphones or an external cable are securely plugged into the correct jack.
- Check the volume control on the cello and any connected amplifier/device.
- Inspect cables for damage.
- Buzzing or Rattling Noise:
- Check string tension and ensure strings are not too old or damaged.
- Verify the bridge is correctly seated and not leaning.
- Ensure the frame extensions are tightly secured and not loose.
- Inspect for any loose components on the cello body.
- Rapid Battery Drain:
- Always unplug headphones and external cables when the cello is not in use. The preamp remains active as long as a jack is connected.
- Ensure the battery is not old or faulty.
- Tuning Instability:
- Ensure strings are properly stretched and settled. New strings may require frequent tuning initially.
- Check that tuning pegs are functioning correctly and holding tension.
- Verify the bridge is stable and not shifting.
Specifications
| Brand | Stagg |
| Model Number | ECL 4/4 BK |
| Size | 4/4 size |
| Color | Black |
| Item Weight | 12 pounds |
| Product Dimensions | 48 x 14 x 4 inches |
| Material Type | Maple (Body), Basswood (Back) |
| String Material | Alloy Steel |
| Number of Strings | 4 |
| Pickup System | Active preamp with under saddle pickup |
| Controls | Volume, Bass |
Warranty and Support
For warranty information and customer support, please refer to the official Stagg website or contact your authorized Stagg dealer. Keep your proof of purchase for any warranty claims.
For further assistance, you may visit the Stagg Store on Amazon.


