1. Introduction
Thank you for choosing the Unicom 63735 Uni-Com Portable Door Chime. This manual provides essential information for the proper installation, operation, and maintenance of your new door chime system. Please read this manual thoroughly before use and retain it for future reference.
Package Contents:
- 1 x Portable Door Chime Receiver Unit
- 1 x Wireless Push Button Transmitter
- 1 x CR2 Battery (for transmitter)
- Mounting Hardware (screws, adhesive pad)
- User Manual (this document)
2. Safety Information
Please observe the following safety precautions to ensure safe operation and to prevent damage to the device:
- Do not expose the unit to rain or moisture.
- Do not disassemble or attempt to repair the unit yourself. Refer all servicing to qualified personnel.
- Keep batteries out of reach of children. If swallowed, seek immediate medical attention.
- Dispose of used batteries according to local regulations.
- Ensure the power source for the receiver unit matches the specified voltage.
3. Setup
3.1. Installing Batteries in the Push Button Transmitter
- Locate the battery compartment on the back of the wireless push button transmitter.
- Open the compartment cover.
- Insert one CR2 battery, ensuring the correct polarity (+/-) as indicated inside the compartment.
- Close the battery compartment cover securely.
3.2. Powering the Receiver Unit
The receiver unit is AC powered. Plug the receiver unit into a standard electrical outlet within range of the push button transmitter. Ensure the outlet is easily accessible.
3.3. Pairing the Units (if necessary)
Most Unicom door chimes come pre-paired. If your units do not communicate, follow these steps to pair them:
- On the receiver unit, press and hold the pairing button (refer to diagram for location) for approximately 3-5 seconds until you hear a short beep or see an indicator light flash.
- Within 10 seconds, press the push button on the transmitter.
- The receiver should chime, indicating successful pairing. If not, repeat the process.
3.4. Mounting the Push Button Transmitter
Choose a suitable location for the push button, typically near your front door. Ensure it is protected from direct heavy rain if possible.
- Using Screws: Mark the desired mounting points, drill pilot holes, and secure the back plate of the transmitter using the provided screws. Snap the transmitter onto the back plate.
- Using Adhesive Pad: Clean the mounting surface thoroughly. Peel off the protective film from one side of the adhesive pad and attach it to the back of the transmitter. Peel off the other side and firmly press the transmitter onto the desired surface for at least 30 seconds.
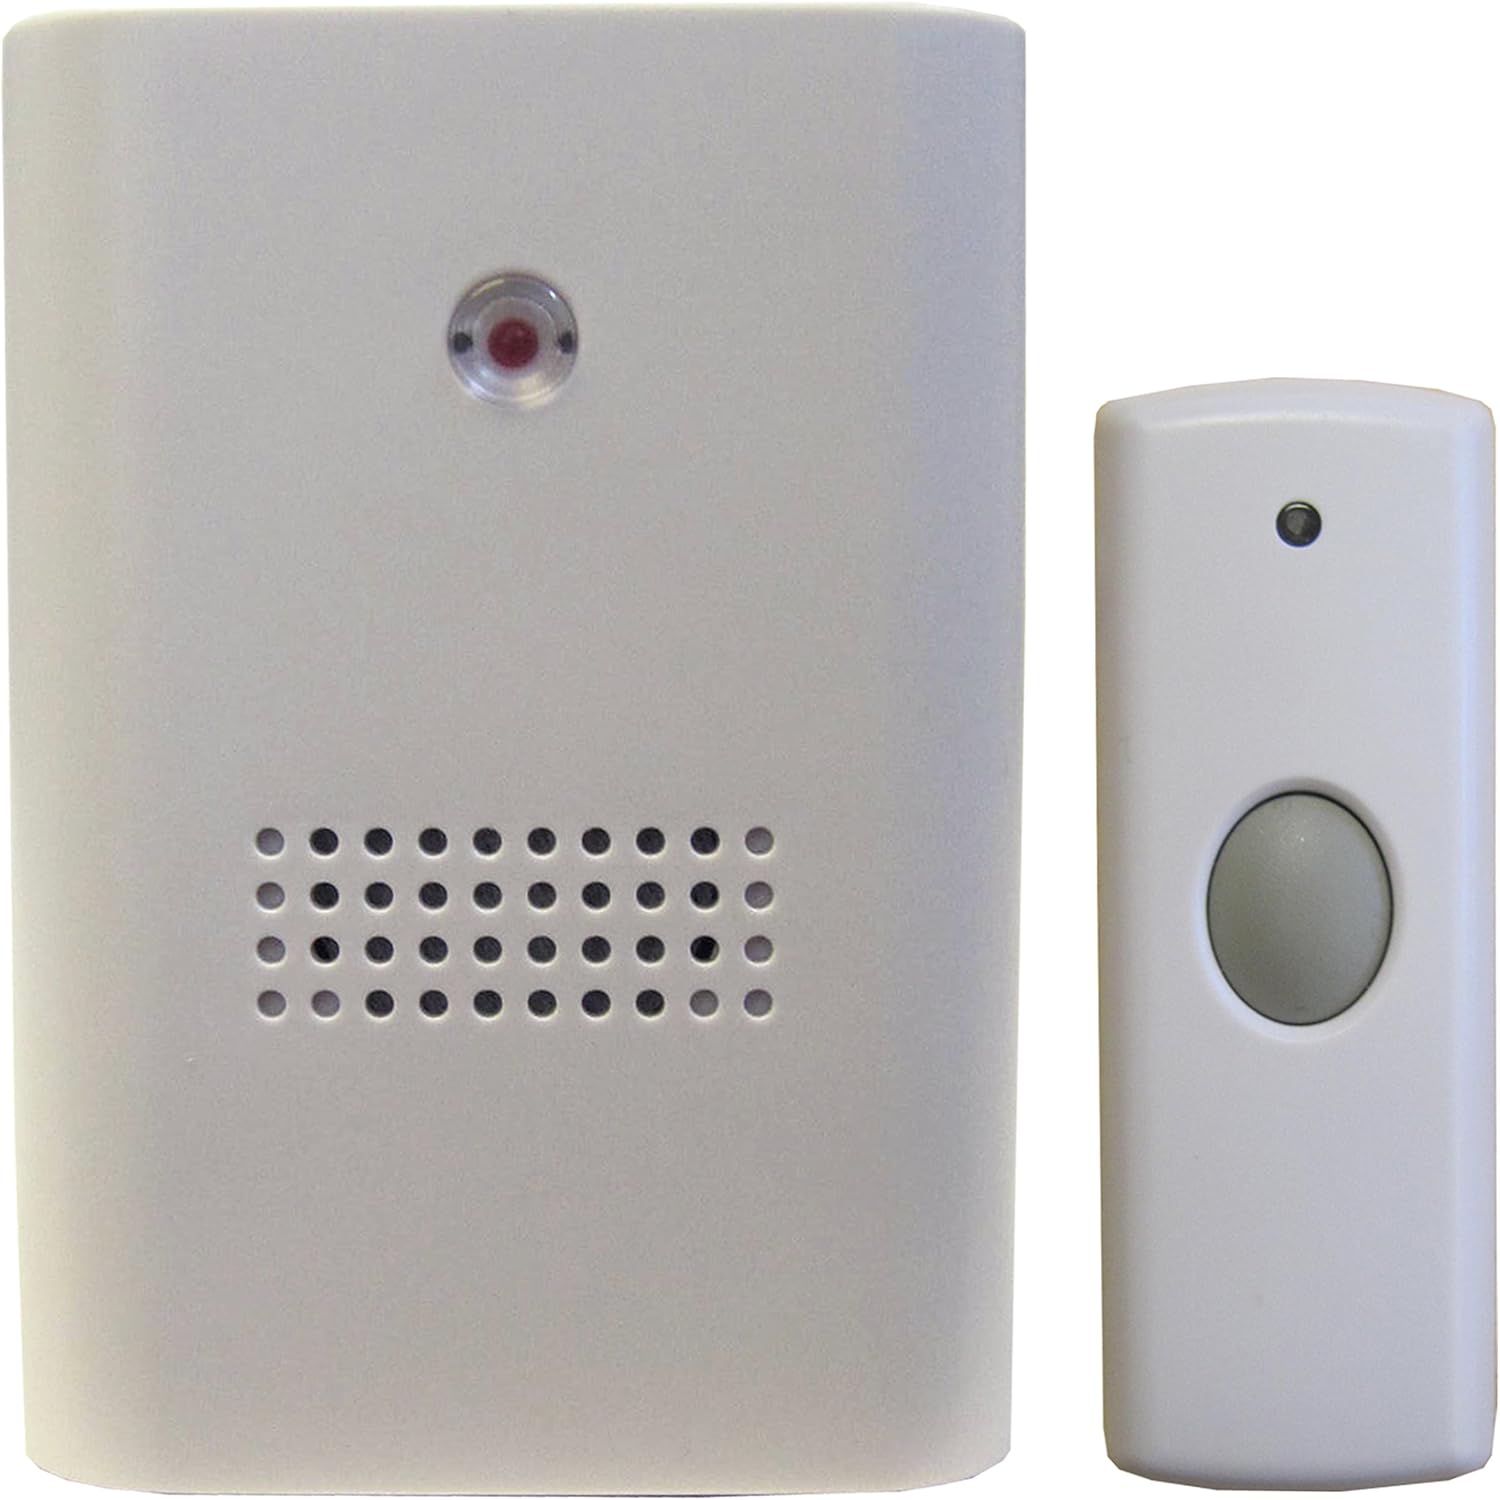
Figure 3.4.1: The Unicom Portable Door Chime receiver unit (left) and the wireless push button transmitter (right). The receiver unit features a speaker grille and an indicator light, while the push button has a large grey button for activation.
4. Operating Instructions
4.1. Changing Chime Melodies
The receiver unit offers multiple chime melodies. To cycle through the available melodies, press the "Melody" button on the side or front of the receiver unit. Each press will play the next melody. Stop pressing when you hear your preferred chime.
4.2. Adjusting Volume
To adjust the volume level of the chime, locate the "Volume" button or switch on the receiver unit. Press the button repeatedly or move the switch to cycle through different volume levels (e.g., High, Medium, Low, Mute).
4.3. Testing the Chime
After setup, press the push button transmitter to test the system. The receiver unit should sound the selected melody and its indicator light may flash. Ensure the receiver is within effective range of the transmitter.

Figure 4.3.1: The Unicom Portable Door Chime receiver unit positioned on a wooden surface next to a clock and a decorative lantern, demonstrating its discreet integration into a home environment.
5. Maintenance
5.1. Battery Replacement (Push Button Transmitter)
If the push button transmitter stops working or its range decreases, the battery may need replacement. Follow the steps in Section 3.1 to replace the CR2 battery.
5.2. Cleaning
Wipe the units with a soft, dry cloth. Do not use abrasive cleaners or solvents, as these can damage the surface. Ensure no liquid enters the units.
6. Troubleshooting
| Problem | Possible Cause | Solution |
|---|---|---|
| Chime does not sound when button is pressed. |
|
|
| Chime sounds intermittently or has poor range. |
|
|
| Chime volume is too low. | Volume setting is too low. | Adjust volume using the volume button/switch on the receiver (refer to Section 4.2). |
7. Specifications
| Feature | Detail |
|---|---|
| Brand | Unicom |
| Model Number | 63735 |
| Product Dimensions (Package) | �.6 x 23.8 x 3.6 cm |
| Item Weight | � g |
| Power Source (Receiver) | AC |
| Battery Type (Transmitter) | 1 x CR2 (included) |
| Colour | White |
| Manufacturer | Unicom |
| First Available Date | 3 Jun. 2014 |
8. Warranty and Support
8.1. Warranty Information
Unicom products are manufactured to high-quality standards. This product comes with a standard manufacturer's warranty against defects in materials and workmanship. Please refer to the packaging or contact Unicom customer service for specific warranty terms and duration.
8.2. Customer Support
For technical assistance, troubleshooting, or inquiries regarding your Unicom Portable Door Chime, please contact Unicom customer support. Contact details can typically be found on the product packaging or the official Unicom website.
Note: Always provide your product model number (63735) when contacting support.


