
1. Introduction
The Panasonic TD73 Melody Week is a programmable clock designed to automatically play chimes, recorded melodies, or announcements at specified times and days. This manual provides detailed instructions for setting up, operating, and maintaining your device to ensure optimal performance.
2. Safety Information
- Battery Safety: Use only the specified battery type. Do not mix old and new batteries, or different types of batteries. Ensure correct polarity (+/-). Remove batteries if the unit will not be used for an extended period.
- Placement: Place the clock on a stable surface or mount it securely on a wall. Avoid areas with extreme temperatures, high humidity, direct sunlight, or strong vibrations.
- Cleaning: Disconnect power (remove batteries) before cleaning. Use a soft, dry cloth. Do not use liquid cleaners or aerosols.
- Water Exposure: This device is not waterproof. Do not expose it to water or other liquids.
- Disassembly: Do not attempt to disassemble or repair the unit yourself. Refer all servicing to qualified personnel.
3. Package Contents
Please check that all items are present in the package:
- Panasonic TD73 Melody Week Clock Unit
- Instruction Manual (this document)
- Mounting hardware (screws, wall anchors) - may vary by region
4. Product Overview
Familiarize yourself with the main components and controls of your Panasonic TD73 Melody Week clock.
Front View
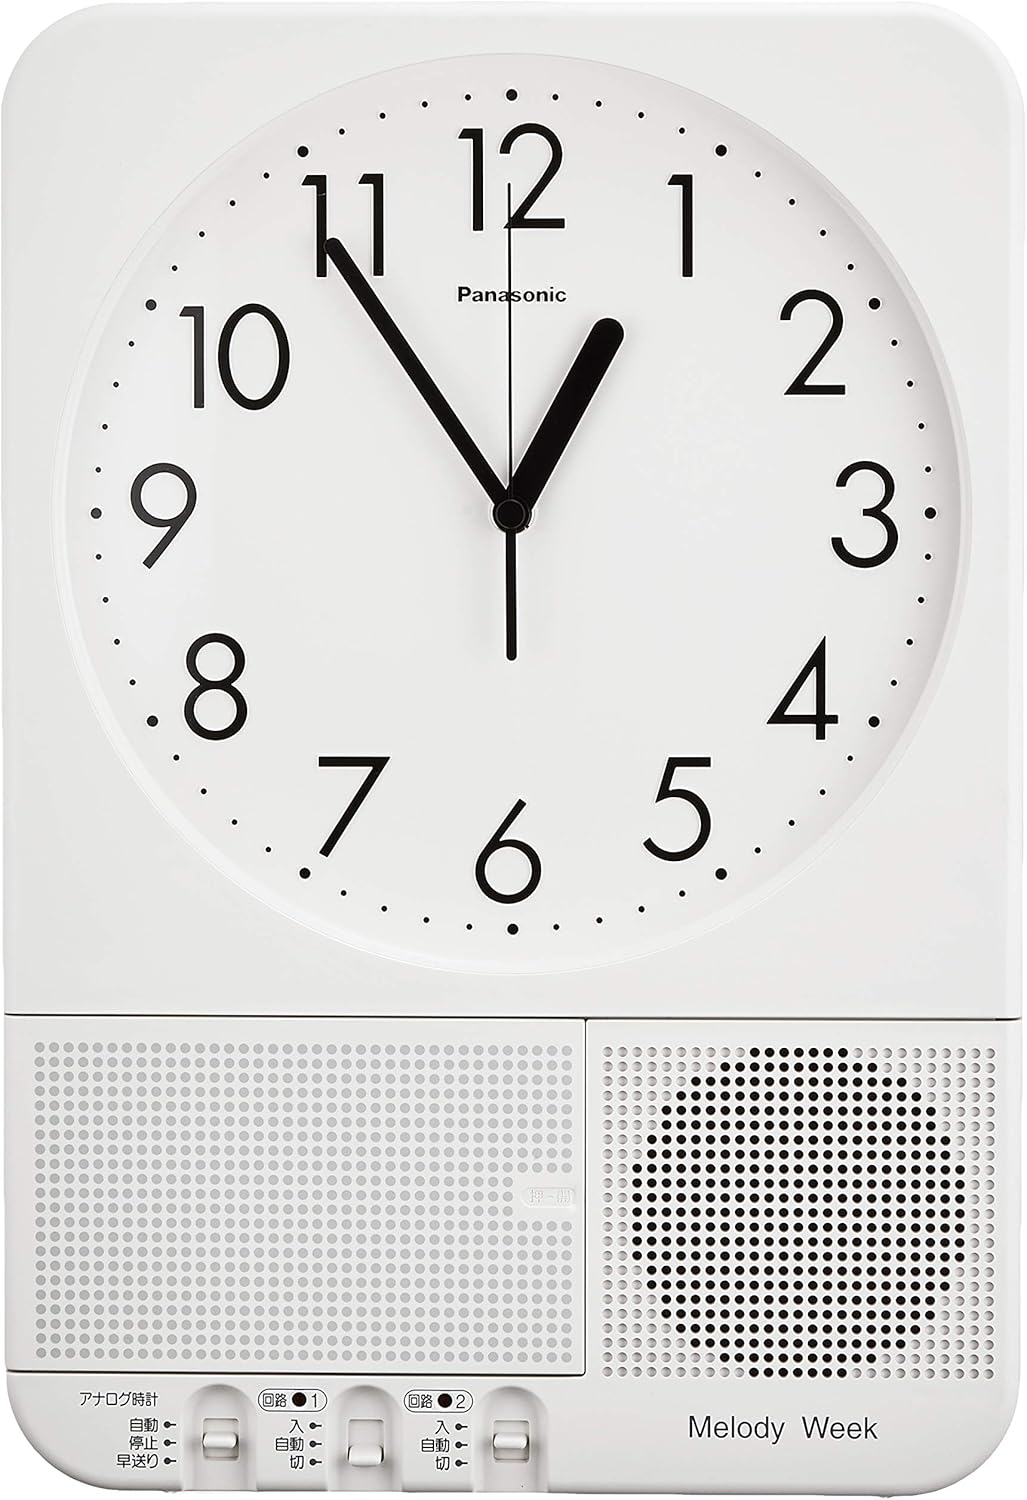
Image Description: This image displays the front of the Panasonic TD73 clock. It features a large, clear analog clock face with black numbers and hands on a white background. Below the clock face is a speaker grille on the right and a covered control panel area on the left, labeled 'Melody Week'.
Control Panel (Open)

Image Description: This image shows the Panasonic TD73 clock with its lower-left control panel cover opened. An LCD screen is visible, along with various buttons for 'Program Settings', 'Recording', 'Playback', 'Time', 'Day of Week', 'Month/Day', 'Hour', 'Minute', 'Volume', 'Melody', 'Chime', 'Time Signal', 'Set', 'Cancel', 'Confirm', 'Back', 'Next', and 'On/Off'. Switches for 'Analog Clock' and 'Program 1/2' are also visible.
Rear View

Image Description: This image displays the back of the Panasonic TD73 clock. It is a plain white surface with several keyholes and screw slots for wall mounting. A rectangular indentation indicates the battery compartment location.
5. Setup
5.1. Battery Installation
- Open the battery compartment cover located on the rear of the clock.
- Insert the required batteries (not included) according to the polarity indicators (+ and -) inside the compartment.
- Close the battery compartment cover securely.
5.2. Wall Mounting
The Panasonic TD73 is designed for wall mounting.
- Choose a suitable location on a wall, ensuring it is sturdy enough to support the clock's weight.
- Mark the positions for the mounting screws using the keyholes on the back of the clock as a template.
- Drill pilot holes if necessary and insert wall anchors (if required for your wall type).
- Insert screws into the wall, leaving a small portion protruding.
- Align the keyholes on the back of the clock with the screws and slide the clock down to secure it.
6. Operating Instructions
The control panel is located behind the cover on the lower-left front of the clock.
6.1. Setting the Current Time (Analog Clock)
- Locate the 'アナログ時計' (Analog Clock) switch on the control panel.
- Set the switch to '早送り' (Fast Forward) to quickly advance the clock hands.
- Once the correct time is reached, return the switch to '自動' (Auto) for normal operation.
6.2. Setting the Digital Display Time and Date
- Press the '時刻' (Time) button to enter time setting mode.
- Use the '時' (Hour) and '分' (Minute) buttons to adjust the current hour and minute.
- Press the '曜日' (Day of Week) button to set the current day.
- Press the '月日' (Month/Day) button to set the current month and day.
- Press '設定' (Set) to confirm the settings.
6.3. Programming Automatic Playback (Melody/Chime/Announcement)
The clock allows for multiple program settings (e.g., Program 1 and Program 2 switches).
- Select the desired program slot using the 'プログラム設定' (Program Settings) button or the 'プログラム 1' / 'プログラム 2' switches.
- Press '設定' (Set) to begin programming.
- Use '時' (Hour) and '分' (Minute) to set the desired playback time.
- Use '曜日' (Day of Week) to select the days for playback (e.g., everyday, weekdays only, specific days).
- Choose the sound type: Press 'メロディ' (Melody), 'チャイム' (Chime), or '報時' (Time Signal/Announcement).
- If selecting '報時' (Announcement), proceed to section 6.4 for recording.
- Adjust the volume using the '音量' (Volume) buttons.
- Press '確認' (Confirm) to save the program.
- To enable or disable a program, use the '入/切' (On/Off) button or the corresponding program switch.
6.4. Using the Recording Function (for Announcements)
- Ensure you are in the program setting mode where '報時' (Announcement) is selected.
- Press the '録音' (Recording) button. The display may show a recording indicator.
- Speak clearly into the microphone (if visible, otherwise assume it's integrated near the speaker).
- Press '録音' (Recording) again to stop recording.
- Press '再生' (Playback) to listen to your recorded announcement.
- If satisfied, press '確認' (Confirm) to save the recording with the program.
7. Maintenance
7.1. Cleaning
Wipe the clock's exterior with a soft, dry cloth. Do not use abrasive cleaners, solvents, or chemical sprays, as these can damage the finish or internal components.
7.2. Battery Replacement
When the display dims or the sound quality deteriorates, it is time to replace the batteries. Follow the battery installation steps in section 5.1. Always replace all batteries at the same time with new ones of the same type.
8. Troubleshooting
- Clock not functioning / No display: Check battery installation and ensure batteries are fresh.
- Analog clock hands not moving: Ensure the 'アナログ時計' (Analog Clock) switch is set to '自動' (Auto). Replace batteries if necessary.
- Programmed sound not playing:
- Verify the program is enabled ('入' / On).
- Check the set time and day for the program.
- Ensure the volume is not set to minimum.
- Replace batteries.
- Recorded announcement quality is poor: Ensure you are speaking clearly and at an appropriate distance from the microphone during recording. Check battery level.
9. Specifications
| Brand | Panasonic |
| Model Number | TD73 |
| Colour | White |
| Display Type | Analog (Clock), Digital (Program/Settings) |
| Power Source | Battery Powered (Batteries not included) |
| Mounting Type | Wall Mount |
| Product Dimensions (W x H x D) | 28W x 41H centimetres (approx. 6cm depth) |
| Item Weight | 600 Grams |
| Frame Material | Plastic |
| Special Features | Automatic Chime, Recorded Melody, Announcements, Programmable Weekly Schedule |

Image Description: This image illustrates the dimensions of the Panasonic TD73 clock, specifically highlighting its height of 17 inches (approximately 42 cm) with a measurement scale next to the clock.
10. Warranty and Support
For warranty information and customer support, please refer to the warranty card included with your product or visit the official Panasonic website for your region. Keep your purchase receipt as proof of purchase.
