
Introduction
The Lutron Pico Remote Control PJ2-3BRL-WH-L01R provides a convenient and flexible solution for controlling Lutron Caseta smart dimmers and plug-in lamp dimmers. This manual outlines the setup, operation, and maintenance of your Pico remote to ensure optimal performance and ease of use.

Figure 1: Lutron Pico Smart Remote Control and its packaging.
What's Included
- (1) Wireless Pico remote control
- (1) Lithium Metal battery (pre-installed)
Setup
Pairing with Caseta Smart Dimmers
The Pico remote can be easily paired with Lutron Caseta dimmers and plug-in lamp dimmers (sold separately) to provide wireless control.
- Hold down the main button on your Caseta smart dimmer for 6 seconds until its indicator light blinks.
- While the dimmer's light is blinking, hold down the "Off" button (bottom button) on the Pico remote until both the dimmer and Pico remote indicator lights blink.
- Release the buttons. The Pico remote is now paired and ready to control your lights.

Figure 2: Easy pairing process for the Pico Remote.
Mounting Options
The Pico remote offers versatile mounting options to suit your needs:
- Handheld Use: The remote is lightweight and compact, ideal for use as a portable control.
- Tabletop Pedestal: Place the remote in a coordinating tabletop pedestal (sold separately) for a stable and accessible control point.
- Wall Mounting: The remote can be mounted directly to almost any surface without new holes or wires using a wall plate bracket (sold separately). This allows you to create a new control location or convert a single-pole switch to a 3-way switch without complex wiring.

Figure 3: Mounting the Pico Remote on different surfaces.

Figure 4: Installing the Pico Remote into a wall plate bracket.
Operating Instructions
The Pico remote features a simple 3-button layout with additional raise/lower controls for intuitive lighting management.

Figure 5: Pico Remote Control button functions.
- Top Button (Light Bulb Icon): Turns lights on to full brightness.
- Center Button (Triangle Up/Down with Circle):
- Up/Down Triangles: Tap to brighten or dim lights incrementally.
- Center Circle: Tap to activate a preset favorite light level. This level can be configured on the paired Caseta dimmer.
- Bottom Button (Light Bulb Icon with Line): Turns lights off.
One Pico remote can control multiple Caseta dimmers, allowing for unified control of several lights or zones from a single remote.

Figure 6: Controlling multiple lights with one Pico Remote.
Product Overview Video
Video 1: An official product video demonstrating the versatility and ease of use of the Lutron Pico Wireless Smart Remote, including pairing with Caseta switches, mounting options, and controlling multiple lighting zones.
Maintenance
Battery Life
The Pico remote control is powered by a single Lithium Metal battery (included) with an impressive typical battery life of 10 years. No regular battery replacement is typically needed for a decade under normal usage conditions.
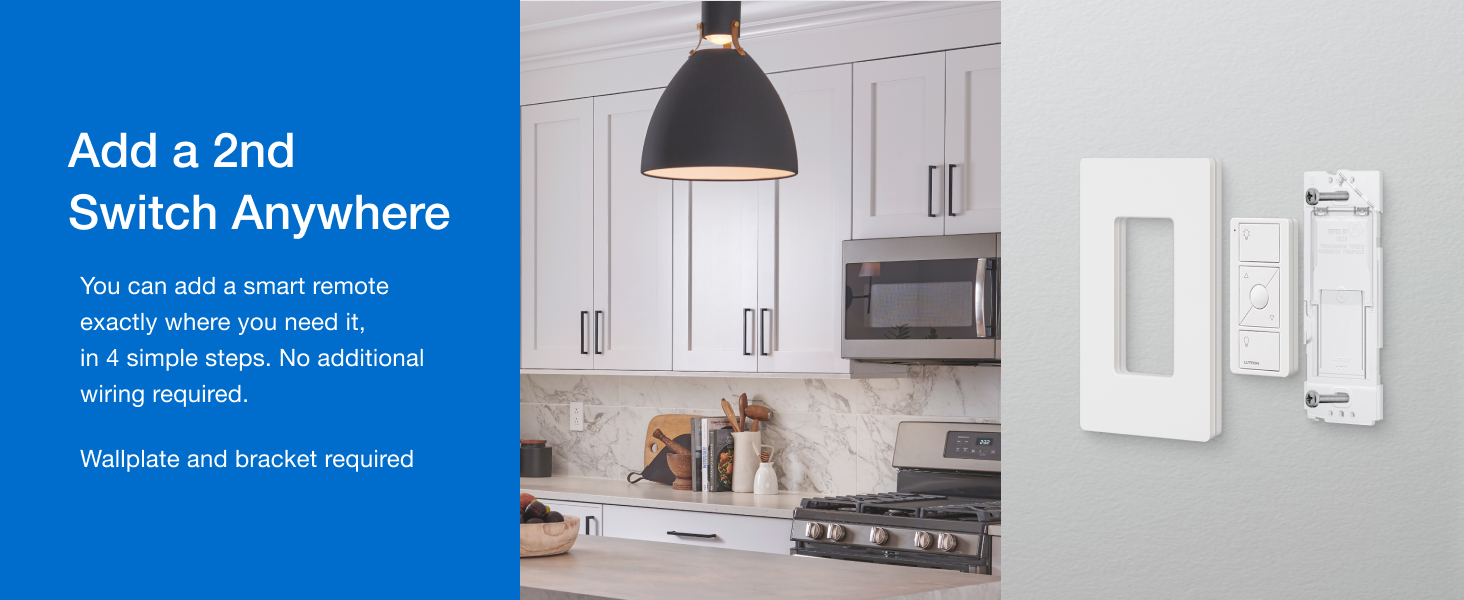
Figure 7: The Pico Remote features a 10-year battery life.
Troubleshooting
If your Pico remote is not functioning as expected, consider the following:
- Check Pairing: Ensure the remote is correctly paired with your Caseta smart dimmer. Repeat the pairing steps if necessary.
- Battery Check: Although the battery has a long life, ensure it is properly seated. If issues persist after many years of use, consider replacing the battery if possible (refer to product documentation for battery replacement instructions).
- Range: Verify that the remote is within the operational range of the paired Caseta dimmer. Obstructions can sometimes interfere with the wireless signal.
- Reset: For persistent issues, a factory reset of the Pico remote and re-pairing might resolve the problem. Consult the full Lutron Caseta system manual for detailed reset procedures.
Specifications
| Model Number | PJ2-3BRL-WH-L01R |
| Brand | Lutron |
| Product Dimensions | 3.88 x 0.5 x 5.75 inches |
| Item Weight | 0.16 ounces |
| Batteries | 1 Lithium Metal battery (included) |
| Operation Mode | Off |
| Connector Type | Plug-in, Wireless |
| Actuator Type | Push Button |
Support & Warranty
For further assistance, technical support, or warranty information, please visit the official Lutron website or contact Lutron customer service. Specific warranty details are typically provided with your product purchase documentation.
You can find more information and support resources on the Lutron Store on Amazon.