1. Product Overview
The TecTake Premium Wall Mounted Double Glass Shelf Unit is designed to provide a practical and elegant storage solution for home entertainment devices such as receivers, DVD players, gaming consoles, and more. Its space-saving design and integrated cable management system help maintain a tidy and organized living space.
Key Features
- Elegant design with stable safety glass shelves.
- Integrated cable channel for neat cable management.
- Height-adjustable shelves for versatile placement of devices.
- Space-saving wall-mounted installation.
- Easy assembly process.
- Each shelf supports a maximum load of 14 kg.

Image 1.1: Front view of the TecTake Premium Wall Mounted Double Glass Shelf Unit.
2. Package Contents
Please ensure all components are present before beginning assembly:
- 1 x Wall shelf unit (main frame)
- 3 x Safety glass shelves
- Extensive assembly material (screws, wall anchors, washers, etc.)
- 1 x Detailed installation instructions (this manual)
3. Specifications
| Attribute | Value |
|---|---|
| Product Dimensions (HxWxD) | 80 x 42 x 33 cm |
| Weight | 7.3 kg |
| Material | Steel frame, 6 mm safety glass shelves |
| Finish Type | Polished |
| Number of Shelves | 3 |
| Max Load per Shelf | 14 kg |
| Mounting Type | Wall Mount |
| Assembly Required | Yes |
| Model Number | 800136 |

Image 3.1: Dimensional diagram of the wall shelf unit.
4. Setup and Installation
Careful installation is crucial for the stability and safety of your wall shelf unit. Please read all instructions before proceeding.
Tools Required
- Drill with appropriate drill bits (for masonry, wood, or drywall)
- Spirit level
- Measuring tape and pencil
- Screwdriver (compatible with provided screws)
- Hammer (if using expansion anchors)
Installation Steps
- Unpack and Verify: Carefully unpack all components and verify against the package contents list.
- Choose Location: Select a suitable wall location. Ensure the wall can support the combined weight of the shelf unit and its intended contents (up to 14 kg per shelf). Avoid areas with hidden electrical wires or plumbing.
- Mark Drilling Points: Use the provided template (if applicable) or measure carefully to mark the drilling points on the wall. Use a spirit level to ensure marks are perfectly horizontal.
- Drill Holes: Drill holes at the marked points using an appropriate drill bit for your wall type. The depth and diameter of the holes should match the provided wall anchors.
- Insert Wall Anchors: Insert the appropriate wall anchors into the drilled holes. For plasterboard or hollow walls, use suitable cavity anchors (may not be included).
- Mount Wall Bracket: Secure the main wall bracket to the wall using the provided screws. Ensure it is firmly attached and level. Do not overtighten.
- Attach Shelves: Slide the glass shelves onto the support arms. Adjust their height as desired using the adjustment mechanism.
- Secure Shelves: Secure the shelves in place using the provided fasteners or locking mechanisms. Ensure each shelf is stable and cannot easily be dislodged.
- Cable Management: Route cables from your devices through the integrated cable channel for a neat and organized appearance.
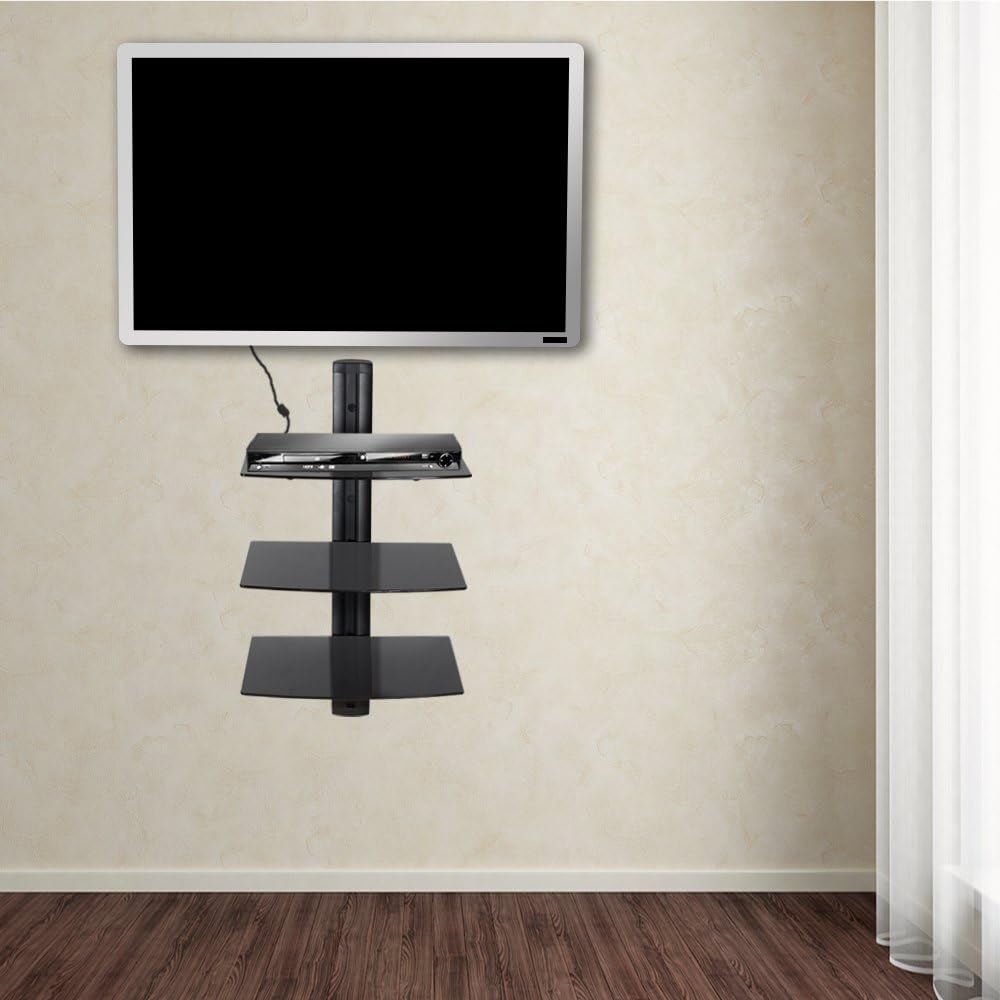
Image 4.1: Example of the wall shelf unit installed in a living space.

Image 4.2: Side view of the shelf unit, showing shelf placement.
5. Operation and Usage
Once installed, the TecTake wall shelf unit provides a functional and aesthetic platform for your media devices.
Placing Devices
Carefully place your electronic devices on the glass shelves. Ensure the weight of each device, along with any accessories, does not exceed the maximum load capacity of 14 kg per shelf. Distribute weight evenly across the shelf surface.
Adjusting Shelf Height
The shelves are designed to be height-adjustable. To adjust a shelf's position, locate the securing mechanism on the support arm, loosen it, slide the shelf to the desired height, and then firmly re-secure the mechanism. Always ensure the shelf is level after adjustment.

Image 5.1: Detail of the shelf adjustment mechanism and glass shelf support.
Cable Management
Utilize the integrated cable channel along the central column to conceal and organize power and AV cables from your devices. This feature helps prevent tangles, reduces clutter, and improves the overall aesthetic of your entertainment area.
6. Maintenance
Regular cleaning and inspection will help maintain the appearance and functionality of your shelf unit.
Cleaning
- Glass Shelves: Clean glass surfaces with a soft, damp cloth and a mild glass cleaner. Avoid abrasive cleaners, scouring pads, or harsh chemicals that could scratch or damage the glass.
- Metal Frame: Wipe the steel frame with a soft, dry or slightly damp cloth. Do not use abrasive cleaners.
Regular Checks
Periodically check all screws and connections, especially those securing the unit to the wall, to ensure they remain tight and secure. This is particularly important after moving or adjusting the unit, or if you notice any instability.
7. Troubleshooting
If you encounter any issues with your TecTake wall shelf unit, refer to the following common problems and solutions:
- Shelf Not Level:
- Ensure the main wall bracket is mounted perfectly level. Re-adjust if necessary.
- Verify that individual shelves are properly seated and secured on their support arms. - Cables Not Tidy:
- Ensure all cables are routed through the designated integrated cable channel.
- Use additional cable ties (not included) to bundle excess cable length for a cleaner look. - Unit Feels Unstable:
- Double-check that the wall anchors and screws used are appropriate for your specific wall type and are securely fastened.
- Ensure the total weight placed on the shelves does not exceed the maximum load capacity of 14 kg per shelf. Redistribute weight if necessary.
8. Warranty and Support
This TecTake product is manufactured with high-quality materials and undergoes strict quality control to ensure durability and performance. For information regarding warranty coverage, claims, or technical support, please refer to your original purchase documentation or contact TecTake customer service directly. Please retain your proof of purchase for any warranty-related inquiries.
For further assistance, please visit the official TecTake website or contact their customer support line.


