
Introduction
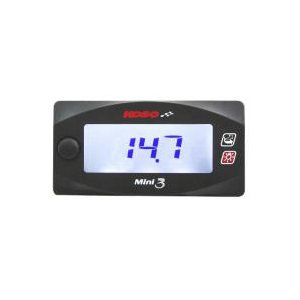
This instruction manual provides essential information for the safe and effective installation, operation, and maintenance of your KOSO Mini3 Digital Air-Fuel Ratio Meter. Please read this manual thoroughly before use and retain it for future reference. This compact meter, part of the Mini3 series, is designed to display the air-fuel ratio based on feedback from the genuine O2 sensor, making it a valuable tool for engine tuning and monitoring fuel efficiency.
Safety Information
- Always disconnect the vehicle's battery before attempting any electrical installation to prevent short circuits or damage.
- Ensure all wiring connections are secure and properly insulated to avoid electrical hazards.
- Installation should ideally be performed by a qualified technician to ensure correct wiring and functionality.
- Do not attempt to modify the meter or its components, as this may void the warranty and lead to malfunction.
- Operate the meter within the specified voltage and temperature ranges to prevent damage.
Package Contents
Verify that all the following items are included in your package:
- KOSO Mini3 Digital Air-Fuel Ratio Meter Unit x 1
- Sensor Harness x 1
- Splice Connectors x 2
- Magic Tape (for mounting) x 1
- Manufacturer-Specific Sensor Harness x 1
- Instruction Manual x 1
Setup and Installation
The KOSO Mini3 Digital Air-Fuel Ratio Meter is designed for direct connection to the vehicle's genuine O2 sensor. Follow these steps for proper installation:
- Identify the O2 Sensor Connector: Locate the genuine O2 sensor connector on your Suzuki Address V125. Refer to your vehicle's service manual if necessary.
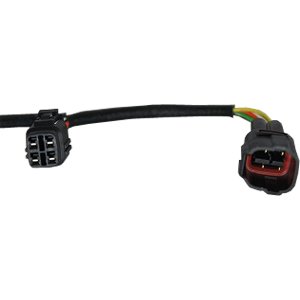
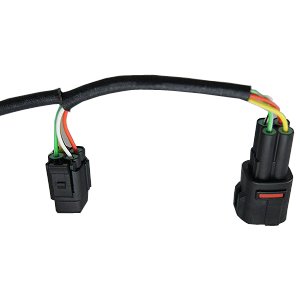
- Connect the Sensor Harness: Connect the provided sensor harness from the KOSO Mini3 meter to the vehicle's O2 sensor connector. Ensure the connector shapes match perfectly for a secure connection.
- Power Connection: Connect the meter's power wires to a suitable DC12V power source on your vehicle. Typically, this involves connecting to the ignition switch or a switched power line. Use the splice connectors if needed, ensuring proper polarity (positive to positive, negative to negative).
- Mounting the Meter: Choose a suitable location on your dashboard or handlebars for the meter. Use the provided magic tape to securely mount the meter, ensuring it is visible and does not obstruct your view or controls.
- Cable Management: Route all cables neatly and securely, away from moving parts, heat sources, and sharp edges. Use cable ties to prevent loose wiring.
Operating Instructions
Once installed and powered on, the KOSO Mini3 Digital Air-Fuel Ratio Meter will automatically begin displaying the air-fuel ratio. No complex setup or calibration is typically required for basic operation.
- Power On: Turn the vehicle's ignition key to the 'ON' position. The meter display will illuminate.
- Reading the Display: The digital display shows the current air-fuel ratio (AFR) value. A typical stoichiometric (ideal) AFR for gasoline engines is around 14.7:1. Values below this indicate a richer mixture, while values above indicate a leaner mixture.
- Monitoring: Observe the AFR during various riding conditions (idle, acceleration, cruising) to understand your engine's fueling characteristics. This information is crucial for fine-tuning engine performance or diagnosing potential issues.

Maintenance
To ensure the longevity and accurate performance of your KOSO Mini3 Digital Air-Fuel Ratio Meter, follow these simple maintenance guidelines:
- Cleaning: Wipe the meter's display and body with a soft, damp cloth. Do not use abrasive cleaners or solvents, as these can damage the display or casing.
- Connection Check: Periodically inspect all wiring connections to ensure they remain secure and free from corrosion. Loose connections can lead to intermittent readings or malfunction.
- Environmental Protection: While the meter is designed to be durable, avoid exposing it to extreme weather conditions or direct high-pressure water sprays.
Troubleshooting
If you encounter issues with your KOSO Mini3 Digital Air-Fuel Ratio Meter, refer to the following common problems and solutions:
| Problem | Possible Cause | Solution |
|---|---|---|
| Meter does not power on | No power supply; Loose power connection; Blown fuse | Check power wiring and connections; Inspect vehicle's fuse box; Ensure battery is charged. |
| Display shows '---' or fluctuates erratically | Loose O2 sensor harness connection; Faulty O2 sensor; Electrical interference | Securely re-connect the O2 sensor harness; Apply contact cleaner to connectors; Test O2 sensor functionality; Check for proper grounding. |
| Inaccurate readings | Incorrect O2 sensor type; Exhaust leak; Meter malfunction | Ensure compatibility with genuine O2 sensor; Inspect exhaust system for leaks; Contact support if issue persists. |
Specifications
| Feature | Specification |
|---|---|
| Display Range | 12.2 - 17.2 (Minimum change unit: 0.1) |
| Operating Voltage | DC12V |
| Operating Temperature Range | -10°C to +60°C |
| Standard Compliance | JIS D 0203 S2 |
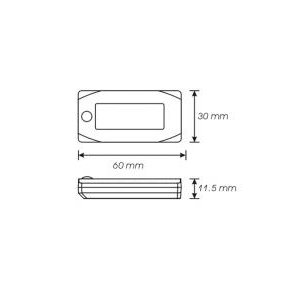
| Body Size (L x W x H) | 60 x 30 x 11.5 mm |
| Body Weight | Approx. 22g |
| Compatibility | Suzuki Address V125 (limited to vehicles with O2 sensor connector shape shown in images) |
Warranty Information
This KOSO Mini3 Digital Air-Fuel Ratio Meter comes with a 12-month warranty from the date of purchase. This warranty applies only to genuine KN Kikaku products. Please retain your proof of purchase for warranty claims. The warranty covers manufacturing defects and malfunctions under normal use. It does not cover damage caused by improper installation, misuse, accidents, or unauthorized modifications.
Support
For further assistance, technical support, or warranty inquiries, please contact your authorized KN Kikaku dealer or the point of purchase. You may also refer to the official KOSO or KN Kikaku websites for additional resources and contact information.
Online Resources:
- KN Kikaku Store on Amazon: Visit KN Kikaku Store

