1. Introduction
The Retevis RT-5RV is a high-power, dual-band handheld transceiver designed for reliable two-way communication. It features extensive receive frequency coverage, providing local-area two-way amateur communications along with unmatched monitoring capability. This manual provides essential information for the proper setup, operation, and maintenance of your RT-5RV walkie talkie.
2. What's in the Box
Upon opening your Retevis RT-5RV package, you should find the following components:
- Retevis RT-5RV Portable 2 Way Radio
- Antenna
- Earpiece
- LI-ion Battery (1400mAh)
- Belt Clip
- Sling (Hand Strap)
- Adapter (Charger)
- English User's Manual
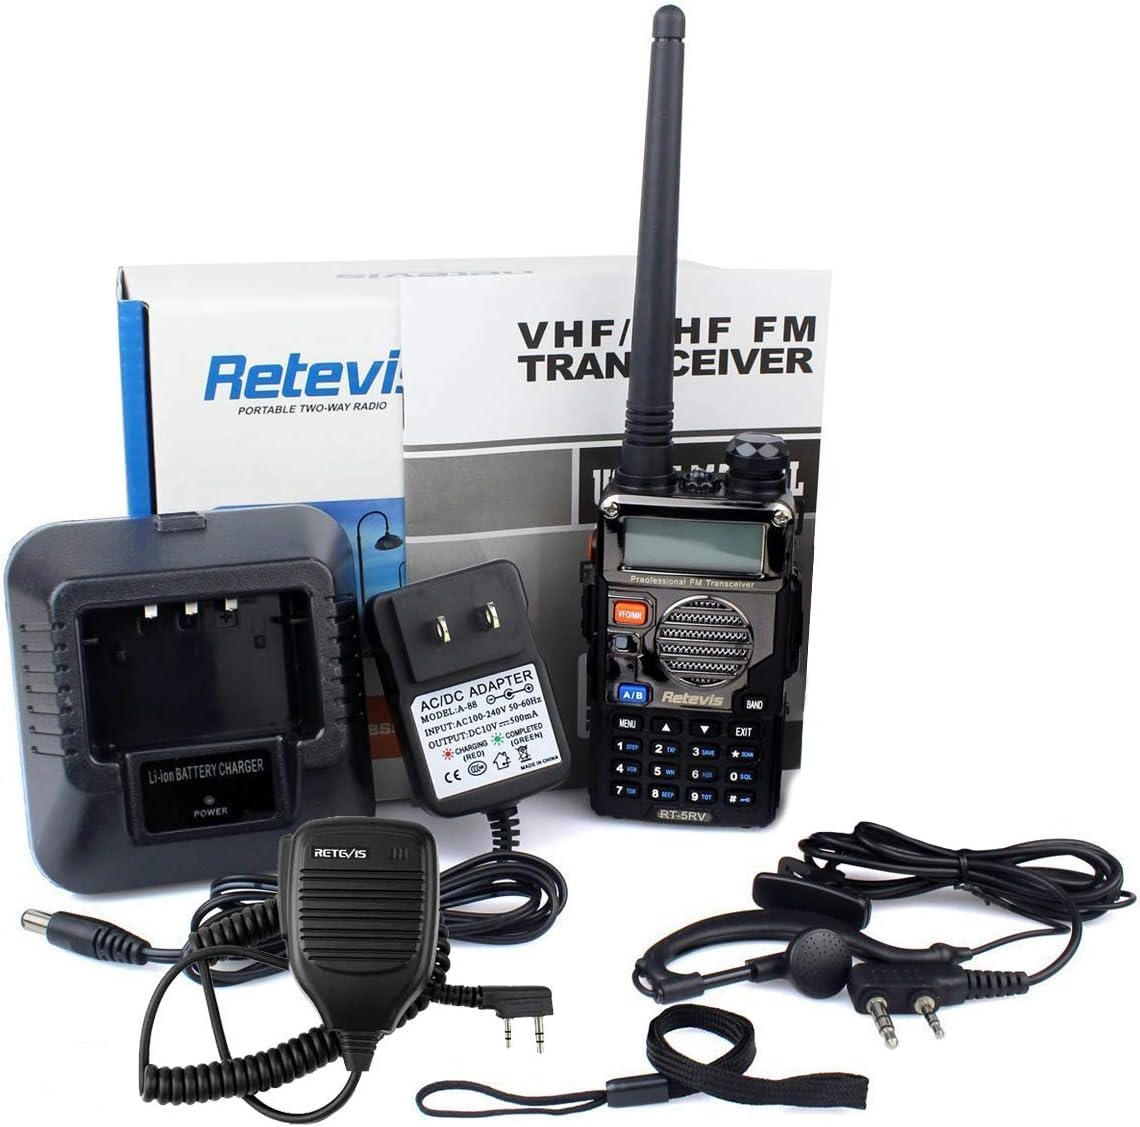
Image: All components included in the Retevis RT-5RV package, laid out on a white surface. This includes the radio unit, antenna, earpiece, battery, belt clip, hand strap, and charging adapter.
3. Setup
3.1. Battery Installation
To install the LI-ion battery, align the battery with the back of the radio unit. Slide the battery upwards until it clicks securely into place. Ensure the battery release button is not pressed during installation.
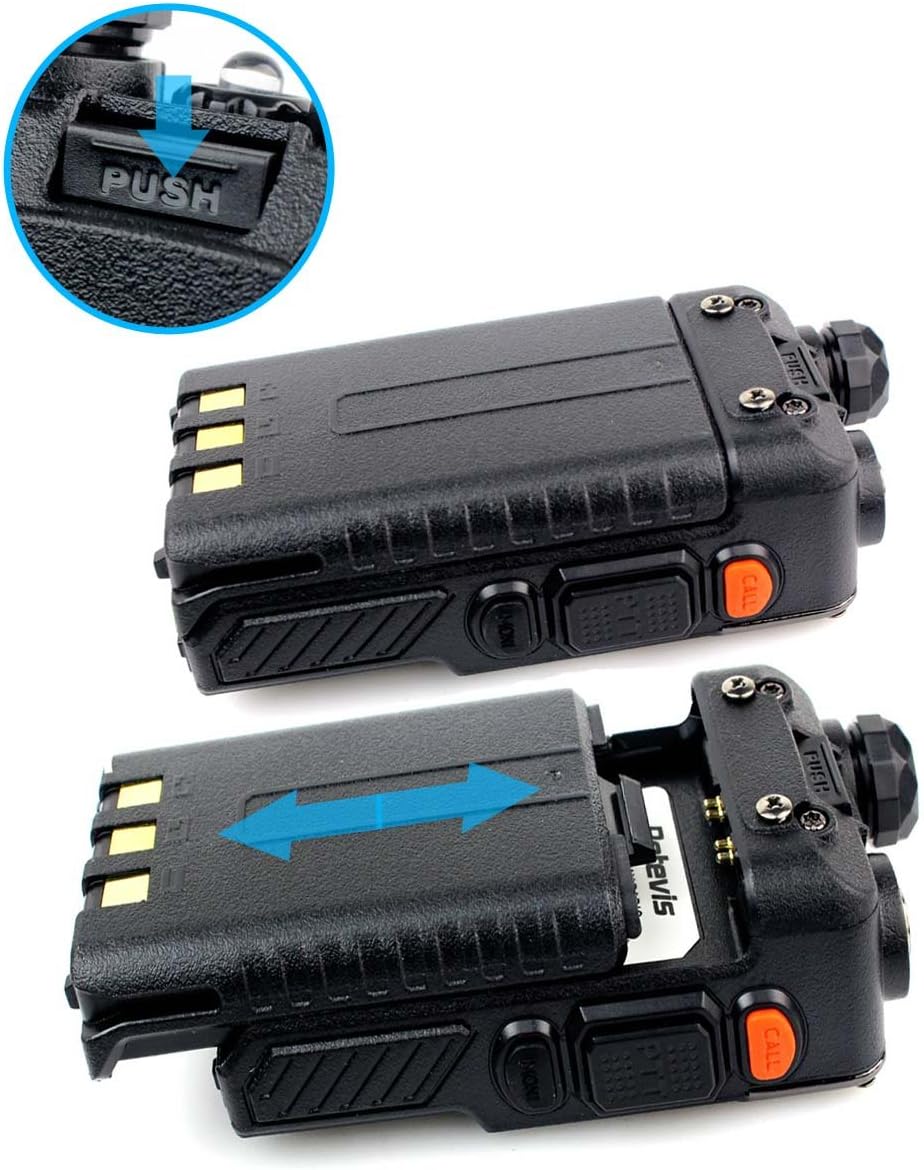
Image: A close-up view demonstrating the process of sliding the LI-ion battery into the back compartment of the Retevis RT-5RV walkie talkie. An arrow indicates the direction of insertion.
3.2. Antenna Installation
Screw the antenna clockwise into the connector on the top of the radio until it is firmly seated. Do not overtighten. Always ensure the antenna is properly installed before operating the radio to prevent damage.
3.3. Belt Clip Installation
Attach the belt clip to the back of the radio using the provided screws. Align the screw holes on the belt clip with those on the radio's battery compartment and tighten securely with a screwdriver.
3.4. Charging the Battery
Place the radio with the battery installed into the charging base. Connect the charging adapter to the charging base and plug it into a power outlet. The indicator light on the charger will show the charging status (usually red for charging, green for fully charged).

Image: The Retevis RT-5RV walkie talkie placed in its charging cradle, with the LI-ion battery and power adapter visible. The image illustrates the complete charging setup.
3.5. Earpiece/Speaker Mic Connection
Open the rubber cover on the right side of the radio. Insert the dual-pin connector of your earpiece or speaker mic firmly into the corresponding ports. Ensure a snug fit for optimal audio quality.

Image: A collage of close-up views of the Retevis RT-5RV walkie talkie, highlighting the antenna connection, battery contacts, keypad, and the dual-pin port for accessories like earpieces or speaker mics.
3.6. Frequency Programming
The RT-5RV supports programming via a USB cable and dedicated software. This allows for customization of frequencies, sub-channels, and other parameters. Ensure you have the correct USB driver and programming software installed on your computer. The software is typically provided by the seller upon request.
Video: A demonstration of how to install the USB driver and use the programming software for the Retevis RT-5RV walkie talkie. The video shows connecting the radio to a computer and navigating the software interface to adjust channel information and frequencies.
4. Operating Instructions
4.1. Power On/Off and Volume Control
Rotate the top-right knob clockwise to turn the radio ON. Continue rotating to increase the volume. Rotate counter-clockwise to decrease the volume and turn OFF the radio.
4.2. Channel/Frequency Mode Switch
The RT-5RV supports both Channel Mode (pre-programmed channels) and Frequency Mode (direct frequency input). Use the VFO/MR button to switch between these modes. In Frequency Mode, you can directly input dual-band frequencies using the keypad.
Video: A demonstration of the various functions of the Retevis RT-5RV walkie talkie, including switching between frequency and channel modes, adjusting squelch, and using the keypad lock. The video highlights the user-friendly interface for common operations.
4.3. Push-to-Talk (PTT) Button
Press and hold the large button on the left side of the radio to transmit. Speak clearly into the microphone. Release the button to stop transmitting and listen for a response.
4.4. Dual Band Operation
The RT-5RV operates on both VHF and UHF bands. The LCD display shows two frequencies, allowing you to monitor two channels simultaneously. Use the A/B button to select which frequency is active for transmission.

Image: The LCD display of the Retevis RT-5RV walkie talkie showing two different frequencies being monitored simultaneously. The display changes color to indicate active channels or modes.
4.5. Emergency Alarm
The radio is equipped with an emergency alarm feature. Consult the detailed user manual for specific instructions on how to activate and deactivate this function, as it may vary based on programming.
4.6. Squelch Adjustment
Squelch filters out weak signals and background noise. The RT-5RV allows for easy squelch adjustment directly from the menu. This is a crucial feature for clear communication, especially in noisy environments or when dealing with weak signals.
4.7. Keypad Lock
To prevent accidental changes to settings, the keypad can be locked. Refer to the full user manual for the specific key combination to activate and deactivate the keypad lock feature.
5. Maintenance
5.1. Battery Care
To maximize battery life and performance, always use the original Retevis charger. Avoid overcharging or completely draining the battery. Store the battery in a cool, dry place when not in use for extended periods.
5.2. Cleaning
Clean the radio's exterior with a soft, damp cloth. Do not use harsh chemicals or abrasive cleaners. Ensure all ports are covered when cleaning to prevent moisture ingress.
5.3. Water Resistance
The RT-5RV is rated as waterproof. While it can withstand splashes and light rain, it is not designed for submersion. Always ensure battery and accessory covers are securely closed to maintain water resistance.
6. Troubleshooting
6.1. No Power
- Ensure the battery is fully charged and properly installed.
- Check that the power/volume knob is rotated clockwise to the ON position.
6.2. No Reception or Poor Audio Quality
- Verify that the antenna is securely attached.
- Check the selected channel or frequency. Ensure it matches the other radio.
- Adjust the squelch level to reduce background noise.
- Ensure you are within the effective communication range.
- Obstacles and terrain significantly affect radio range.
Video: An animated explanation of factors affecting two-way radio range, including radio power, signal type, horizon distance, atmospheric conditions, antenna, and terrain/obstacles. It visually demonstrates how terrain blocks signals and the concept of a radio horizon.
Video: A practical demonstration of the range capabilities of the Retevis RT-5RV walkie talkie in a residential area. The video shows two individuals testing communication at increasing distances, highlighting how audio clarity can be affected by distance and obstacles.
6.3. Extending Communication Distance
To extend communication distance:
- Increase the transmission power (in theory, if the transmission power is doubled, the communication distance can be expanded to approximately 1.4 times the original distance).
- Improve the receiving sensitivity (adjust the squelch threshold of the walkie-talkie and use a high-gain antenna to correspondingly improve the receiving sensitivity of the walkie-talkie).
- Keep launching from a higher location.
- Keep your battery charged.
7. Specifications
| Feature | Value |
|---|---|
| Product Dimensions | 4.33 x 2.28 x 1.26 inches |
| Item Weight | 7 ounces (0.44 Pounds) |
| Special Features | Emergency Alarm, Long Range |
| Other Display Features | Wireless |
| Color | Black |
| Number of Channels | 128 |
| Water Resistance Level | Waterproof |
| Compatible Devices | Retevis speaker mics, earpieces, CHIRP-compatible devices |
| Battery Life | 12 Hours (1400mAh) |
8. Warranty & Support
For warranty information, technical support, or any inquiries regarding your Retevis RT-5RV walkie talkie, please contact the seller or manufacturer directly. Refer to the packaging or the official Retevis website for contact details.


