1. Introduction
This manual provides essential information for the safe and effective installation, operation, and maintenance of your Bosch Refrigerator Freezer Door Plastic Pivoting Hinge, part number 603659. Please read these instructions carefully before proceeding with any installation or maintenance to ensure proper function and safety.
Safety Information
- Always disconnect the appliance from the power supply before attempting any repairs or installations.
- Wear appropriate personal protective equipment, such as gloves, to prevent injury.
- If you are unsure about any step, consult a qualified technician.
2. Product Overview
This product is a genuine Bosch replacement plastic pivoting hinge designed for refrigerator and freezer doors. It ensures smooth and secure door operation, maintaining the appliance's efficiency and sealing capabilities.
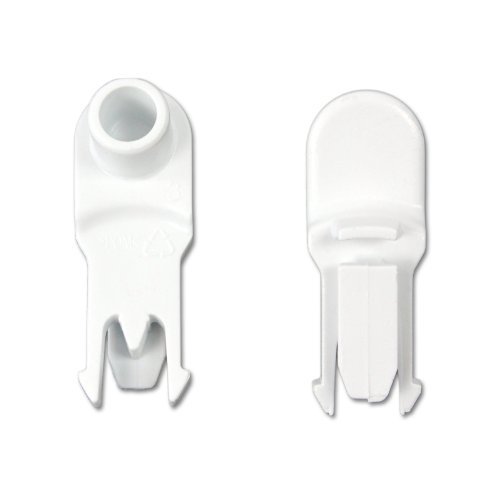
An image showing the Bosch plastic pivoting hinge, designed for refrigerator and freezer doors. This component is crucial for the proper function and alignment of the appliance door.
Part Number: 603659
Material: Plastic
3. Compatibility
This replacement hinge is compatible with a wide range of Bosch refrigerator and freezer models. Please verify your appliance's model number against the list below to ensure compatibility. The hinge is compatible with models including, but not limited to:
GSD26410/03, GSD26N01GB/01, GSD30410NE/03, GSD31430/04, GSD26410/04, GSD26N01GB/02, GSD30410NE/04, GSD31N30/0/01, GSD26410/05, GSD26N01GB/03, GSD30N10/01, GSD31N30/02, GSD26410GB/03, GSD26N10/01, GSD30N10/02, GSD31N30SD/01, GSD26410GB/04, GSD26N10/02, GSD30N10/03, GSD31N30SD/02, GSD26410NE/03, GSD26N10/03, GSD30N10NE/01, GSD34410/03, GSD26410NE/04, GSD26N10NE/01, GSD30N10NE/02, GSD34410/04, GSD26411FF/01, GSD26N10NE/02, GSD30N10SD/01, GSD34N01GB/01, GSD26411FF/02, GSD26N10SD/01, GSD30N10SD/02, GSD34N01GB/02, GSD26411FF/03, GSD26N10SD/02, GSD31430/03, GSD34N01GB/03, GSD34N10/01, GSN24A10ME/03, GSN24V11/01, GSN28A21/01, GSD34N10/02, GSN24A20/02, GSN24V11/02, GSN28A21/02, GSD34N10/03, GSN24A20/03, GSN24V20/01, GSN28A75/01, GSD34N10SD/01, GSN24A21/01, GSN24V21/01, GSN28A75/02, GSD34N10SD/02, GSN24A21/02, GSN24V21/02, GSN28A85/01, GSD34N40/01, GSN24V00/01, GSN24V22/01, GSN28A85/02, GSD34N40/02, GSN24V01/01, GSN24V70EX/01, GSN28V00/02, GSD34N41/01, GSN24V01/02, GSN24V70EX/02, GSN28V00GB/02, GSD34N41/02, GSN24V01SD/01, GSN28A10/02, GSN28V00ME/01, GSN24A10ME/02, GSN24V10/01, GSN28A20/02, GSN28V01/01, GSN28V01/02, GSN28V41/02, GSN32A20GB/02, GSN32A71/01, GSN28V01GB/01, GSN28V60GB/02, GSN32A20GB/03, GSN32A72/01, GSN28V01GB/02, GSN28V61GB/01, GSN32A21/01, GSN32A80/01, GSN28V01SD/01, GSN28V61GB/02, GSN32A21/02, GSN32A90/02, GSN28V20/02, GSN32A10ME/02, GSN32A21GB/01, GSN32A90/03, GSN28V21/01, GSN32A10ME/03, GSN32A21GB/02, GSN32A91/01, GSN28V21/02, GSN32A11ME/01, GSN32A22/01, GSN32A91/02, GSN28V40/01, GSN32A11ME/02, GSN32A22/02, GSN32A91/03, GSN28V40/02, GSN32A20/02, GSN32A70/02, GSN32V00/01, GSN28V41/01, GSN32A20/03, GSN32A70/03, GSN32V00/02, GSN32V00SA/01, GSN32V15/01, GSN32V70/02, GSN34A30CH/01, GSN32V01/01, GSN32V16/01, GSN32V70/03, GSN34A30CH/02, GSN32V01/02, GSN32V16/02, GSN32V70/04, GSN34A30CH/03, GSN32V01SD/01, GSN32V22/01, GSN32V70/05, GSN34A31/01, GSN32V01SD/02, GSN32V28/01, GSN32V70SA/01, GSN34A31/02, GSN32V10/02, GSN32V30/01, GSN32V71/01, GSN34A31/03.
4. Setup (Installation)
Replacing a refrigerator or freezer door hinge requires careful attention to detail. Follow these general steps for installation. Specific appliance models may have slight variations.
Tools Required:
- Screwdriver (Phillips or flathead, depending on existing screws)
- Wrench or socket set (if bolts are used)
- Pry tool (optional, for removing trim)
- Gloves
Installation Steps:
- Disconnect Power: Unplug the refrigerator or freezer from the electrical outlet to prevent electric shock.
- Empty Door: Remove all items from the door shelves to reduce weight.
- Support Door: Have a second person support the door, or use appropriate blocking, to prevent it from falling when hinges are removed.
- Remove Old Hinge: Carefully unscrew and remove the old, damaged hinge. Note the orientation and position of any washers or spacers.
- Install New Hinge: Position the new Bosch plastic pivoting hinge (part number 603659) in the correct orientation. Secure it with the original screws or appropriate fasteners. Do not overtighten.
- Check Alignment: Gently close and open the door to ensure it swings freely and seals properly. Adjust the hinge position slightly if necessary to achieve correct alignment.
- Reconnect Power: Once the hinge is securely installed and the door operates correctly, plug the appliance back into the electrical outlet.
5. Operating
After installation, the hinge should allow the refrigerator or freezer door to open and close smoothly without resistance or binding. Ensure the door gasket forms a complete seal when the door is closed to maintain optimal appliance performance and energy efficiency.
- Verify that the door closes completely on its own or with a gentle push.
- Check for any gaps in the door seal by placing a piece of paper between the door and the appliance frame and closing the door. If the paper slides out easily, the seal may be compromised, or the door alignment needs adjustment.
6. Maintenance
Regular maintenance helps prolong the life of your hinge and ensures continued smooth operation.
- Cleaning: Periodically wipe down the hinge with a damp cloth to remove dust and debris. Avoid abrasive cleaners.
- Lubrication: If the hinge begins to squeak or feel stiff, a small amount of food-grade silicone lubricant can be applied to the pivot points. Do not use oil-based lubricants, as they can attract dirt and degrade plastic.
- Inspection: Routinely check the hinge for any signs of wear, cracks, or loose screws. Tighten any loose screws immediately.
7. Troubleshooting
| Problem | Possible Cause | Solution |
|---|---|---|
| Door does not close properly or is misaligned. | Hinge not installed correctly; screws loose; door overloaded. | Check hinge alignment and tighten screws. Reduce weight in door shelves. |
| Hinge squeaks during operation. | Lack of lubrication; friction between plastic parts. | Apply a small amount of food-grade silicone lubricant to the pivot points. |
| Door feels stiff or difficult to open/close. | Hinge binding; debris in hinge mechanism. | Clean the hinge area. Apply lubricant. Recheck installation for proper alignment. |
8. Specifications
- Brand: Bosch
- Part Number: 603659
- Material: Plastic
- Quantity per package: 1 hinge assembly
- Mounting Type: Door Mount
9. Warranty and Support
Warranty Information: Specific warranty terms for this replacement part are typically provided by the manufacturer (Bosch) or the seller at the time of purchase. Please refer to your purchase documentation or contact the seller directly for details regarding warranty coverage.
Customer Support: For further assistance, technical questions, or to report issues not covered in this manual, please contact Bosch customer service or the retailer from whom you purchased this hinge. Ensure you have your appliance model number and the hinge part number (603659) ready when contacting support.
You can often find support contact information on the official Bosch website or through your appliance's original user manual.


