
1. Introduction
This manual provides essential information for the safe and effective installation, operation, and maintenance of the Finder 90.26 Relay Socket. Please read this manual thoroughly before using the product and retain it for future reference. The Finder 90.26 is designed for use with compatible relays in industrial electrical control systems.
2. Safety Information
WARNING: Risk of Electric Shock. Installation and servicing should only be performed by qualified personnel.
- Always disconnect power before installing, wiring, or servicing the relay socket.
- Ensure all wiring complies with local and national electrical codes.
- Do not exceed the specified voltage and current ratings of the device.
- Protect the device from moisture, dust, and extreme temperatures.
- Use appropriate personal protective equipment (PPE) when working with electrical systems.
3. Product Overview
The Finder 90.26 Relay Socket is a robust component designed to securely hold and connect compatible electromechanical relays. It features a DIN rail mounting capability, allowing for easy integration into control cabinets and electrical panels. The socket provides reliable electrical connections for the relay's coil and contacts, facilitating efficient circuit control.
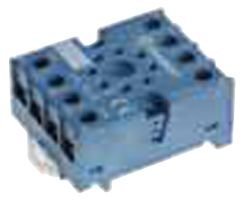
This image displays the Finder 90.26 Relay Socket, a compact electrical component designed for mounting on a DIN rail. It features multiple connection points for relay pins and wiring, facilitating secure and organized electrical installations.
4. Setup and Installation
4.1 Mounting
- Ensure the power supply to the installation area is completely disconnected.
- Align the Finder 90.26 Relay Socket with the DIN rail.
- Press the socket firmly onto the DIN rail until it clicks into place, ensuring it is securely fastened.
4.2 Wiring
- Refer to the wiring diagram provided with your specific relay for correct terminal connections.
- Strip the insulation from the wire ends to the appropriate length (typically 6-8 mm).
- Insert the prepared wires into the corresponding terminals on the relay socket.
- Tighten the terminal screws securely to ensure good electrical contact and prevent loose connections. Do not overtighten.
- Verify all connections are correct and secure before proceeding.
4.3 Relay Insertion
- Carefully align the pins of the compatible relay with the corresponding holes in the 90.26 socket.
- Gently push the relay into the socket until it is fully seated. Ensure all pins are properly engaged.
5. Operating Instructions
Once the Finder 90.26 Relay Socket is correctly installed and a compatible relay is inserted, the system is ready for operation. The socket acts as an interface, allowing the relay to control electrical circuits based on the input signal to its coil.
- Apply the specified coil voltage (e.g., 250 Volts AC/DC) to the appropriate terminals of the relay socket.
- The relay will actuate, changing the state of its contacts (normally open to closed, or normally closed to open).
- The contacts can then switch loads up to the rated current (e.g., 10 Amps).
- The operation mode is automatic, meaning the relay will switch based on the presence or absence of the coil voltage.
6. Maintenance
The Finder 90.26 Relay Socket is designed for long-term reliability with minimal maintenance. However, periodic inspection is recommended to ensure optimal performance and safety.
- Inspection: Regularly check for any signs of physical damage, discoloration, or loose connections. Ensure the relay is securely seated in the socket.
- Cleaning: If necessary, gently clean the exterior of the socket with a dry, lint-free cloth. Do not use solvents or abrasive cleaners. Ensure power is disconnected before cleaning.
- Replacement: If the socket shows signs of damage, wear, or malfunction, it should be replaced by a qualified technician.
7. Troubleshooting
If you encounter issues with your Finder 90.26 Relay Socket, consider the following troubleshooting steps:
- Relay Not Actuating:
- Verify that the correct coil voltage is being applied to the relay terminals.
- Check for loose or incorrect wiring connections.
- Ensure the relay is fully and correctly seated in the socket.
- Test the relay separately if possible to rule out a faulty relay.
- Intermittent Operation:
- Inspect for loose wiring connections or damaged insulation.
- Check for environmental factors such as excessive vibration or temperature fluctuations.
- Overheating:
- Ensure the current flowing through the contacts does not exceed the rated current of 10 Amps.
- Verify proper ventilation around the device.
If problems persist after performing these checks, contact qualified technical support.
8. Specifications
| Feature | Specification |
|---|---|
| Model Number | 90.26 |
| Brand | Finder |
| Current Rating | 10 Amps |
| Mounting Type | DIN Rail Mount |
| Operation Mode | Automatic |
| Coil Voltage | 250 Volts |
| ASIN | B00KG1Q6FQ |
| Date First Available | October 27, 2014 |
9. Warranty and Support
Finder products are manufactured to high-quality standards. For specific warranty information, please refer to the documentation provided with your purchase or visit the official Finder website. In case of technical issues or questions not covered in this manual, please contact Finder customer support or your authorized distributor for assistance.
For more information, you may visit the Finder Store on Amazon.