
1. Introduction
This manual provides essential instructions for the safe and efficient operation, maintenance, and troubleshooting of your Vestil L-270-DC-HD 27x45 DC Powered Tote Lift 3k. Please read this manual thoroughly before assembly, operation, or maintenance to ensure proper use and to prevent injury or damage. Keep this manual for future reference.
2. Safety Information
WARNING: Failure to follow these safety instructions can result in serious injury or death.
- Always read and understand the entire manual before operating the tote lift.
- Do not exceed the rated load capacity of 3000 pounds (1360 kg). Overloading can cause instability and equipment failure.
- Ensure the load is centered and stable on the forks before lifting or moving.
- Operate the lift only on level, stable surfaces. Avoid inclines or uneven terrain.
- Keep hands and feet clear of all moving parts, especially during lifting and lowering operations.
- Wear appropriate personal protective equipment (PPE), including safety shoes and gloves.
- Do not use the lift as a personnel carrier or lifting platform for individuals.
- Ensure the battery is properly charged and maintained according to the instructions.
- Inspect the lift for damage or wear before each use. Do not operate if damaged.
- Only authorized and trained personnel should operate this equipment.
3. Product Overview
The Vestil L-270-DC-HD is a DC-powered tote lift designed for efficient material handling. It features a robust construction and an electric lift mechanism for raising and lowering loads.

Figure 1: Side view of the Vestil L-270-DC-HD tote lift in a raised position, showing the forks extended upwards.

Figure 2: Side view of the Vestil L-270-DC-HD tote lift in a lowered position, with forks resting near the ground.
3.1 Key Components
- Forks: Used to engage and lift loads.
- Handle: For steering and controlling the lift and lower functions.
- Control Panel: Contains buttons or levers for lift/lower operations and battery indicator.
- Battery Compartment: Houses the DC power source.
- Wheels: For mobility and steering.
- Hydraulic Lift Mechanism: The system responsible for raising and lowering the forks.

Figure 3: Rear view of the tote lift, highlighting the ergonomic handle and the battery compartment.
4. Setup and Initial Operation
4.1 Unpacking and Inspection
- Carefully remove the tote lift from its packaging.
- Inspect the unit for any signs of shipping damage. Report any damage to the carrier and supplier immediately.
- Ensure all components listed in the packing slip are present.
4.2 Initial Battery Charge
Before first use, fully charge the battery. Refer to Section 6 for detailed charging instructions.
4.3 Familiarization with Controls
Locate the lift and lower controls on the handle. Test their functionality without a load to understand their response.
5. Operating Instructions
5.1 Pre-Operation Checks
- Verify the battery charge level.
- Check for any visible damage, leaks, or loose components.
- Ensure the wheels move freely and the steering mechanism is functional.
5.2 Lifting a Load
- Position the tote lift with the forks fully lowered and aligned with the pallet or tote.
- Slowly push the forks completely under the load.
- Engage the lift control to raise the forks until the load is clear of the ground.
- Ensure the load is stable and centered on the forks.
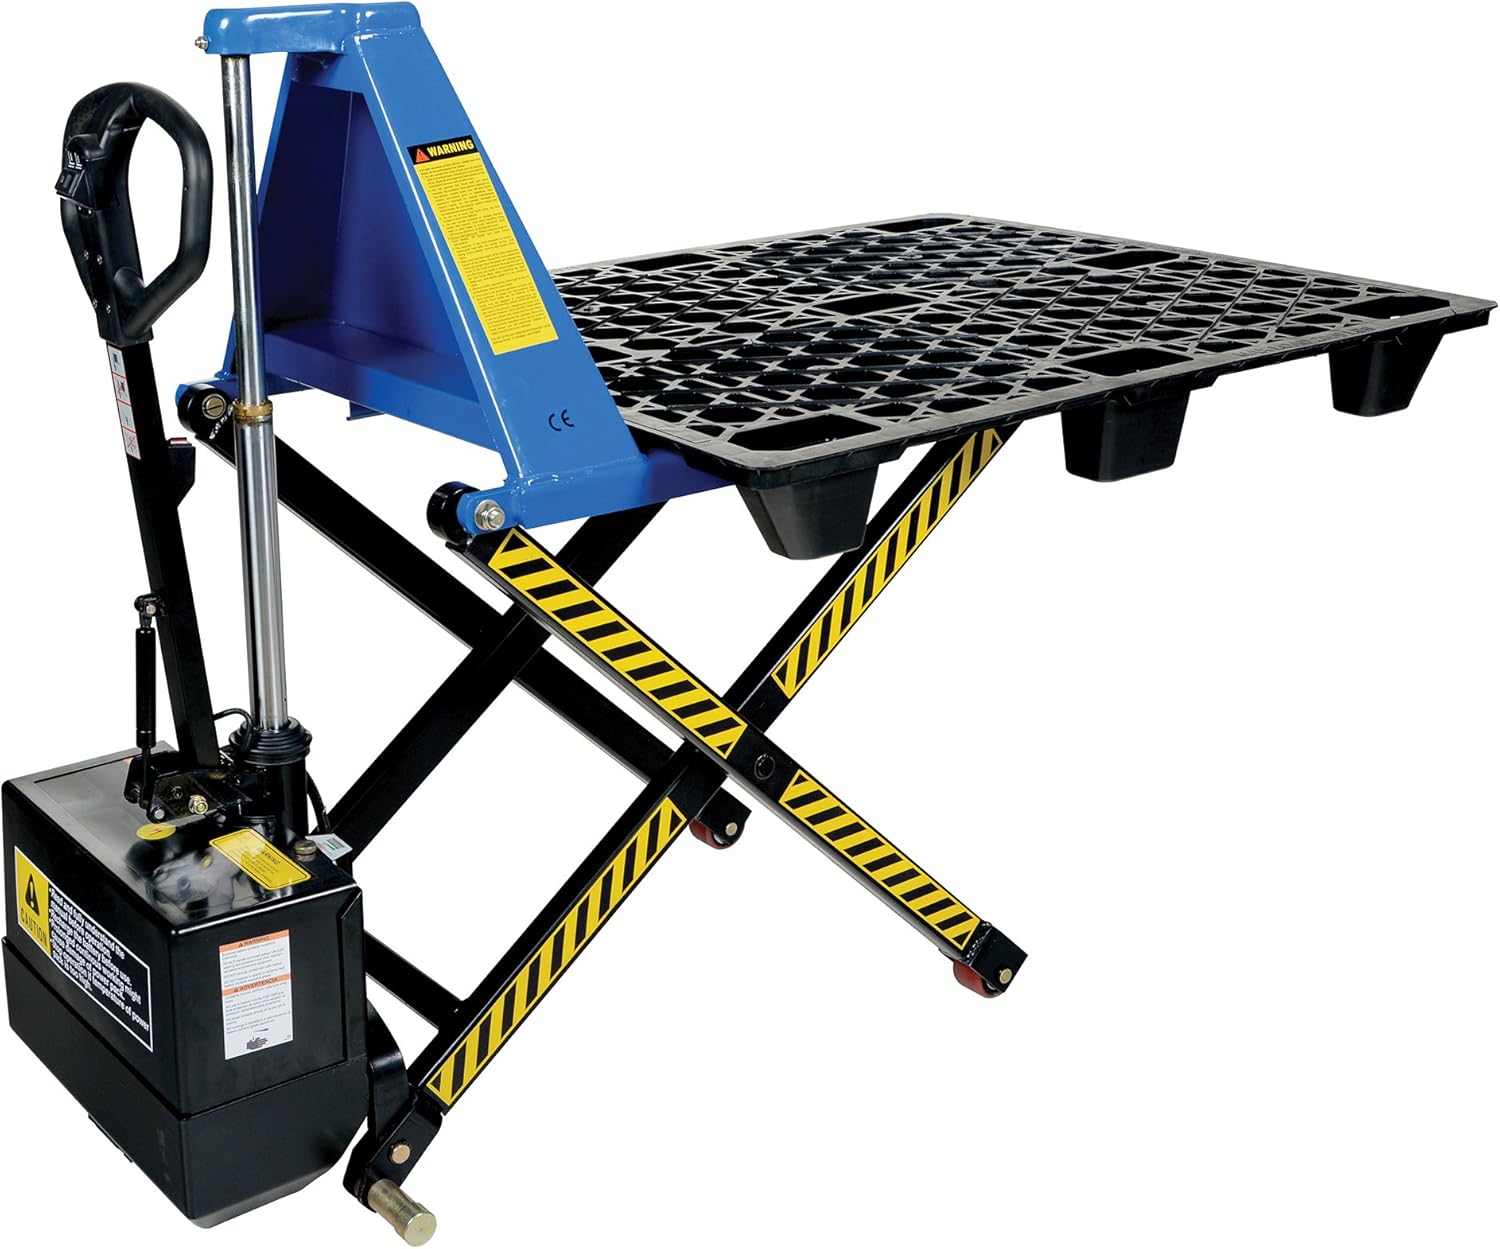
Figure 4: The tote lift with a pallet securely placed on its forks, raised to a working height.
5.3 Moving the Unit
- With the load lifted just enough to clear the ground, carefully steer the unit to its destination.
- Move at a slow, controlled pace, especially when turning or on uneven surfaces.
- Avoid sudden stops or starts.
5.4 Lowering a Load
- Position the load precisely where it needs to be placed.
- Engage the lower control to slowly and smoothly descend the forks until the load rests securely on the ground or desired surface.
- Once the load is fully supported, retract the forks from underneath.
6. Charging the Battery
The Vestil L-270-DC-HD is equipped with a DC power system. Proper battery charging is crucial for performance and longevity.
- Ensure the tote lift is turned off and parked in a safe, well-ventilated area.
- Connect the charger cable to the charging port on the lift.
- Plug the charger into a suitable electrical outlet.
- Monitor the charger's indicator lights (if present) to confirm charging status.
- Allow the battery to charge fully. Charging times may vary depending on the battery's discharge level.
- Once fully charged, disconnect the charger from the outlet first, then from the lift.
CAUTION: Use only the charger supplied or approved by Vestil. Do not expose the battery or charger to water or extreme temperatures.
7. Maintenance
Regular maintenance ensures the safe and efficient operation of your tote lift.
7.1 Daily Checks
- Check battery charge level.
- Inspect forks for bends, cracks, or damage.
- Verify proper function of lift and lower controls.
- Check for any hydraulic fluid leaks.
7.2 Weekly/Monthly Checks
- Inspect wheels and casters for wear or damage. Clean any debris.
- Check all fasteners for tightness.
- Lubricate moving parts as recommended by Vestil (refer to specific lubrication points if available in product documentation).
- Clean the exterior of the unit to prevent dirt buildup.
7.3 Hydraulic Fluid
Periodically check the hydraulic fluid level. Use only recommended hydraulic fluid. Consult a qualified technician for fluid replacement or system bleeding.
8. Troubleshooting
| Problem | Possible Cause | Solution |
|---|---|---|
| Lift does not raise | Low battery charge Overload Low hydraulic fluid Electrical connection issue | Charge battery Reduce load to within capacity Check/refill hydraulic fluid Inspect connections (contact service) |
| Lift does not lower | Lower control malfunction Obstruction | Check control mechanism (contact service) Remove obstruction |
| Unit difficult to move/steer | Damaged wheels/casters Debris in wheels Steering mechanism issue | Inspect/replace wheels Clean wheels Inspect steering components (contact service) |
| Battery not charging | Charger not connected Faulty charger/battery Power outlet issue | Ensure proper connection Test charger/battery (contact service) Check power outlet |
If troubleshooting steps do not resolve the issue, contact Vestil customer support or a qualified service technician.
9. Specifications
| Feature | Detail |
|---|---|
| Model Name | L-270-DC-HD |
| Brand | Vestil |
| Load Capacity | 3000 Pounds (1360 kg) |
| Item Weight | 346 Pounds (157 kg) |
| Material | Blend |
| Color | Multicolor (typically blue) |
| Item Dimensions (LxWxH) | 63 x 26.75 x 46.5 inches (160 x 68 x 118 cm) |
| Package Dimensions (LxWxH) | 63.5 x 46.5 x 26.75 inches (161 x 118 x 68 cm) |
| UPC | 691215025027 |
| Manufacturer | Vestil Manufacturing Co. |
10. Warranty Information
Vestil products are typically covered by a limited warranty against defects in materials and workmanship. The specific terms and duration of the warranty may vary. Please refer to the warranty documentation included with your purchase or contact Vestil customer support for detailed information regarding your product's warranty coverage.
11. Customer Support
For technical assistance, replacement parts, or service inquiries, please contact Vestil customer support. When contacting support, have your product model number (L-270-DC-HD) and serial number (if applicable) readily available to expedite service.
Contact information for Vestil can typically be found on their official website or on the product packaging.

