Introduction
Welcome to the user manual for your Paasche Airbrush TG-227-1 Spray Head. This manual provides essential information for the proper setup, operation, maintenance, and troubleshooting of your new spray head.
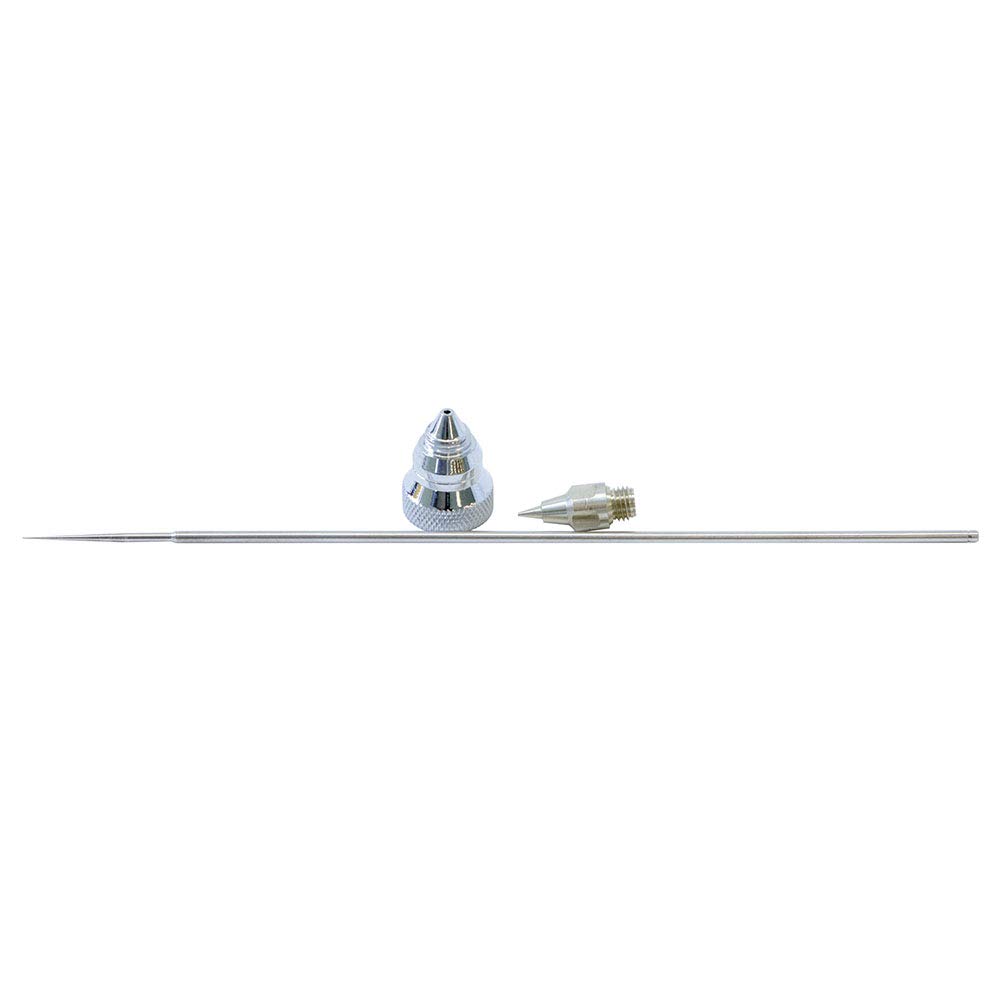
This image displays the complete set of components for the TG-227-1 spray head, including the air cap, fluid tip, and needle, which are designed to work together for optimal airbrush performance.
Setup and Installation
The TG-227-1 spray head is designed for use with Paasche TG and TGX series airbrushes. Proper installation is crucial for optimal performance.
Components Overview
The spray head consists of three primary components:
- Air Cap: The outermost component, which directs the air flow.

This image shows a detailed view of the air cap, a precision-machined component that fits over the fluid tip and helps atomize paint by directing compressed air.
- Fluid Tip: The central component through which paint exits.

This image provides a close-up of the fluid tip, the part of the spray head responsible for controlling the flow of paint from the airbrush body.
- Needle: A long, tapered rod that passes through the fluid tip to regulate paint flow.

This image illustrates the needle, a critical component that moves back and forth within the fluid tip to precisely control the amount of paint released during airbrushing.
Installation Steps
- Ensure your airbrush is clean and free of any paint residue.
- Carefully thread the fluid tip onto the front of the airbrush body. Do not overtighten.
- Slide the needle through the rear of the airbrush body until its tapered end passes through the fluid tip. Secure the needle chuck.
- Screw the air cap onto the front of the airbrush, over the fluid tip. Ensure it is snug but not excessively tight.
- Test the airbrush for proper air and fluid flow before use.
Operating Your Spray Head
The TG-227-1 spray head, once installed, functions as the primary atomization point for your airbrush. Its .25mm size is ideal for fine detail work.
Basic Operation Principles
The spray head works by mixing compressed air with fluid (paint) at the tip. The needle's position within the fluid tip controls the amount of paint released, while the air cap shapes the spray pattern.
- Fine Lines: For very fine lines, pull the trigger back minimally to allow a small amount of paint to flow.
- Wider Coverage: For broader coverage, pull the trigger further back to increase paint flow.
- Air Pressure: Adjust your air compressor's pressure according to the paint viscosity and desired spray pattern. Start with lower pressures for fine work and increase for broader coverage or thicker paints.
Maintenance and Cleaning
Regular cleaning of your TG-227-1 spray head is essential to prevent clogs and ensure consistent performance.
Daily Cleaning
- Empty any remaining paint from the airbrush cup.
- Flush the airbrush with an appropriate cleaning solution (e.g., water for acrylics, solvent for enamels). Spray the cleaner through the airbrush until it runs clear.
- Remove the air cap and wipe it clean with a soft cloth and cleaner.
- Carefully remove the needle from the rear of the airbrush. Wipe it clean from the tip towards the back to avoid pushing paint into the airbrush body.
- Use a small brush or cotton swab to clean the inside of the fluid tip.
- Reassemble the spray head components.
Deep Cleaning (As Needed)
For stubborn clogs or dried paint, disassemble the spray head completely. Soak the air cap and fluid tip in an appropriate cleaning solution. Use specialized airbrush cleaning tools to gently remove any dried paint from inside the components.
Caution:
Be extremely careful when handling the needle and fluid tip as they are delicate and can be easily damaged. Never use metal tools to clean the fluid tip opening.
Troubleshooting Common Issues
| Problem | Possible Cause | Solution |
|---|---|---|
| No paint flow | Clogged fluid tip or air cap; bent needle; paint too thick | Clean spray head thoroughly; check needle for damage; thin paint |
| Splattering/Spitting | Partially clogged tip; air cap loose; insufficient air pressure | Clean tip; tighten air cap; increase air pressure |
| Uneven spray pattern | Damaged fluid tip or air cap; dried paint on tip | Inspect and replace damaged parts; clean tip |
Product Specifications
- Model Number: T-227-1 (also known as TG-227-1)
- Head Size: Size 1 (.25mm)
- Compatibility: Paasche TG & TGX series airbrushes
- Components Included: Tip, Needle, Air Cap
- Product Dimensions: 15.24 x 1.27 x 1.27 cm (6 x 0.5 x 0.5 inches)
- Item Weight: 9.07 g (0.32 ounces)
- Country of Origin: USA
- Manufacturer: Paasche Airbrush
Warranty and Support
For specific warranty information and technical support regarding your Paasche Airbrush TG-227-1 Spray Head, please refer to the official Paasche Airbrush website or contact their customer service directly.
You can often find contact details and warranty policies on the manufacturer's official website: www.paascheairbrush.com


