Important Safety Information
Read and understand all instructions before installing, operating, or maintaining this product. Failure to follow these instructions may result in serious injury or property damage. Keep this manual for future reference.
- Always disconnect power before performing any service or maintenance.
- Ensure the pump and filter are installed on a level, solid surface.
- Do not operate the pump if the suction or discharge lines are blocked.
- Never run the pump dry. Ensure the pump is primed with water before starting.
- Keep children away from the equipment.
- Use only approved electrical connections and ensure proper grounding.
- Do not exceed the maximum operating pressure of the filter.
Product Overview
The XtremepowerUS 13-inch Sand Filter with 3/4HP Pool Pump is designed for efficient water filtration in above-ground swimming pools up to 10,000 gallons. It features a durable sand filter tank, a powerful pump, and a digital programmer for automated operation.

Image: The complete XtremepowerUS 13-inch sand filter and 3/4HP pool pump system, showing the sand tank, pump, and multi-port valve.
Setup and Installation
This system is designed for straightforward installation. Ensure all components are present before beginning.
Components Checklist:
- Sand Filter Tank
- 3/4HP Pool Pump
- Multi-port Valve
- Pressure Gauge
- Hoses and Clamps (some adapters/hoses sold separately)
- Pump Basket with Clear Lid
- Digital Programmer/Timer
Step-by-Step Installation:
- Positioning: Place the filter and pump on a firm, level surface near the pool, ensuring adequate drainage and protection from weather.
- Sand Filling: Remove the multi-port valve from the top of the filter tank. Cover the standpipe opening inside the tank to prevent sand from entering. Carefully pour approximately 42 lbs of filter sand (not included) into the tank. Ensure the sand level is appropriate for optimal filtration.
- Multi-port Valve Installation: Clean any sand from the tank opening. Carefully place the multi-port valve onto the tank, ensuring the standpipe aligns correctly with the valve's opening. Secure the valve to the tank using the provided clamp or flange.
- Pump Connection: Connect the pump to the filter tank using the provided hose and clamps. The pump's discharge port connects to the 'PUMP' port on the multi-port valve.
- Pool Connections: Connect the pool's skimmer/suction line to the pump's inlet. Connect the pool's return line to the 'RETURN' port on the multi-port valve. This system includes 1.25"/1.5" NPSM threaded connections; ensure compatible hoses and adapters are used.
- Pressure Gauge: Install the pressure gauge into the designated port on the multi-port valve.
- Electrical Connection: Plug the 3-prong power cord into a properly grounded 115V electrical outlet. The integrated controller allows for programming.

Image: An angled view of the sand filter and pump, illustrating the connections between the pump and the multi-port valve.

Image: A close-up view of the hose connection secured with a clamp to the multi-port valve, demonstrating proper assembly.
Operating Instructions
Before starting the pump, ensure all connections are secure and the pump is primed with water.
Priming the Pump:
- Ensure the pump basket is full of water.
- Open all suction and return valves to the pool.
- Set the multi-port valve to the 'WASTE' position.
- Turn on the pump. Water should begin to flow. Once a steady stream of water is observed, turn off the pump.
- Proceed with backwashing as described in the Maintenance section.
Multi-port Valve Settings:
The 4-way valve offers multiple settings for various pool maintenance tasks. Always turn off the pump before changing the valve position.
- FILTRATION: This is the standard operating mode for daily pool cleaning. Water flows from the pool, through the filter sand, and back to the pool.
- BACKWASH: Used to clean the filter sand. Water flows in reverse through the filter, flushing trapped debris out through the waste port.
- RINSE: Used after backwashing to flush any remaining dirty water from the valve and pipes to the waste port, and to settle the sand bed.
- WINTER: Used for winterizing the filter system. Consult your winterization guide for specific instructions.

Image: A detailed view of the 4-way multi-port valve, showing the handle and various operational settings.
Digital Programmer/Timer:
The integrated controller allows for programmable operation from 2 to 24 hours. It supports two operational modes:
- Continuous Mode: For daily, recurring filtration cycles.
- Single Cycle Mode: For one-time operation.
Refer to the control panel for specific button functions and programming steps. The control panel typically includes ON/OFF and TIME setting buttons.

Image: A collage showing key components: the digital control panel with timer settings, the pump basket, the multi-port valve, and the pressure gauge.
Maintenance
Regular maintenance ensures optimal performance and longevity of your sand filter system.
Backwashing the Filter:
Backwash when the pressure gauge reading rises 8-10 PSI above its clean operating pressure, or when water clarity diminishes.
- Turn off the pump.
- Set the multi-port valve to 'BACKWASH'.
- Turn on the pump. Allow it to run for 2-3 minutes, or until the water flowing out of the waste port appears clear.
- Turn off the pump.
- Set the multi-port valve to 'RINSE'.
- Turn on the pump. Run for 30-60 seconds to rinse the sand bed.
- Turn off the pump.
- Set the multi-port valve to 'FILTRATION'.
- Turn on the pump to resume normal operation.

Image: A close-up view of the pressure gauge, indicating pressure in PSI and bar, essential for monitoring filter performance and determining when to backwash.
Cleaning the Pump Basket:
Periodically check and clean the pump's pre-filter basket to ensure unrestricted water flow.
- Turn off the pump and close any necessary valves to prevent water flow.
- Unscrew the clear lid of the pump basket.
- Remove the basket and empty any debris.
- Rinse the basket thoroughly with water.
- Replace the basket and secure the lid, ensuring the O-ring is properly seated for a watertight seal.
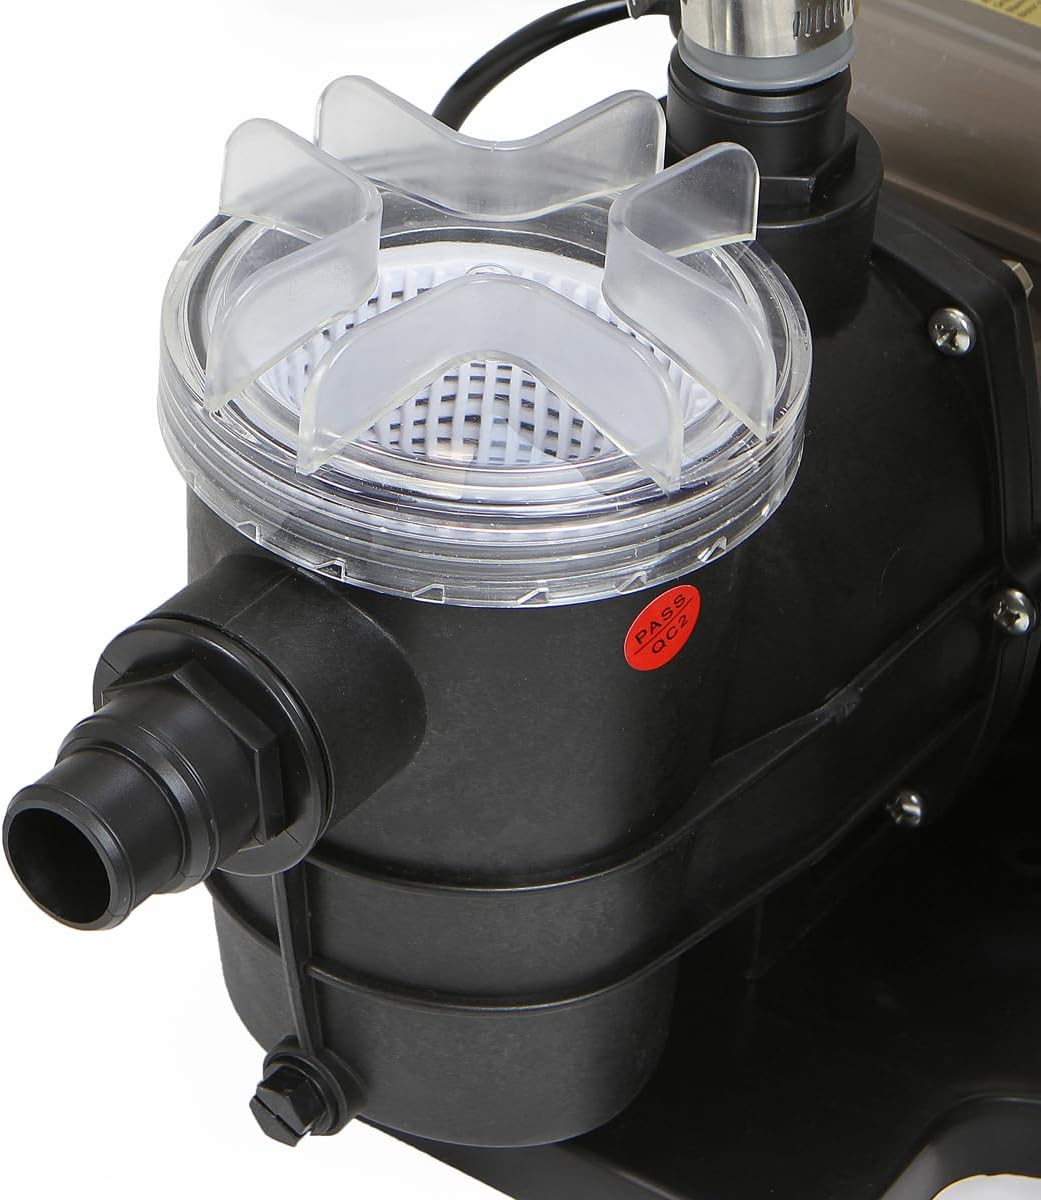
Image: A close-up view of the pump basket, showing the clear lid and the internal strainer, which collects larger debris before it reaches the pump impeller.
Sand Replacement:
Filter sand typically lasts 3-5 years, depending on usage and water quality. Replace sand when filtration efficiency significantly decreases despite regular backwashing.
Troubleshooting
This section addresses common issues you might encounter.
| Problem | Possible Cause | Solution |
|---|---|---|
| Pump not running | No power; tripped breaker; motor issue | Check power connection, circuit breaker. Ensure timer is set correctly. If motor is faulty, contact support. |
| Low water flow/pressure | Clogged pump basket; dirty filter sand; air leak in suction line; closed valves | Clean pump basket. Backwash filter. Check all connections for air leaks. Ensure all valves are open. |
| Water not clearing | Dirty filter sand; insufficient filtration time; incorrect chemical balance | Backwash filter thoroughly. Increase daily filtration time. Test and adjust pool chemistry. |
| Leaks at connections | Loose connections; worn O-rings/gaskets; damaged hoses | Tighten all hose clamps and threaded connections. Inspect and replace any damaged O-rings, gaskets, or hoses. Use Teflon tape on threaded fittings. |
| Pump losing prime | Air leak in suction line; low water level in pool; clogged skimmer/main drain | Check all suction side connections for air leaks. Ensure pool water level is above skimmer opening. Clear any blockages in skimmer or main drain. |
Specifications
- Brand: XtremepowerUS
- Model Number: 75159
- Product Dimensions: 17"L x 14"W x 22"H
- Item Weight: 26 Pounds
- Power Source: Corded Electric
- Voltage: 115 Volts
- Maximum Flow Rate: 44 Liters Per Minute (approx. 2,640 GPH)
- Maximum Lifting Height: 10 Meters
- Material: ABS Plastic
- Style: Pool Filter and Pool Pump
- Specific Uses For Product: Above-Ground Pool
- Sand Capacity: 42 lbs
- UPC: 633585757740
Warranty and Support
For warranty information or technical support, please refer to the documentation included with your purchase or contact XtremepowerUS customer service directly. Keep your proof of purchase for any warranty claims.


