
Introduction
The Polder Deluxe Preset In-Oven Thermometer with Ultra Probe, Model THM-308-90, is designed to accurately monitor internal meat temperatures during cooking. It features built-in USDA recommended preset temperatures for various meat types and doneness levels, simplifying the cooking process. The ultra probe provides precise temperature readings, and its comfort grip handle is designed to prevent moisture damage. This thermometer allows you to monitor cooking progress without repeatedly opening the oven door.
Key features include:
- Preset temperatures for common meat types and doneness.
- Silicon comfort grip, heat resistant up to 650°F (343°C).
- Easy-to-read display with a flat-base design for stable placement.
- Integrated USDA cooking chart on the thermometer face.
- Temperature range: 120°F to 200°F (49°C to 93°C).
Package Contents
Verify that all components are present in the package:
- Base unit (thermometer display)
- Ultra probe with high-heat silicone cord
- Comfort grip handle (integrated with probe)
- Magnetic wall mount
- 1 AAA battery (included)
Setup
- Battery Installation: Locate the battery compartment on the back of the base unit. Open the compartment, insert the included 1 AAA battery, ensuring correct polarity (+/-). Close the compartment securely.
- Probe Connection: Insert the probe's connector firmly into the jack located on the side of the base unit.
- Placement: The base unit can be placed on a countertop using its flat base or attached to a metal surface (like an oven door or refrigerator) using the magnetic wall mount. Ensure the unit is positioned where the display is easily visible and the probe cord can reach the food without obstruction or being pinched.
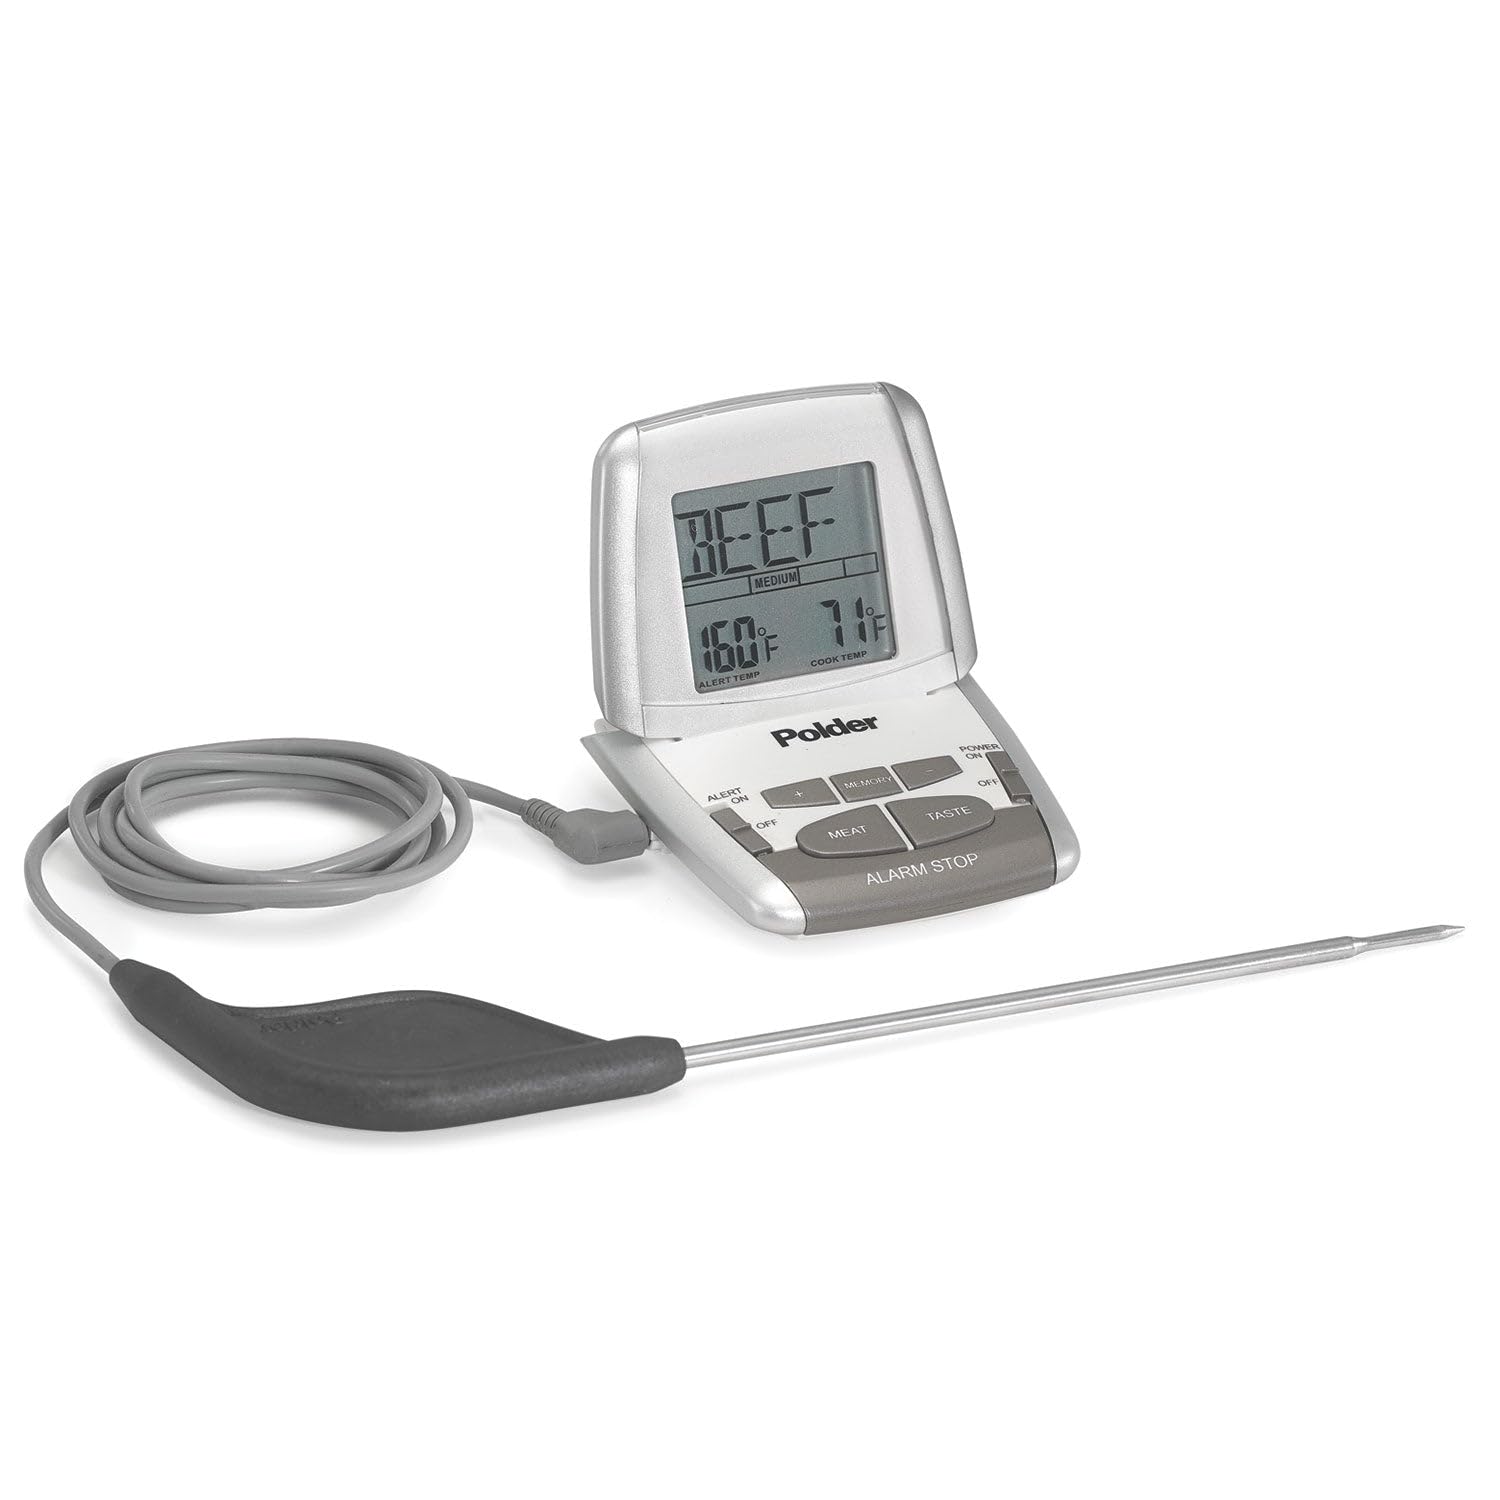
Image: Polder Deluxe Preset In-Oven Thermometer, Model THM-308-90. The image shows the main display unit with its probe and cord, highlighting its compact design and clear screen.
Operating Instructions
- Power On: Press the 'ON/OFF' button to turn on the thermometer. The display will illuminate.
- Selecting Preset Temperature: The thermometer features preset temperatures for various meats. Refer to the USDA cooking chart printed on the thermometer face for guidance. Use the 'MEAT' button to cycle through different meat types (e.g., Beef, Veal, Lamb, Pork, Poultry). Use the 'TASTE' button to select the desired doneness level (e.g., Rare, Medium, Well Done) for the chosen meat type. The target temperature will be displayed.
- Inserting the Probe: Carefully insert the metal tip of the ultra probe into the thickest part of the food, avoiding bone or gristle. Ensure the probe tip is fully embedded in the food for accurate readings. The silicone cord is designed to withstand high oven temperatures, but avoid direct contact with heating elements or open flames.
- Monitoring Temperature: The current internal temperature of the food will be displayed on the base unit. The thermometer will sound an alarm when the food reaches the preset target temperature.
- Alarm Stop: To silence the alarm, press the 'ALARM STOP' button.
- Power Off: After use, press and hold the 'ON/OFF' button to turn off the thermometer.
Care and Maintenance
- Cleaning the Probe: The probe should be hand washed with warm, soapy water after each use. Do not immerse the entire probe or the cord connector in water. Wipe the probe clean and dry thoroughly before storage.
- Cleaning the Base Unit: Wipe the base unit with a damp cloth. Do not immerse the base unit in water or place it in a dishwasher.
- Storage: Store the thermometer and probe in a clean, dry place when not in use.
- Battery Replacement: Replace the AAA battery when the display becomes dim or the unit fails to power on.
Troubleshooting
- Problem: Thermometer display is blank or dim.
- Solution: Check the battery. Ensure it is inserted correctly with the proper polarity. Replace the AAA battery if necessary.
- Problem: Inaccurate temperature readings.
- Solution: Ensure the probe tip is fully inserted into the thickest part of the food and not touching bone or gristle. Verify the probe connector is securely plugged into the base unit. Allow sufficient time for the temperature to stabilize (response time is approximately 500 milliseconds, but food temperature changes gradually).
- Problem: Alarm does not sound at target temperature.
- Solution: Confirm that a target temperature has been correctly set using the 'MEAT' and 'TASTE' buttons. Check battery level.
- Problem: Probe cord appears damaged or melted.
- Solution: The silicone cord is heat resistant, but direct contact with oven heating elements or open flames can cause damage. Ensure the cord is positioned safely during cooking. If the cord is damaged, discontinue use and replace the probe.
Specifications
| Feature | Specification |
|---|---|
| Model | THM-308-90 |
| Brand | Polder |
| Temperature Range | 120°F to 200°F (49°C to 93°C) |
| Display Type | Analog |
| Power Source | 1 AAA Battery (included) |
| Probe Cord Length | Approximately 40 inches |
| Outer Material | Plastic |
| Special Feature | Manual, Preset Temperatures |
| Response Time | 500 milliseconds |
| Usage | Indoor |
| Care Instructions | Hand Wash (probe only) |
Warranty and Support
This product is covered by a manufacturer's warranty. For specific warranty details, claims, or technical support, please refer to the documentation included with your purchase or contact Polder customer service directly. Keep your purchase receipt as proof of purchase.
For further assistance, visit the official Polder website or contact their customer support department.

