
LUXE Bidet NEO 120
LUXE Bidet NEO 120 User Manual
Non-Electric Bidet Attachment for Toilet Seat
1. Introduction
Thank you for choosing the LUXE Bidet NEO 120. This manual provides detailed instructions for the installation, operation, and maintenance of your new bidet attachment. Please read this manual thoroughly before installation and retain it for future reference.

Image: The LUXE Bidet NEO 120 attachment installed on a toilet, showing the control panel.
2. Product Overview
2.1 Components Included
The LUXE Bidet NEO 120 package includes all necessary parts for installation. Please verify that all components are present before beginning installation.
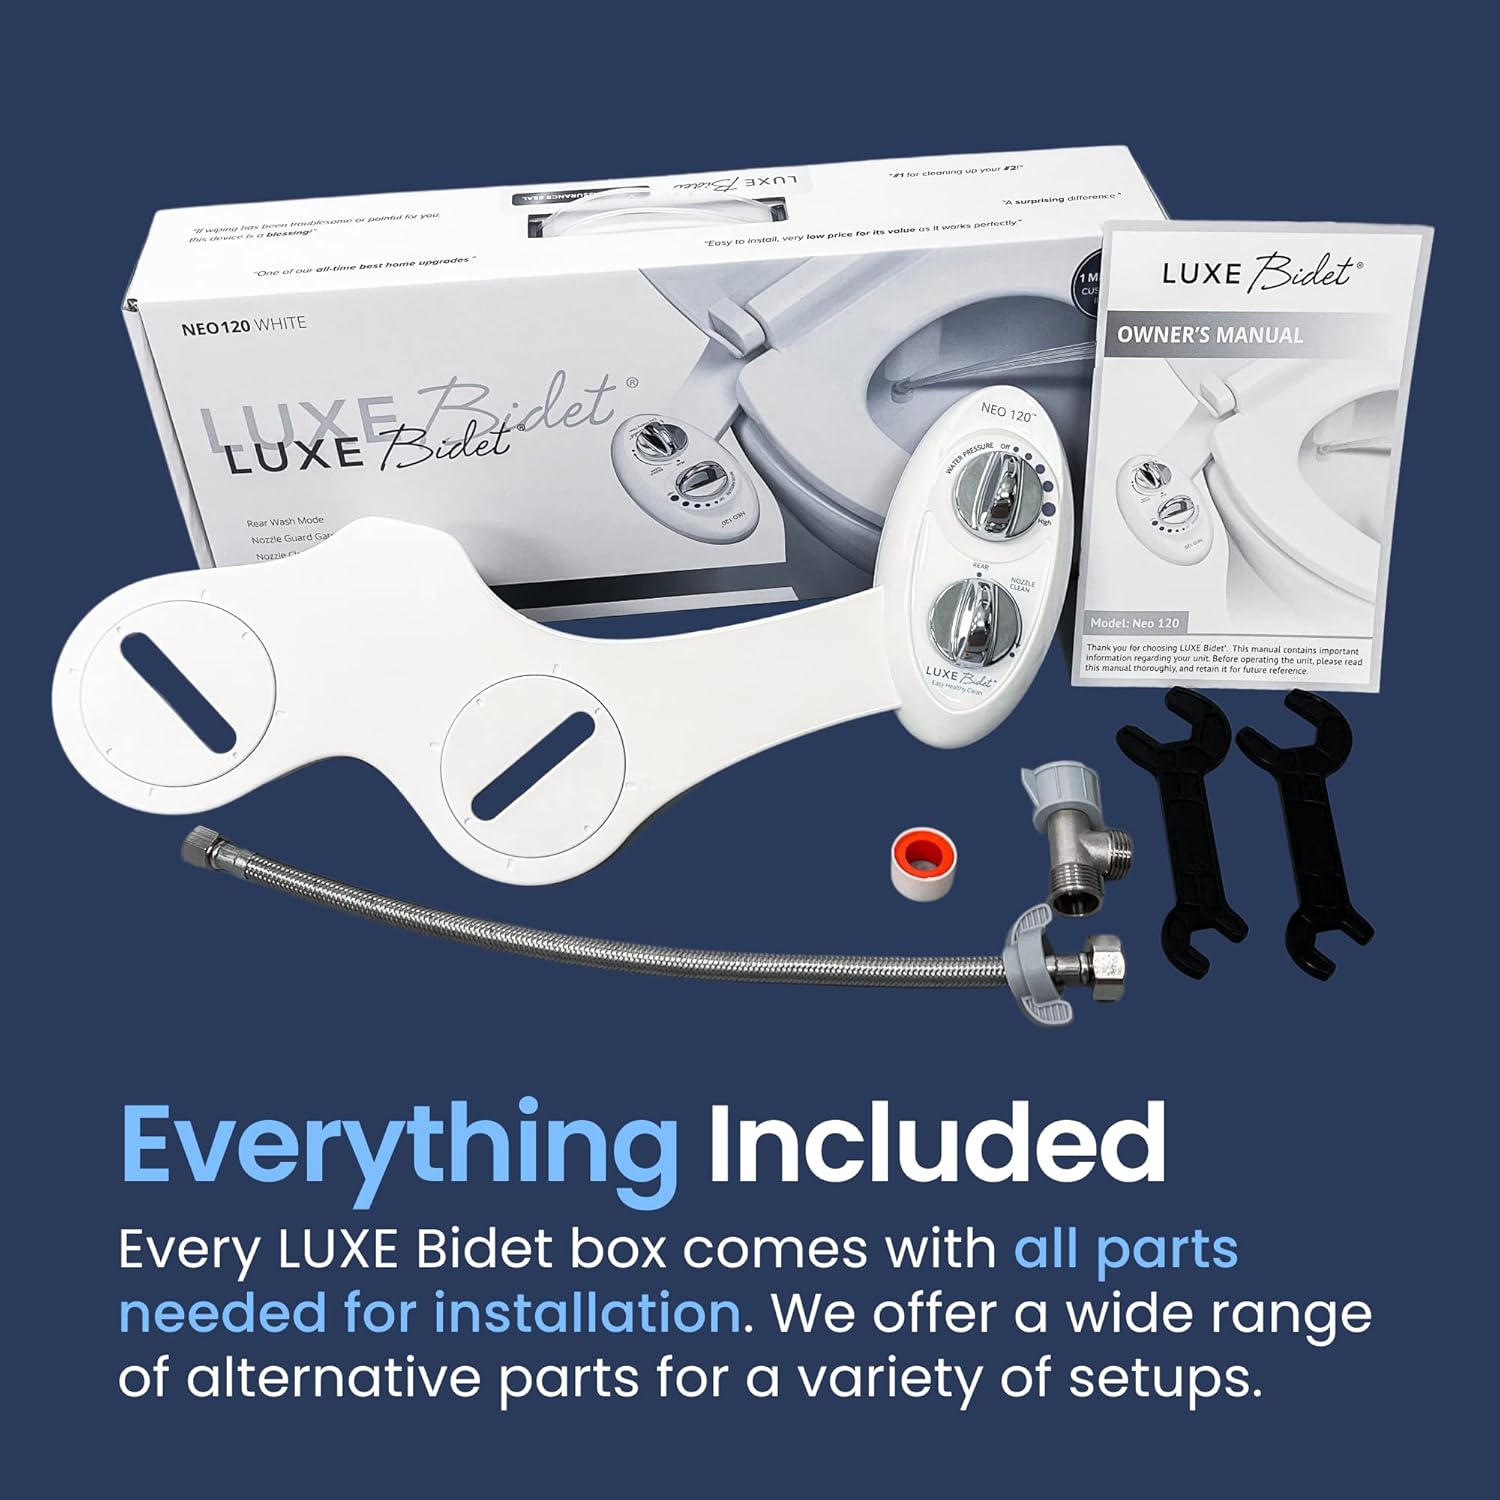
Image: Contents of the LUXE Bidet NEO 120 box, including the bidet unit, T-adapter, hose, and installation tools.
- LUXE Bidet NEO 120 Attachment
- Metal T-adapter
- Braided Metal Hose
- Installation Wrenches
- Owner's Manual
2.2 Key Features
- Self-Cleaning Nozzle: The nozzle automatically retracts behind a guard gate after each use, ensuring hygiene.
- Adjustable Water Pressure: A control knob allows users to customize water pressure for comfort.
- Rear Wash Function: Provides a targeted spray for effective cleaning.
- Non-Electric Operation: Requires no electricity, simplifying installation and reducing energy consumption.
- Durable Construction: Features high-pressure valves with metal-ceramic cores and steel hoses for longevity.

Image: Visual representation of the NEO 120's Rear Wash and Self-Clean modes, along with retractable nozzles, protective guard gate, and adjustable plates.
3. Installation Guide
Follow these steps for a quick and easy installation. No special tools are required beyond what is provided.

Image: A visual guide demonstrating the three main steps for installing the bidet attachment.
- Turn Off Water Supply: Locate the water supply valve for your toilet and turn it clockwise until the water flow stops. Flush the toilet to drain the tank.
- Remove Toilet Seat: Lift the hinge covers and use a screwdriver to loosen the bolts holding the toilet seat to the bowl. Remove the toilet seat.
- Position the Bidet Attachment: Place the LUXE Bidet NEO 120 on the toilet rim, aligning the adjustable plates with the toilet seat bolt holes. Adjust the plates as needed to ensure a secure fit.
- Reinstall Toilet Seat: Place your toilet seat back on top of the bidet attachment and secure it with the original bolts. Ensure the bidet is centered and stable.
- Disconnect Water Supply Hose: Unscrew the existing water supply hose from the toilet tank fill valve. Have a towel ready to catch any residual water.
- Install T-Adapter: Connect the T-adapter to the toilet tank fill valve. Ensure the rubber washer is properly seated to prevent leaks.
- Connect Hoses:
- Connect the original toilet water supply hose to the bottom of the T-adapter.
- Connect the provided braided metal hose from the T-adapter to the bidet attachment's water inlet.
- Turn On Water Supply: Slowly turn the toilet water supply valve counter-clockwise to restore water flow. Check for any leaks at all connection points. If leaks occur, tighten connections slightly.
- Test the Bidet: Proceed to the "Operation Instructions" section to test your new bidet.
Important: Ensure the bidet fits your toilet. Refer to the dimensions in the Specifications section or the image below for compatibility.

Image: Toilet measurement guide to ensure proper fit of the bidet attachment.
4. Operation Instructions
The LUXE Bidet NEO 120 features simple controls for a refreshing experience.

Image: Detailed view of the bidet's control panel and nozzle area.
4.1 Using the Rear Wash
- Sit comfortably on the toilet seat.
- Slowly turn the Water Pressure Control Knob (bottom knob) clockwise to increase water pressure. The nozzle will extend and begin spraying.
- Adjust the water pressure to your desired comfort level.
- When finished, turn the Water Pressure Control Knob counter-clockwise until it clicks to the "OFF" position. The nozzle will retract.
4.2 Using the Self-Cleaning Function
The self-cleaning function rinses the nozzle before or after use to maintain hygiene.
- Turn the Mode Control Knob (top knob) to the "NOZZLE CLEAN" position.
- Slowly turn the Water Pressure Control Knob (bottom knob) clockwise to activate the spray. Water will flow over the nozzle to clean it.
- Allow the nozzle to rinse for a few seconds.
- Turn the Water Pressure Control Knob counter-clockwise to the "OFF" position, then return the Mode Control Knob to the "REAR" position.
5. Maintenance
Regular maintenance ensures optimal performance and hygiene of your LUXE Bidet NEO 120.
- Nozzle Cleaning: Utilize the built-in "NOZZLE CLEAN" function regularly as described in the Operation Instructions.
- Exterior Cleaning: Wipe the exterior of the bidet attachment with a soft, damp cloth and a mild, non-abrasive cleaner. Avoid harsh chemicals that could damage the finish.
- Guard Gate: The guard gate protects the nozzle. Ensure it is free from debris. If necessary, gently wipe it clean.
- Filter Screen (if applicable): Periodically check the filter screen inside the T-adapter connection for sediment buildup. If clogged, turn off the water supply, disconnect the hose, and clean the screen under running water.
6. Troubleshooting
If you encounter issues with your LUXE Bidet NEO 120, refer to the following common problems and solutions:
| Problem | Possible Cause | Solution |
|---|---|---|
| Water Leakage | Loose connections, missing/damaged washers, overtightened connections. | Ensure all connections are hand-tightened, then secured with a quarter-turn using a wrench. Check for properly seated rubber washers. Do not overtighten. |
| No Water Spray / Low Pressure | Water supply valve closed, clogged filter screen, low household water pressure. | Ensure the toilet water supply valve is fully open. Check and clean the filter screen in the T-adapter. Verify household water pressure. |
| Nozzle Not Retracting | Debris obstructing nozzle, control knob not fully in "OFF" position. | Ensure the Water Pressure Control Knob is turned completely to "OFF". Gently clean around the nozzle and guard gate to remove any obstructions. |
| Bidet Does Not Fit Toilet | Incompatible toilet dimensions. | Refer to the "Does it fit my toilet?" diagram in the Installation Guide and the Specifications section to confirm compatibility. |
If these solutions do not resolve the issue, please contact LUXE Bidet Customer Support.
7. Specifications
Detailed specifications for the LUXE Bidet NEO 120.

Image: Dimensional drawing of the LUXE Bidet NEO 120.
- Model: NEO 120
- Dimensions: 17 x 10 x 3 inches (Product)
- Item Weight: 0.16 ounces
- Color: White
- Material: Plastic
- Installation Method: Toilet Seat Mount
- Number of Handles: 1 (Control Knob)
- Special Features: Dual Function Sprayer (Rear Wash, Nozzle Clean)
- Power Source: Non-Electric (Water Pressure Operated)
- Compatibility: Designed to fit most standard two-piece toilets. Refer to the "Does it fit my toilet?" diagram for specific measurements.
8. Warranty & Support
8.1 Warranty Information
The LUXE Bidet NEO 120 comes with an 18-month warranty covering the bidet and its accessories. To activate your extended warranty and for more details, please register your product online at the official LUXE Bidet website.
This warranty covers manufacturing defects and ensures your product functions as intended under normal use.
8.2 Customer Support
For any questions, concerns, or assistance with installation or troubleshooting, our dedicated Customer Care team is available to help. You can reach us via:
- Phone: Please refer to the official LUXE Bidet website for current contact numbers.
- Email: Please refer to the official LUXE Bidet website for current contact email addresses.
- Live Chat: Available on the official LUXE Bidet website.
- Online Guides: Step-by-step guides and FAQs are available on the LUXE Bidet website.

Image: LUXE Bidet customer support options, including U.S. based support and online resources.
Please have your model number (NEO 120) and purchase date ready when contacting support.
Related documentsNEO 120


Ask a question about this manual
Ask about setup, troubleshooting, compatibility, parts, safety, or missing instructions. Manuals+ will review the question and use this page’s manual context to help answer it.