1. Introduction
This manual provides essential instructions for setting up, operating, maintaining, and troubleshooting your Epson Perfection V370 Scanner. Please read this manual thoroughly to ensure proper use and optimal performance of your device.
The Epson Perfection V370 is a versatile flatbed scanner designed for high-quality scanning of documents, photos, and 35mm film or slides. It features advanced optical technology to capture fine details and accurate colors.
2. Setup
2.1 Unpacking and Component Check
Carefully remove all components from the packaging. Ensure the following items are present:
- Epson Perfection V370 Scanner Unit
- AC Adapter and Power Cable
- USB Cable
- Film Holder (for 35mm film/slides)
- Setup Guide (this document)
Retain all packaging materials for future transport or service needs.
2.2 Software Installation
- Do not connect the scanner to your computer yet.
- Visit the official Epson support website (www.epson.com/support) and navigate to the support page for the Perfection V370.
- Download the latest drivers and scanning software (e.g., Epson Scan 2) compatible with your operating system.
- Run the installer and follow the on-screen instructions to complete the software installation.
2.3 Hardware Connection
- Connect the AC adapter to the scanner's power input and then plug the power cable into an electrical outlet.
- Connect one end of the USB cable to the scanner's USB port and the other end to an available USB port on your computer.
- Turn on the scanner using the power button. Your computer should detect the scanner and complete the driver installation automatically if the software was installed correctly.
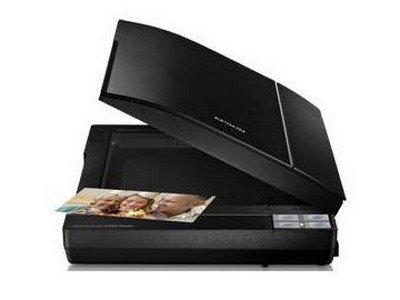
Figure 1: Epson Perfection V370 Scanner with its lid open, showing a photograph placed on the scanning bed. This illustrates the scanner's flatbed design and how items are positioned for scanning.
3. Operating the Scanner
3.1 Basic Scanning Procedure
- Ensure the scanner is powered on and connected to your computer.
- Place the document or photo face-down on the scanner glass, aligning it with the corner guide. For film or slides, use the provided film holder and place it on the glass.
- Open the Epson Scan 2 software on your computer.
- Select the appropriate scanning mode (e.g., Document Mode, Photo Mode, Film Mode) based on what you are scanning.
- Adjust settings such as resolution, color depth, and destination folder as needed.
- Click the Scan button to begin the scanning process.
- Review the scanned image and save it to your desired location.
3.2 Scanning Documents
For text documents, consider the following settings:
- Mode: Document Mode or Office Mode.
- Image Type: Black & White or Grayscale for text clarity and smaller file sizes.
- Resolution: 200-300 dpi is typically sufficient for text documents. Higher resolutions increase file size without significant benefit for text.
- Text Enhancement: Enable features like Text Enhancement or Unsharp Mask in the software for sharper text.
3.3 Scanning Photos
For photographs, focus on color accuracy and detail:
- Mode: Photo Mode.
- Image Type: Color.
- Resolution: 300-600 dpi is recommended for good quality photo scans. For archival purposes or large prints, higher resolutions up to the scanner's maximum (4800 dpi) may be used.
- Color Restoration: Utilize the software's color restoration features for faded photos.
- Dust Removal: Enable Digital ICE Technology (if available in your software version) or other dust removal features to minimize imperfections.
3.4 Scanning 35mm Film and Slides
The Epson Perfection V370 includes a built-in transparency unit for scanning film and slides. Use the provided film holder for proper positioning.
- Open the scanner lid and remove the document mat from the transparency unit area.
- Place your 35mm film strips or mounted slides into the appropriate slots in the film holder. Ensure they are clean and free of dust.
- Position the film holder on the scanner glass, aligning it with the guides.
- In Epson Scan 2, select Film Mode or Transparency Unit as the source.
- Adjust resolution (e.g., 2400-4800 dpi for film) and other image correction settings.
- Preview and scan your film or slides.
4. Maintenance
4.1 Cleaning the Scanner
Regular cleaning helps maintain scan quality.
- Scanner Glass: Use a soft, lint-free cloth lightly dampened with a mild glass cleaner (non-abrasive) to clean the scanner glass. Avoid spraying cleaner directly onto the glass.
- Exterior: Wipe the exterior of the scanner with a soft, dry cloth. Do not use strong detergents or abrasive cleaners.
- Film Holder: Clean the film holder with a soft, dry cloth.
Always power off and unplug the scanner before cleaning.
4.2 Calibration
If you notice color inaccuracies or streaks that are not due to dirt, your scanner may require calibration. Refer to the Epson Scan 2 software's help menu for instructions on how to perform a scanner calibration, if available.
5. Troubleshooting
This section addresses common issues you might encounter.
5.1 Scanner Not Turning On
- Ensure the AC adapter is securely connected to both the scanner and a working electrical outlet.
- Verify the power outlet is functional by plugging in another device.
5.2 Scanner Not Detected by Computer
- Check that the USB cable is securely connected to both the scanner and the computer. Try a different USB port.
- Restart your computer and the scanner.
- Reinstall the scanner drivers from the Epson support website.
5.3 Streaks or Lines in Scanned Images
- Clean the scanner glass thoroughly, as dust or smudges are a common cause.
- If scanning film, ensure the film holder and film itself are clean.
- Perform a scanner calibration if the issue persists after cleaning.
5.4 Scanned Images are Too Dark or Light
- Adjust the brightness and contrast settings within the Epson Scan 2 software.
- Ensure the document or photo is correctly placed on the scanner glass and the lid is fully closed.
- Check for proper lighting conditions if scanning reflective materials.
6. Specifications
| Feature | Specification |
|---|---|
| Scanner Type | Flatbed |
| Brand | Epson |
| Model Name | Perfection V370 |
| Connectivity Technology | USB |
| Product Dimensions (D x W x H) | 4.3" x 20.5" x 4.3" |
| Resolution | 4800 x dpi (Optical) |
| Color Depth | 24 bpp |
| Optical Sensor Technology | CCD |
| Item Weight | 8.38 pounds |
| Minimum System Requirements | Windows 7 |
7. Warranty and Support
Epson products typically come with a limited warranty. The specific terms and duration of your warranty may vary based on your region and the product's purchase condition (new or refurbished). Please refer to the warranty documentation included with your scanner or visit the official Epson support website for detailed warranty information.
For technical assistance, driver downloads, FAQs, and further support, please visit the Epson support website:
When contacting support, please have your scanner's model name (Perfection V370) and serial number ready. The serial number is usually located on a label on the back or bottom of the scanner unit.


